Terraform example
A very common practice in the orchestation technique is to create an image with RDP (Remote Desktop Protocol) enabled for users that need an UI in the system. In this example, we will create an Ubuntu image with XFCE4, RDP and a data volume of 2GB attached to the instance.
Step 1: Create the variables file (variables.tf)
# Instance information
variable "instance_info" {
  type = map(string)
  default = {
    name        = "ubuntu-rdp-instance"
    image_name  = "Ubuntu server 24.04 (Noble Numbat)"
    flavor_name = "m1.small"
  }
}

# Configure your user credentials for colossus
variable "user_credentials" {
  type = map(string)
  default = {
    username  = "<OPENSTACK_USERNAME>"
    password  = "<OPENSTACK_PASSWORD>"
    url_login = "https://colossus.cesar.unizar.es:5000/v3"
  }
}

# Set your SSH private key local path
variable "private_ssh_key" {
  type        = string
  default     = "<PRIVATE_SSH_KEY_LOCAL_PATH>"
  description = "Private ssh key path"
}

# Set the keypair name associated with your private SSH key
variable "keypair_name" {
  type        = string
  default     = "<OPENSTACK_ID_KEYPAIR>"
  description = "Keypair name for instance access"
}

# Set the UUID of the external gateway (vlanXXXX)
variable "external_gateway" {
  type    = string
  default = "<OPENSTACK_VLAN_UUID>"
}

# Configure external VLAN available in colussus for your user
variable "external_network" {
  type    = string
  default = "vlanXXX"
}

# UNIZAR DNS records
variable "dns_ip" {
  type    = list(string)
  default = ["155.210.12.9", "155.210.3.12"]
}

# Network and subnetwork
variable "network_rdp" {
  type = map(string)
  default = {
    net_name    = "rdp-network"
    subnet_name = "rdp-subnetwork"
    cidr        = "192.168.0.0/24"
  }
}

# 2GB external volume size, data volume
variable "volume_size" {
  type        = number
  default     = 2
  description = "Size of the volume in GB"
}

# Mounting point for data volume
variable "mounting_point_data" {
  type        = string
  default     = "/mnt/data-volume"
  description = "Mounting point for data volume"
}

# Credentials for RDP user (default user ubuntu)
variable "rdp_credentials" {
  type = map(string)
  default = {
    username  = "ubuntu"
    password  = "ubuntu"
  }
  description = "Credentials for RDP user"
}
Step 2: Create the variables provider file (provider.tf)
provider "openstack" {
    user_name     = var.user_credentials["username"]
    tenant_name   = var.user_credentials["username"]
    password      = var.user_credentials["password"]
    auth_url      = var.user_credentials["url_login"]
}
Step 3: Security groups file (security_groups.tf)
This security group, we open the port 22 and 3389.
resource "openstack_compute_secgroup_v2" "ssh" {
  name        = "ssh"
  description = "Open input ssh port"
  rule {
    from_port   = 22
    to_port     = 22
    ip_protocol = "tcp"
    cidr        = "0.0.0.0/0"
  }
}

resource "openstack_compute_secgroup_v2" "rdp" {
  name        = "rdp"
  description = "Open input rdp port"
  rule {
    from_port   = 3389
    to_port     = 3389
    ip_protocol = "tcp"
    cidr        = "0.0.0.0/0"
  }
}
Step 4: Networking file (network.tf)
We create a router, a network and a subnetwork.
# Router creation
resource "openstack_networking_router_v2" "router_rdp" {
  name                = "rdp-router"
  external_network_id = var.external_gateway
}

# Network creation
resource "openstack_networking_network_v2" "router_rdp" {
  name = var.network_rdp["net_name"]
}

#### RDP SUBNET ####

# Subnet rdp configuration
resource "openstack_networking_subnet_v2" "rdp" {
  name            = var.network_rdp["subnet_name"]
  network_id      = openstack_networking_network_v2.router_rdp.id
  cidr            = var.network_rdp["cidr"]
  dns_nameservers = var.dns_ip
}

# Router interface configuration
resource "openstack_networking_router_interface_v2" "rdp" {
  router_id = openstack_networking_router_v2.router_rdp.id
  subnet_id = openstack_networking_subnet_v2.rdp.id
}
Step 5: Main file (main.tf)
We create the instance, attach the network to the instance and a data volume of 2GB, as well as the floating IP.
# Configure OpenStack Provider
terraform {
required_version = ">= 0.14.0"
  required_providers {
    openstack = {
      source  = "terraform-provider-openstack/openstack"
      version = "~> 1.53.0"
    }
  }
}

# Create instance
resource "openstack_compute_instance_v2" "rdp_instance" {
  name            = var.instance_info["name"]
  image_name      = var.instance_info["image_name"]
  flavor_name     = var.instance_info["flavor_name"]
  key_pair        = var.keypair_name
  network {
    port = openstack_networking_port_v2.rdp.id
  }
}

# Create network port
resource "openstack_networking_port_v2" "rdp" {
  name           = "port-instance-rdp"
  network_id     = openstack_networking_network_v2.router_rdp.id
  security_group_ids = [
    openstack_compute_secgroup_v2.ssh.id,
    openstack_compute_secgroup_v2.rdp.id,
  ]
  fixed_ip {
    subnet_id = openstack_networking_subnet_v2.rdp.id
  }
}

# Create floating ip
resource "openstack_networking_floatingip_v2" "rdp" {
  pool = var.external_network
}

# Attach floating ip to instance
resource "openstack_compute_floatingip_associate_v2" "rdp" {
  floating_ip = openstack_networking_floatingip_v2.rdp.address
  instance_id = openstack_compute_instance_v2.rdp_instance.id
}

# Create volume
resource "openstack_blockstorage_volume_v3" "data_volume" {
  name        = "data-volume"
  description = "Data volume for demo instance"
  size        = var.volume_size  # Size in GB
}

# Attach volume to instance
resource "openstack_compute_volume_attach_v2" "attached" {
  instance_id = openstack_compute_instance_v2.rdp_instance.id
  volume_id   = openstack_blockstorage_volume_v3.data_volume.id
}

resource "null_resource" "post_deployment" {
  connection {
    type        = "ssh"
    host        = openstack_networking_floatingip_v2.rdp.address
    user        = "ubuntu"
    private_key = file(var.private_ssh_key)
  }

  # Copies file from local directory to remote directory
  provisioner "file" {
    source      = "script.sh"
    destination = "/tmp/script.sh"
  }

  provisioner "remote-exec" {
    inline = [
      "chmod +x /tmp/script.sh",
      "/tmp/script.sh ${var.volume_size} ${var.mounting_point_data} ${var.rdp_credentials["username"]} ${var.rdp_credentials["password"]}",
    ]
  }
}

# Add volume output
output "volume_id" {
  value = "Volume ID: ${openstack_blockstorage_volume_v3.data_volume.id}"
}

output "volume_mount_point" {
  value = "Data volume amounted at: ${var.mounting_point_data}"
}

# Output instance details
output "instance_name" {
  value = "Instance name: ${openstack_compute_instance_v2.rdp_instance.name}"
}

output "instance_ip" {
  value = "Instance IP: ${openstack_compute_instance_v2.rdp_instance.access_ip_v4}"
}

output "floating_ip" {
  value = "Floating IP: ${openstack_networking_floatingip_v2.rdp.address}"
}

output "ssh_connection" {
  value = "ssh -i ${var.private_ssh_key} ubuntu@${openstack_networking_floatingip_v2.rdp.address}"
}

output "rdp_credentials" {
  value = "RDP user: ${var.rdp_credentials["username"]} / password: ${var.rdp_credentials["password"]}"
}
The main.tf uses an post-deployment bash script to format the data volume and install XFCE4 and RDP, this is the script.sh file:
#!/bin/bash

# Look for disks with the specified size
DISK=/dev/$(lsblk | awk -v size=$1G '$4 == size {print $1}')

# Check if the disk is available
if [ -z "$DISK" ]; then
  echo "No disk found with size ${1}G"
  exit 1
else
  echo "Disk found: $DISK"
fi

# Check if the disk is already mounted and unmount it
if mount | grep -q "$DISK"; then
  echo "Unmounting $DISK"
  sudo umount $DISK
fi

DATA_VOLUME=$2

# Format data volume and mount it
sudo mkfs.ext4 -qF $DISK
sudo mkdir -p $DATA_VOLUME && \
sudo mount $DISK $DATA_VOLUME && \
sudo chown -R ubuntu:ubuntu $DATA_VOLUME

# Add the disk to fstab use the UUID of the disk
UUID=$(sudo blkid -s UUID -o value $DISK)
if [ -z "$UUID" ]; then
  echo "Failed to get UUID for $DISK"
  exit 1
fi

# Check if the disk is already in fstab
if grep -q "$UUID" /etc/fstab; then
  echo "Disk $DISK already in fstab"
else
  echo "Adding disk $DISK to fstab"
  echo "UUID=$UUID $DATA_VOLUME ext4 defaults,nofail 0 2" | sudo tee -a /etc/fstab
fi

# Install xfce4 and xrdp and configure it
sudo apt-get update && \
sudo apt-get install -y xfce4 xfce4-goodies xrdp && \
sudo adduser xrdp ssl-cert && \
sudo systemctl restart xrdp

# Install xubuntu and configure it
#sudo apt-get update && \
#sudo apt-get install -y xubuntu-desktop xrdp && \
#sudo adduser xrdp ssl-cert && \
#sudo systemctl restart xrdp

# Create .xsession file for xfce4
echo "xfce4-session" | sudo tee .xsession
sudo mv .xsession /home/ubuntu/.xsession
sudo chown $USER:$USER /home/ubuntu/.xsession
sudo chmod 755 /home/ubuntu/.xsession

# Configure xrdp to use xfce4
sudo sed -i.bak '/^test -x \/etc\/X11\/Xsession && exec \/etc\/X11\/Xsession/a xfce4-session' /etc/xrdp/startwm.sh
sudo sed -i.bak 's/\/etc\/X11\/Xsession/\/home\/ubuntu\/.xsession/' /etc/xrdp/startwm.sh
sudo sed -i.bak 's/\/etc\/X11\/Xsession/\/home\/ubuntu\/.xsession/' /etc/xrdp/xrdp.ini
sudo sed -i.bak 's/\/etc\/X11\/Xsession/\/home\/ubuntu\/.xsession/' /etc/xrdp/xrdp-sesman.ini

# Open port 3389
sudo ufw enable
sudo ufw allow 3389
sudo ufw allow OpenSSH

# Set password for ubuntu user, password ubuntu
echo "$3:$4" | sudo -S chpasswd

# Reboot the system
sudo reboot
Step 6: Launch Terraform orchestrator
Now, you can launch the commands to create the orchestration in colossus cloud:
terraform init
source <file>-rc.sh
terraform fmt -recursive
terraform plan -out plan.out
terraform apply plan.out
You can debug the terraform deployment by setting the OS_DEBUG=1 variable:
OS_DEBUG=1 TF_LOG=DEBUG terraform apply plan.out
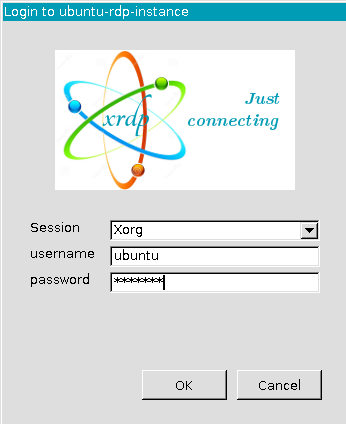
Step 7: Connect to RDP
Once terraform ends the deployment, you can connect RDP thru Windows Remote Desktop application in windows Systems or Remmina in Linux. The deplyment creates an RDP user ubuntu with password ubuntu:
Set the floating IP in Windows Remote Desktop application to connect the RDP instance.

NOTE: The terraform deployment lasts around 30 minutes
Rolling back changes (optional)
You can rollback the deployment and destroy the instance with the command:
terraform destroy
IMPORTANT: This will destroy the instance and you will lose all your data.
For more information check the terraform documentation: https://developer.hashicorp.com/terraform/docs