Agustina documentation
Repository used for BIFI's external documentation, available to all.
| Members | Contact |
|---|---|
| Daniel Martínez Cucalón | daniel.martinez@bifi.es |
| Sergio Martínez-Losa | sergio.martinez@bifi.es |
Procedimientos básicos en Agustina
Información acerca de los procedimientos de gestión en Agustina (English version at the end).
Solicitud de acceso al sistema
Para obtener un usuario del sistema Agustina es necesario llevar a cabo una serie de pasos que comprenden la creación de un proyecto, sus cuentas asociadas, activación de las mismas y vinculación al proyecto creado.
Los formularios a cumplimentar se encuentran en : https://soporte.bifi.unizar.es/forms/form.php
Ingreso en el sistema
El comando para acceder a Agustina por ssh es:
ssh id_usuario@agustina.bifi.unizar.es
Ejemplo:
ssh john.diaz@agustina.bifi.unizar.es
El usuario podrá acceder de este modo siempre y cuando tenga una dirección IP fija abierta en el firewall. En caso contrario, el acceso podrá hacerse a través de Bridge:
ssh id_usuario@bridge.bifi.unizar.es
y una vez hecho el login:
ssh id_usuario@agustina.bifi.unizar.es
Ejemplo:
ssh jdiazlag@bridge.bifi.unizar.es

ssh john.diaz@agustina.bifi.unizar.es
Editores de texto
El editor establecido por defecto es Vi, aunque pueden cargarse Emacs (module load emacs) o Vim (module load vim).
Uso del almacenamiento
Una vez hecho login en el sistema Agustina, el usuario dispondrá de un pequeño espacio (limitado por cuota) bajo su directorio home. Dicho espacio no está pensado para almacenar datos, ya que es muy reducido; su uso está orientado a guardar scripts, notas y elementos ligeros.
Cada usuario podrá acceder a espacio de almacenamiento scratch bajo sistema LUSTRE, con mayor capacidad y orientado a uso de trabajo más intensivo, ubicado en /fs/agustina/id_usuario
Ejemplo:
/fs/agustina/john.diaz/
Gestión de trabajos
IMPORTANTE Cualquier trabajo que se lance de forma local en los nodos de login será cancelado. Los jobs deben lanzarse contra el cluster.
Agustina se basa en un sistema Slurm de gestión de colas. El procedimiento normal para ejecutar trabajos se basa en la creación de un script indicando las características de la tarea y el uso del comando sbatch.
El sistema dispone de varias particiones:
	PARTITION AVAIL  TIMELIMIT  NODES  STATE NODELIST
	agustina_fat        up 7-00:00:00      3   idle afat[01-03]
	agustina_thin*      up 7-00:00:00     93   idle athin[01-93]
	rasmia_hopper       up 7-00:00:00      2   idle agpuh[01-03]
	rasmia_ada          up 7-00:00:00      9   idle agpul[01-09]
	cierzo_thin         up 7-00:00:00     78   idle czthin[01-79]
	cierzo_fat 	        up 7-00:00:00      1   idle czfat01
	cierzo_kepler       up 7-00:00:00      4   idle czgpuk[01-04]
	full                up 7-00:00:00     96   idle afat[01-03],athin[01-93],agpuh[01-03],agpul[01-09],czthin[01-79],czfat01, czgpuk[01-04]
	RES                 up 7-00:00:00      9   idle afat01,athin[01-02,04-06,09,11-12,14-16,18-23,25-30]
Siendo agustina_thin la que comprende los nodos estándar de computación, agustina_fat la de nodos con el doble de memoria y full la totalidad de los nodos de cómputo. Por otra parte tenemos las particiones de GPU, las cuales corresponden a rasmia_hopper con GPUs H100 y rasmia_ada con GPUs L40S. Podremos comprobar su estado con el comando sinfo.
También se disponen de colas para ejecutar sobre la infraestructura cierzo (cierzo_thin y cierzo_fat), así como una cola de GPUs llamada cierzo_kepler, para más información consultar: https://cesar.unizar.es/hpc/.
Agustina está basado en procesadores AMD mientras que RasmIA y cierzo están basados en procesadores Intel.
IMPORTANTE: Los usuarios que usen horas de cálculo provenientes de la RES (Red Española de Supercomputación), deberán usar la partición RES.
Ejemplo helloWorld.sh para enviar a la cola de trabajo:
#!/bin/env bash

#SBATCH -J helloTest # job name
#SBATCH -o helloTest.o%j # output and error file name (%j expands to jobID)
#SBATCH -N 3 # total number of nodes
#SBATCH --ntasks-per-node=12 # number of cores per node (maximum 24)
#SBATCH -p agustina_thin # partition

echo "Hello world, I am running on node $HOSTNAME"
sleep 10
date
Para lanzar la tarea es imprescindible hacerlo asociándola a su proyecto correspondiente:
sbatch --account id_proyecto helloWorld.sh
De lo contrario, obtendremos un mensaje de error:
sbatch: error: QOSMaxSubmitJobPerUserLimit
sbatch: error: Batch job submission failed: Job violates accounting/QOS policy (job submit limit, user\'s size and/or time limits)
Podemos comprobar el estado de ejecución del script con el comando squeue.
Ejemplo:
[john.diaz@alogin02 slurmTest]$ sbatch --account proyecto_prueba helloWorld.sh
Submitted batch job 1707

[john.diaz@alogin02 slurmTest]$ squeue
	     JOBID     PARTITION     NAME     USER ST       TIME  NODES NODELIST(REASON)
	      1707 agustina_thin helloTes john.dia  R       0:01      3 athin[49-51]
Existen otros comandos útiles para la gestión de trabajos:
Cancelación
scancel job_id
Información detallada
scontrol show job identificadorJob
IMPORTANTE: Los trabajos tienen una duración máxima en el sistema de una semana (7 días desde el lanzamiento del trabajo), por lo tanto, si el trabajo dura más de una semana el sistema de colas lo cancelará. Para evitar este hecho, el usuario deberá dividir los datos de entrada para lanzar trabajos con menos carga de procesado o paralelizar su software.
Información sobre códigos de estado: https://confluence.cscs.ch/display/KB/Meaning+of+Slurm+job+state+codes
Guía de usuario Slurm: https://slurm.schedmd.com/quickstart.html
Basic procedures on Agustina
Information about management procedures on Agustina.
Requesting access to the system
To obtain a user account on the Agustina system you must follow a series of steps that include creating a project, its associated accounts, activating them and linking them to the created project.
The forms to complete are available at: https://soporte.bifi.unizar.es/forms/form.php
Logging in to the system
The command to access Agustina by SSH is:
ssh user_id@agustina.bifi.unizar.es
Example:
ssh john.diaz@agustina.bifi.unizar.es
A user can access this way provided they have a fixed IP address allowed through the firewall. Otherwise, access can be done via the Bridge:
ssh user_id@bridge.bifi.unizar.es
and once logged in:
ssh user_id@agustina.bifi.unizar.es
Example:
ssh jdiazlag@bridge.bifi.unizar.es

ssh john.diaz@agustina.bifi.unizar.es
Text editors
The default editor is Vi, although Emacs (module load emacs) or Vim (module load vim) modules can be loaded.
Storage usage
After logging into Agustina, the user will have a small quota-limited home directory. This space is not intended for data storage, as it is very limited; it is meant to store scripts, notes and small items.
Each user can access larger scratch storage on a LUSTRE filesystem for more intensive work, located at /fs/agustina/user_id
Example:
/fs/agustina/john.diaz/
Job management
IMPORTANT Any job launched directly on the login nodes will be cancelled. Jobs must be submitted to the cluster.
Agustina uses Slurm as the queuing system. The normal procedure to run jobs is to create a script specifying the job characteristics and submit it with sbatch.
The system provides several partitions:
    PARTITION AVAIL  TIMELIMIT  NODES  STATE NODELIST
    agustina_fat        up 7-00:00:00      3   idle afat[01-03]
    agustina_thin*      up 7-00:00:00     93   idle athin[01-93]
    rasmia_hopper       up 7-00:00:00      2   idle agpuh[01-03]
    rasmia_ada          up 7-00:00:00      9   idle agpul[01-09]
    cierzo_thin         up 7-00:00:00     78   idle czthin[01-79]
    cierzo_fat 	        up 7-00:00:00      1   idle czfat01
    cierzo_kepler       up 7-00:00:00      4   idle czgpuk[01-04]
    full                up 7-00:00:00     96   idle afat[01-03],athin[01-93],agpuh[01-03],agpul[01-09],czthin[01-79],czfat01, czgpuk[01-04]
    RES                 up 7-00:00:00      9   idle afat01,athin[01-02,04-06,09,11-12,14-16,18-23,25-30]
agustina_thin contains the standard compute nodes, agustina_fat contains nodes with double memory, and full includes all compute nodes. GPU partitions are rasmia_hopper (H100 GPUs) and rasmia_ada (L40S GPUs). Check their status with sinfo.
There are also queues for the Cierzo infrastructure (cierzo_thin and cierzo_fat) and a GPU queue cierzo_kepler. For more information see: https://cesar.unizar.es/hpc/
Agustina nodes use AMD processors, while RasmIA and Cierzo use Intel processors.
IMPORTANT: Users using computing hours from the Spanish Supercomputing Network (RES) must use the RES partition.
Example helloWorld.sh to submit a job:
#!/bin/env bash

#SBATCH -J helloTest             # job name
#SBATCH -o helloTest.o%j         # output and error file name (%j expands to jobID)
#SBATCH -N 3                     # total number of nodes
#SBATCH --ntasks-per-node=12     # number of cores per node (maximum 24)
#SBATCH -p agustina_thin         # partition

echo "Hello world, I am running on node $HOSTNAME"
sleep 10
date
When submitting the job it is mandatory to associate it with the corresponding project account:
sbatch --account project_id helloWorld.sh
Otherwise you will get an error:
sbatch: error: QOSMaxSubmitJobPerUserLimit
sbatch: error: Batch job submission failed: Job violates accounting/QOS policy (job submit limit, user's size and/or time limits)
You can check the job status with squeue.
Example:
[john.diaz@alogin02 slurmTest]$ sbatch --account proyecto_prueba helloWorld.sh
Submitted batch job 1707

[john.diaz@alogin02 slurmTest]$ squeue
         JOBID     PARTITION     NAME     USER ST       TIME  NODES NODELIST(REASON)
          1707 agustina_thin helloTes john.dia  R       0:01      3 athin[49-51]
Other useful job management commands:
Cancel a job:
scancel job_id
Detailed job information:
scontrol show job jobID
IMPORTANT: Jobs have a maximum duration of one week (7 days) in the system; if a job runs longer it will be cancelled. To avoid this, split input data to run shorter jobs or parallelize your software.
Information about Slurm job state codes: https://confluence.cscs.ch/display/KB/Meaning+of+Slurm+job+state+codes
Slurm user guide: https://slurm.schedmd.com/quickstart.html
Anaconda 2024
Anaconda 2024 is a free and open-source software distribution of the Python and R languages, used in data science and machine learning. It is aimed at simplifying the deployment and management of software packages.
WARNING: If you do not know how to create your own anaconda environment in agustina cluster, please read the instruction below, otherwise send and email with your request to agustina@bifi.es for further assistance.
Anaconda is useful to create your own conda environment in the /fs/agustina/USER folder. To do this, you can import your own yml file and create the environment with the following commands:
Usage
module load anaconda/2024
export CONDA_PKGS_DIRS=/fs/agustina/$(whoami)/.conda-pkgs
mkdir -p /fs/agustina/$(whoami)/conda-env
$ANACONDA3_HOME/bin/conda-env create --prefix /fs/agustina/$(whoami)/conda-env/my-conda-env --file /fs/agustina/$(whoami)/conda-env/my-environment-file.yml
source $ANACONDA3_HOME/bin/activate /fs/agustina/$(whoami)/conda-env/my-conda-env
Anaconda 2025
module load anaconda/2025
export CONDA_PKGS_DIRS=/fs/agustina/$(whoami)/.conda-pkgs
mkdir -p /fs/agustina/$(whoami)/conda-env
$ANACONDA3_HOME/bin/conda env create --prefix /fs/agustina/$(whoami)/conda-env/my-conda-env --file /fs/agustina/$(whoami)/conda-env/my-environment-file.yml
source $ANACONDA3_HOME/bin/activate /fs/agustina/$(whoami)/conda-env/my-conda-env
Once you have the environment ready and activated, you can more packages with pip install or conda install inside the environment, the you can create a bash script to launch the environment in agustina cluster:
Example script : test-anaconda.sh
#!/bin/bash

#SBATCH -J test-anaconda
#SBATCH -o test-anaconda-%j.msg
#SBATCH -e test-anaconda-%j.err
#SBATCH -p agustina_thin
#SBATCH -N 1

module load anaconda/2024

# activate environment
source $ANACONDA3_HOME/bin/activate /fs/agustina/$(whoami)/conda-env/my-conda-env

python -v

echo "done!!"
Submit with :
sbatch --account=your_project_ID test-anaconda.sh
Base file: my-environment-file.yml
name: base
channels:
  - https://repo.anaconda.com/pkgs/main
  - https://repo.anaconda.com/pkgs/r
  - conda-forge
dependencies:
  - _libgcc_mutex=0.1=conda_forge
  - _openmp_mutex=4.5=2_gnu
  - archspec=0.2.3=pyhd8ed1ab_0
  - boltons=24.0.0=pyhd8ed1ab_0
  - brotli-python=1.1.0=py312h2ec8cdc_2
  - bzip2=1.0.8=h4bc722e_7
  - c-ares=1.32.3=h4bc722e_0
  - ca-certificates=2024.8.30=hbcca054_0
  - certifi=2024.8.30=pyhd8ed1ab_0
  - cffi=1.17.1=py312h06ac9bb_0
  - charset-normalizer=3.4.0=pyhd8ed1ab_0
  - colorama=0.4.6=pyhd8ed1ab_0
  - conda=24.9.2=py312h7900ff3_0
  - conda-libmamba-solver=24.9.0=pyhd8ed1ab_0
  - conda-package-handling=2.4.0=pyh7900ff3_0
  - conda-package-streaming=0.11.0=pyhd8ed1ab_0
  - distro=1.9.0=pyhd8ed1ab_0
  - fmt=10.2.1=h00ab1b0_0
  - frozendict=2.4.6=py312h66e93f0_0
  - h2=4.1.0=pyhd8ed1ab_0
  - hpack=4.0.0=pyh9f0ad1d_0
  - hyperframe=6.0.1=pyhd8ed1ab_0
  - idna=3.10=pyhd8ed1ab_0
  - jsonpatch=1.33=pyhd8ed1ab_0
  - jsonpointer=3.0.0=py312h7900ff3_1
  - keyutils=1.6.1=h166bdaf_0
  - krb5=1.21.3=h659f571_0
  - ld_impl_linux-64=2.43=h712a8e2_2
  - libarchive=3.7.4=hfca40fe_0
  - libcurl=8.10.1=hbbe4b11_0
  - libedit=3.1.20191231=he28a2e2_2
  - libev=4.33=hd590300_2
  - libexpat=2.6.4=h5888daf_0
  - libffi=3.4.2=h7f98852_5
  - libgcc=14.2.0=h77fa898_1
  - libgcc-ng=14.2.0=h69a702a_1
  - libgomp=14.2.0=h77fa898_1
  - libiconv=1.17=hd590300_2
  - libmamba=1.5.9=h4cc3d14_0
  - libmambapy=1.5.9=py312h7fb9e8e_0
  - libnghttp2=1.64.0=h161d5f1_0
  - libnsl=2.0.1=hd590300_0
  - libsolv=0.7.30=h3509ff9_0
  - libsqlite=3.47.0=hadc24fc_1
  - libssh2=1.11.0=h0841786_0
  - libstdcxx=14.2.0=hc0a3c3a_1
  - libstdcxx-ng=14.2.0=h4852527_1
  - libuuid=2.38.1=h0b41bf4_0
  - libxcrypt=4.4.36=hd590300_1
  - libxml2=2.13.4=h064dc61_2
  - libzlib=1.3.1=hb9d3cd8_2
  - lz4-c=1.9.4=hcb278e6_0
  - lzo=2.10=hd590300_1001
  - mamba=1.5.9=py312h9460a1c_0
  - menuinst=2.2.0=py312h7900ff3_0
  - ncurses=6.5=he02047a_1
  - openssl=3.4.0=hb9d3cd8_0
  - packaging=24.2=pyhd8ed1ab_0
  - pip=24.3.1=pyh8b19718_0
  - platformdirs=4.3.6=pyhd8ed1ab_0
  - pluggy=1.5.0=pyhd8ed1ab_0
  - pybind11-abi=4=hd8ed1ab_3
  - pycosat=0.6.6=py312h98912ed_0
  - pycparser=2.22=pyhd8ed1ab_0
  - pysocks=1.7.1=pyha2e5f31_6
  - python=3.12.7=hc5c86c4_0_cpython
  - python_abi=3.12=5_cp312
  - readline=8.2=h8228510_1
  - reproc=14.2.4.post0=hd590300_1
  - reproc-cpp=14.2.4.post0=h59595ed_1
  - requests=2.32.3=pyhd8ed1ab_0
  - ruamel.yaml=0.18.6=py312h66e93f0_1
  - ruamel.yaml.clib=0.2.8=py312h66e93f0_1
  - setuptools=75.3.0=pyhd8ed1ab_0
  - tk=8.6.13=noxft_h4845f30_101
  - tqdm=4.67.0=pyhd8ed1ab_0
  - truststore=0.10.0=pyhd8ed1ab_0
  - tzdata=2024b=hc8b5060_0
  - urllib3=2.2.3=pyhd8ed1ab_0
  - wheel=0.45.0=pyhd8ed1ab_0
  - xz=5.2.6=h166bdaf_0
  - yaml-cpp=0.8.0=h59595ed_0
  - zstandard=0.23.0=py312hef9b889_1
  - zstd=1.5.6=ha6fb4c9_0
prefix:
More info :
Autodock-Vina
AutoDock Vina is an open-source program for doing molecular docking. It was originally designed and implemented by Dr. Oleg Trott in the Molecular Graphics Lab (now CCSB) at The Scripps Research Institute.
Usage
Example script : testAutodock.sh
#!/bin/bash
#
#SBATCH -J testAutodock # job name
#SBATCH -o testAutodock.o%j # output and error file name (%j expands to  jobID)
#SBATCH -e testAutodock.e%j # output and error file name (%j expands to  jobID)
#SBATCH -n 2
#SBATCH -p agustina_thin

module load vina/1.2.5
vina_1.2.5_linux_x86_64 --config conf.txt --out out-10modes.pdbqt --exhaustiveness 8 --cpu 2
Submit with :
sbatch --account=your_project_ID testAutodock.sh
More info :
- https://vina.scripps.edu/manual/
- https://github.com/sha256feng/Autodock-vina-example?tab=readme-ov-file
Bedtools 2.31.0
Collectively, the bedtools utilities are a swiss-army knife of tools for a wide-range of genomics analysis tasks. The most widely-used tools enable genome arithmetic: that is, set theory on the genome. For example, bedtools allows one to intersect, merge, count, complement, and shuffle genomic intervals from multiple files in widely-used genomic file formats such as BAM, BED, GFF/GTF, VCF. While each individual tool is designed to do a relatively simple task (e.g., intersect two interval files), quite sophisticated analyses can be conducted by combining multiple bedtools operations on the UNIX command line.
Bedtools is developed in the Quinlan laboratory at the University of Utah and benefits from fantastic contributions made by scientists worldwide.
Usage
Example script : test-bedtools.sh
#!/bin/bash

#SBATCH -J bedtools-test
#SBATCH -e bedtools-test%j.err
#SBATCH -o bedtools-test%j.msg
#SBATCH -p agustina_thin # queue (partition)

# load bedtools
module load bedtools/2.31.0

# list bedtools root folder
ls -al $BEDTOOLS_ROOT

bedtools --help

echo "DONE!"
Submit with :
sbatch --account=your_project_ID test-bedtools.sh
More info :
Biogenomics environment with Anaconda 2024
Biogenomics environment with Anaconda 2024 is a custom Anaconda 2024 environment with ready to use tools for Biogenomic research. The apps included are:
- FastQC
- MultiQC
- Bowtie2
- Bismark
- Trim-galore
- Bedtools
- Samtools
WARNING: If you do not know how to create your own anaconda environment in agustina cluster, please read the instruction below, otherwise send and email with your request to agustina@bifi.es for further assistance.
IMPORTANT: If you want to update or install new programs on this conda environment please contact support at agustina@bifi.es for further assistance, pointing out the programs to install or update with the version needed.
Usage
Example script : test-biogenomics.sh
#!/bin/bash

#SBATCH --job-name=test-biogenomics
#SBATCH --output=test-biogenomics-%j.msg
#SBATCH --error=test-biogenomics-%j.err
#SBATCH -p agustina_thin
#SBATCH -N 1

export CRYPTOGRAPHY_OPENSSL_NO_LEGACY=1

module load genomics/2024

echo "FASTQC"
fastqc --help

echo "MULTIQC"
multiqc --help

echo "BOWTIE2"
bowtie2 --help

echo "BISMARK"
bismark --help

echo "TRIM-GALORE"
trim-galore --help

echo "BEDTOOLS"
bedtools --help

echo "SAMTOOLS"
samtools --help

echo "DONE!!!!"
Submit with :
sbatch --account=your_project_ID test-biogenomics.sh
More info :
Comsol
Create physics-based models and simulation applications with this software platform. The Model Builder enables you to combine multiple physics in any order for simulations of real-world phenomena. The Application Builder gives you the tools to build your own simulation apps. The Model Manager is a modeling and simulation management tool.
Usage
Example script : testComsol.sh
#!/bin/bash
#
#SBATCH -J a00P1TMax80ay220d300 # job name
#SBATCH -o a00P1TMax80ay220d300.o%j # output and error file name (%j expands to  jobID)
#SBATCH --nodes 2
#SBATCH --exclusive
#SBATCH -p agustina_thin

module load comsol/6.1
comsol batch -inputfile a00P1TMax80ay220d300.mph -outputfile outa00P1TMax80ay220d300.mph -batchlog loga00P1TMax80ay220d300.txt
Submit with :
sbatch --account=your_project_ID testComsol.sh
More info :
CP2K
CP2K is a quantum chemistry and solid state physics software package that can perform atomistic simulations of solid state, liquid, molecular, periodic, material, crystal, and biological systems. CP2K provides a general framework for different modeling methods such as DFT using the mixed Gaussian and plane waves approaches GPW and GAPW. Supported theory levels include DFTB, LDA, GGA, MP2, RPA, semi-empirical methods (AM1, PM3, PM6, RM1, MNDO, …), and classical force fields (AMBER, CHARMM, …). CP2K can do simulations of molecular dynamics, metadynamics, Monte Carlo, Ehrenfest dynamics, vibrational analysis, core level spectroscopy, energy minimization, and transition state optimization using NEB or dimer method.
Usage
Example script : testCp2k.sh
#!/bin/bash

#SBATCH -e cp2k_test%j.err
#SBATCH -o cp2k_test%j.msg
#SBATCH -p agustina_thin
#SBATCH -N 4
#SBATCH --ntasks-per-node=24

module load cp2k/2024.1

cp2k --help
cp2k --version
Submit with :
sbatch --account=your_project_ID testCp2k.sh
More info :
CUDA 12.0
CUDA is a proprietary parallel computing platform and application programming interface that allows software to use certain types of graphics processing units for accelerated general-purpose processing, an approach called general-purpose computing on GPUs.
IMPORTANT: If you make use of GPU queues, it is mandatory to select a minimum number of CPU cores given by 16 cores/GPU multiplied by the amount of nodes selected and the number of selected GPUs (16 cores/gpu * num. GPUs * num. nodes).
Usage
Example script : test-cuda.sh
#!/bin/bash

#SBATCH -J cuda-test # job name
#SBATCH -o cuda-test.o%j # output and error file name (%j expands to jobID)
#SBATCH -p rasmia_ada # queue L40S (partition)
#SBATCH -N 2 # total number of nodes
#SBATCH --gres=gpu:1 # gpus per node
#SBATCH --cpus-per-task=32 # 16 cores por GPU * 1 GPU * 2 nodos

module load cuda/12.0

echo $CUDA12_HOME
echo $CUDA12_BIN
echo $CUDA12_LIB64
echo $CUDA12_INCLUDE

$CUDA12_BIN/nvcc --version

echo "done!!"
The informative report will be shown un the job output file.
Submit with :
sbatch --account=your_project_ID test-cuda.sh
More info :
CREST
CREST was developed as a utility and driver program for the semiempirical quantum chemistry package xtb. The programs name originated as an abbreviation for Conformer–Rotamer Ensemble Sampling Tool as it was developed as a program for conformational sampling at the extended tight-binding level GFN-xTB. Since then several functionalities have been added to the code. In its current state, the program provides a variety of sampling procedures, for example for improved thermochemistry, or explicit solvation.
Usage
Example script : testCrest.sh
#!/bin/bash

#SBATCH -e crest_test%j.err
#SBATCH -o crest_test%j.msg
#SBATCH -p agustina_thin
#SBATCH -N 4
#SBATCH --ntasks-per-node=24

module load crest/3.0.1

crest --help
crest --version
Submit with :
sbatch --account=your_project_ID testCrest.sh
More info :
DIA-NN
DIA-NN - a universal software suite for data-independent acquisition (DIA) proteomics data processing. Conceived at the University of Cambridge, UK, in the laboratory of Kathryn Lilley (Cambridge Centre for Proteomics), DIA-NN opened a new chapter in proteomics, introducing a number of algorithms which enabled reliable, robust and quantitatively accurate large-scale experiments using high-throughput methods. DIA-NN is currently being further developed in the laboratory of Vadim Demichev at the Charité (University Medicine Berlin, Germany).
Installed version: DIA-NN v1.8.1
Usage
Example script : testDIANN.sh
#!/bin/bash

#SBATCH -e diann_test %j.err
#SBATCH -o diann_test%j.msg
#SBATCH -p agustina_thin
#SBATCH -N 1
#SBATCH --ntasks-per-node=1

module load diann/1.8.1

$DIANN_HOME/diann-1.8.1 -h
Submit with :
sbatch --account=your_project_ID testDIANN.sh
More info :
Filogenics environment with Anaconda 2024
Filogenics environment with Anaconda 2024 is a custom Anaconda 2024 environment with ready to use tools for Filogenic research. The apps included are:
- FastQC
- fastp
- AdapterRemoval
- bwa
- Samtools
- mapDamage
- RAxML
- IQTREE2
- MrBayes
- Beast2
WARNING: If you do not know how to create your own anaconda environment in agustina cluster, please read the instruction below, otherwise send and email with your request to agustina@bifi.es for further assistance.
IMPORTANT: If you want to update or install new programs on this conda environment please contact support at agustina@bifi.es for further assistance, pointing out the programs to install or update with the version needed.
Usage
Example script : test-filogenics.sh
#!/bin/bssh

#SBATCH -J test-filogenics
#SBATCH --output=test-filogenics-%j.out
#SBATCH --error=test-filogenics-%j.err
#SBATCH -p agustina_thin
#SBATCH -N 1

export CRYPTOGRAPHY_OPENSSL_NO_LEGACY=1

module load filogenics/2024

# FastQC#
fastqc --help

# fastp
fastp --help

# AdapterRemoval
AdapterRemoval --help

# bwa
bwa

# Samtools
samtools --help

# mapDamage
mapDamage --help

# RAxML
raxmlHPC -h

# IQTREE2
iqtree2 --help

# MrBayes
mb -h

# Beast2
beast -version
Submit with :
sbatch --account=your_project_ID test-filogenics.sh
More info :
FHI-aims
FHI-aims is an all-electron electronic structure code based on numeric atom-centered orbitals. It enables first-principles simulations with very high numerical accuracy for production calculations, with excellent scalability up to very large system sizes (thousands of atoms) and up to very large, massively parallel supercomputers (ten thousand CPU cores).
Usage
Example script : testFHI.sh
#!/bin/bash

# Request 2 nodes with 128 MPI tasks per node for 20 minutes
#SBATCH --job-name=FHI-aims
#SBATCH --nodes=3
#SBATCH --ntasks-per-node=2
#SBATCH --cpus-per-task=1
#SBATCH --mem-per-cpu=64GB
#SBATCH -p agustina_thin

ulimit -s unlimited
module purge
module load gnu12/12.2.0
module load openmpi4/4.1.4
module load hwloc/2.7.0
module load fhi-aims/240507
mpirun aims.240507.scalapack.mpi.x
In addition to the script for launching the task, it is necessary to provide the input data in the files control.in and geometry.in
FHI-aims.260331
#!/bin/bash
#SBATCH --job-name=FHI-aims
#SBATCH -N 4
#SBATCH --ntasks-per-node=64
#SBATCH --cpus-per-task=1
#SBATCH --mem-per-cpu=3900MB
#SBATCH -p agustina_thin

module purge
module load gnu12
module load openmpi4/4.1.4
module load hwloc/2.7.0
module load fhi-aims/260331

export OMP_PROC_BIND=true
export OMP_PLACES=cores

ulimit -s unlimited

echo "Executing ${FHIAIMS_BINARY}"
mpirun --mca btl_tcp_if_include ib0 \
       --mca orte_forward_job_control 1 \
       $FHIAIMS_BINARY
Submit with :
sbatch --account=your_project_ID testFHI.sh
More info :
Gaussian
Gaussian 16 is the latest in the Gaussian series of programs. It provides state-of-the-art capabilities for electronic structure modeling. Gaussian 16 is licensed for a wide variety of computer systems. All versions of Gaussian 16 contain every scientific/modeling feature, and none imposes any artificial limitations on calculations other than your computing resources and patience.
Usage
Example script : testGaussian.sh
#!/bin/bash

#SBATCH -e TSHX2_boro_NBOs%j.err
#SBATCH -o TSHX2_boro_NBOs%j.msg
#SBATCH -p agustina_thin
#SBATCH -N 4
#SBATCH --ntasks-per-node=24

module load gaussian/g16

g16 < TSHX2_boro_NBOs.gjf
Submit with :
sbatch --account=your_project_ID testGaussian.sh
Users can also make use of Gaussian 09, for legacy purposes, indeed this module could be loaded as:
module load gaussian/g09
Usage:
Example script : testGaussian.sh
#!/bin/bash

#SBATCH -e TSHX2_boro_NBOs%j.err
#SBATCH -o TSHX2_boro_NBOs%j.msg
#SBATCH -p agustina_thin
#SBATCH -N 4
#SBATCH --ntasks-per-node=24

module load gaussian/g09

g09 < TSHX2_boro_NBOs.gjf
Submit with :
sbatch --account=your_project_ID testGaussian.sh
More info :
Gimic
This is the GIMIC program for calculating magnetically induced currents in molecules. For this program produce any kind of useful information, you need to provide it with an AO density matrix and three (effective) magnetically perturbed AO density matrices in the proper format. Currently only recent versions of ACES2 (CFOUR), Turbomole, QChem, LSDalton, FERMION++, Gaussian can produce these matrices. Dalton is in the works.If you would like to add your favourite program to the list please use the source, Luke.
Usage
Example script : testGimic.sh
#!/bin/bash
#SBATCH -J testGimic # job name
#SBATCH -N 1 # total number of nodes
#SBATCH --cpus-per-task=2
#SBATCH --output=testGimig-%j.out #output file (%j expands to jobID)
#SBATCH --error=testGimic-%j.err #error file (%j expands to jobID)
#SBATCH --mem-per-cpu=16G
#SBATCH -p agustina_thin # partition

module load gimic/2.2.1
gimic > gimic.out
Launched from gimic-master/examples/benzene/3D directory.
More info :
- https://gimic.readthedocs.io/en/latest/index.html
- https://codeload.github.com/qmcurrents/gimic/zip/refs/heads/master
Golang 1.9
Build simple, secure, scalable systems with Go.
- An open-source programming language supported by Google
- Easy to learn and great for teams
- Built-in concurrency and a robust standard library
- Large ecosystem of partners, communities, and tools
Usage
Example script : testGolang.sh
#!/bin/bash

#SBATCH -e golang_test%j.err
#SBATCH -o golang_test%j.msg
#SBATCH -p agustina_thin
#SBATCH -N 4
#SBATCH --ntasks-per-node=24

module load golang/1.9

go --help
go version
Submit with :
sbatch --account=your_project_ID testGolang.sh
More info :
Gromacs
Gromacs. A free and open-source software suite for high-performance molecular dynamics and output analysis. There are two versions of gromacs 2024.5, the CPU version and de GPU version.
Usage CPU version
Example script : test-gromacs-cpu.sh
#!/bin/sh
#SBATCH --job-name=test-gromacs-cpu
#SBATCH --output=test-gromacs-cpu-%j.out
#SBATCH --error=test-gromacs-cpu-%j.err
#SBATCH -p agustina_thin
#SBATCH -N 1
#SBATCH --ntasks-per-node=16

# load CPU version
module load gromacs/gromacs-2024.5_cpu

source $GROMACS_BIN/GMXRC

export OMP_NUM_THREADS=16

mpirun $GROMACS_BIN/./gmx_mpi --help

echo "done!"
Submit with :
sbatch --account=your_project_ID test-gromacs-cpu.sh
Usage GPU version
Example script : test-gromacs-gpu.sh
#!/bin/sh
#SBATCH --job-name=test-gromacs-gpu
#SBATCH --output=test-gromacs-gpu-%j.out
#SBATCH --error=test-gromacs-gpu-%j.err
#SBATCH -p rasmia_ada
#SBATCH -N 1
#SBATCH --ntasks-per-node=16
#SBATCH --gres=gpu:4

# load gromacs with GPU support
module load gromacs/gromacs-2024.5_gpu

source $GROMACS_BIN/GMXRC

nvidia-smi -L

export CUDA_VISIBLE_DEVICES=0,1,2,3
export OMP_NUM_THREADS=16
export GMX_ENABLE_DIRECT_GPU_COMM=1
export GMX_FORCE_UPDATE_DEFAULT_GPU=true

mpirun $GROMACS_BIN/./gmx_mpi --help

echo "done!"
Submit with :
sbatch --account=your_project_ID test-gromacs-gpu.sh
Gromacs 2020.5
Example script : test-gromacs-cpu.sh
#!/bin/sh
#SBATCH --job-name=test-gromacs-cpu
#SBATCH --output=test-gromacs-cpu-%j.out
#SBATCH --error=test-gromacs-cpu-%j.err
#SBATCH -p agustina_thin
#SBATCH -N 1
#SBATCH --ntasks-per-node=16

# load CPU version
module load gromacs/gromacs-2020.5_cpu

export OMP_NUM_THREADS=16

source $GROMACS_BIN/GMXRC
#source $GROMACS_SINGLE_BIN/GMXRC # or source $GROMACS_BIN/GMXRC
#source $GROMACS_DOUBLE_BIN/GMXRC

# also available for single and double precission
# $GROMACS_SINGLE_BIN/./gmx_mpi --help
# $GROMACS_DOUBLE_BIN/./gmx_mpi_d --help
mpirun $GROMACS_BIN/./gmx_mpi --help

echo "done!"
Submit with :
sbatch --account=your_project_ID test-gromacs-cpu.sh
Example script : test-gromacs-gpu.sh
#!/bin/sh
#SBATCH --job-name=test-gromacs-gpu
#SBATCH --output=test-gromacs-gpu-%j.out
#SBATCH --error=test-gromacs-gpu-%j.err
#SBATCH -p rasmia_ada
#SBATCH -N 1
#SBATCH --ntasks-per-node=16
#SBATCH --gres=gpu:4

# load gromacs with GPU support
module load gromacs/gromacs-2020.5_gpu

source $GROMACS_BIN/GMXRC

nvidia-smi -L

export CUDA_VISIBLE_DEVICES=0,1,2,3
export OMP_NUM_THREADS=16
export GMX_ENABLE_DIRECT_GPU_COMM=1
export GMX_FORCE_UPDATE_DEFAULT_GPU=true

mpirun $GROMACS_BIN/./gmx_mpi --help

echo "done!"
Submit with :
sbatch --account=your_project_ID test-gromacs-gpu.sh
More info :
Hisat 2.2.1
Hisat2 is a fast and sensitive alignment program for mapping next-generation sequencing reads (both DNA and RNA) to a population of human genomes as well as to a single reference genome. Based on an extension of BWT for graphs (Sirén et al. 2014), we designed and implemented a graph FM index (GFM), an original approach and its first implementation. In addition to using one global GFM index that represents a population of human genomes, HISAT2 uses a large set of small GFM indexes that collectively cover the whole genome. These small indexes (called local indexes), combined with several alignment strategies, enable rapid and accurate alignment of sequencing reads. This new indexing scheme is called a Hierarchical Graph FM index (HGFM).
Usage
Example script : test-hisat.sh
#!/bin/bash

#SBATCH -J hisat-test
#SBATCH -e hisat-test%j.err
#SBATCH -o hisat-test%j.msg
#SBATCH -p agustina_thin # queue (partition)

# load hisat
module load hisat/2.2.1

# list hisat root folder
ls -al $HISAT_ROOT

hisat2 --help

echo "DONE!"
Submit with :
sbatch --account=your_project_ID test-hisat.sh
More info :
Julia
The Julia Programming Language.
Usage
Example script : testJulia.sh
#!/bin/bash

#SBATCH -e julia_test%j.err
#SBATCH -o julia_test%j.msg
#SBATCH -p agustina_thin
#SBATCH -N 4
#SBATCH --ntasks-per-node=24

module load julia/1.10.3

julia --help
julia --version
Submit with :
sbatch --account=your_project_ID testJulia.sh
More info :
llama.cpp
llama.cpp is an open source software library that performs inference on various large language models such as Llama. It is co-developed alongside the GGML project, a general-purpose tensor library. Inference of Meta's LLaMA model (and others) in pure C/C++. Command-line tools are included with the library.
Usage
llama.cpp has been compiled with GPU support, it is available for GPU queues ADA and Hopper.
Available llama.cpp versions:
- llama.cpp v1 (b4234)
- llama.cpp v1 (b4706)
Example script : test-llamacpp-hpc.sh
#!/bin/bash

#SBATCH -J llamacpp-gpu-test
#SBATCH -e llamacpp-test%j.err
#SBATCH -o llamacpp-test%j.msg
#SBATCH -p rasmia_ada # queue (partition)
#SBATCH --nodelist=agpul08
#SBATCH --gres=gpu:1

#module load llama.cpp/b4234
module load llama.cpp/b4706

BASE_PATH=/fs/agustina/$(whoami)/llamacpp
MODELS_PATH=$BASE_PATH/models

mkdir -p $MODELS_PATH

if [ -f "$MODELS_PATH/tiny-vicuna-1b.q5_k_m.gguf" ]; then
  echo "Model tiny-vicuna-1b.q5_k_m.gguf exists"
else
  echo "Model tiny-vicuna-1b.q5_k_m.gguf does not exist, downloading now..."

  # model download
  wget https://huggingface.co/afrideva/Tiny-Vicuna-1B-GGUF/resolve/main/tiny-vicuna-1b.q5_k_m.gguf -P $MODELS_PATH
fi

mkdir -p $BASE_PATH/answers

PROMPT='I think the meaning of life is'

# use llama.cpp client
$LLAMACPP_BIN/./llama-cli --help
$LLAMACPP_BIN/./llama-cli --version
$LLAMACPP_BIN/./llama-cli --list-devices
$LLAMACPP_BIN/./llama-cli -m $MODELS_PATH/tiny-vicuna-1b.q5_k_m.gguf \
                          -p "$PROMPT" \
                          --n-predict 128 \
                          --n-gpu-layers -1 \
                          -dev CUDA0 > $BASE_PATH/answers/llama-cli-answer.txt

cat $BASE_PATH/answers/llama-cli-answer.txt

# list llama.cpp directory to find out more tools
ls -al $LLAMACPP_BIN

echo "DONE!"
Submit with :
sbatch --account=your_project_ID test-llamacpp-hpc.sh
More info :
llama.cpp Bindings
llama.cpp bindings are the python bindings to use llama.cpp. Simple Python bindings for llama.cpp library.
Usage
Example script : test-llamacpp-bindings.sh
#!/bin/bash

#SBATCH -J test-llamacpp-bindings
#SBATCH -e test-llamacpp-bindings-%j.err
#SBATCH -o test-llamacpp-bindings-%j.msg
#SBATCH -p rasmia_hopper # queue (partition)
#SBATCH --nodelist=agpuh03 # select one node
#SBATCH --gres=gpu:1 # select one GPU

module load llama-cpp-python/0.3.1

export SSL_CERT_FILE=/etc/ssl/certs/ca-bundle.trust.crt
pip install typing-extensions diskcache certifi

# check available GPUs
nvidia-smi

python test-llamacpp-bindings.py

echo "DONE!"
Submit with :
sbatch --account=your_project_ID test-llamacpp-bindings.sh
Example file : test-llamacpp-bindings.py
import os
import urllib.request
from llama_cpp import Llama

def download_file(file_link, filename):
    # Checks if the file already exists before downloading
    if not os.path.isfile(filename):
        urllib.request.urlretrieve(file_link, filename)
        print("File downloaded successfully.")
    else:
        print("File already exists.")

# Dowloading GGML model from HuggingFace
ggml_model_path = "https://huggingface.co/TheBloke/zephyr-7B-beta-GGUF/resolve/main/zephyr-7b-beta.Q4_0.gguf"
filename = "zephyr-7b-beta.Q4_0.gguf"

download_file(ggml_model_path, filename)

llm = Llama(model_path="zephyr-7b-beta.Q4_0.gguf", n_ctx=512, n_batch=126, n_gpu_layers=-1)

def generate_text(
    prompt="Who is the CEO of Apple?",
    max_tokens=256,
    temperature=0.1,
    top_p=0.5,
    echo=False,
    stop=["#"],
):
    output = llm(
        prompt,
        max_tokens=max_tokens,
        temperature=temperature,
        top_p=top_p,
        echo=echo,
        stop=stop,
    )
    output_text = output["choices"][0]["text"].strip()
    return output_text

def generate_prompt_from_template(input):
    chat_prompt_template = f"""<|im_start|>system
You are a helpful chatbot.<|im_end|>
<|im_start|>user
{input}<|im_end|>"""
    return chat_prompt_template

prompt = generate_prompt_from_template(
    "Compose an engaging travel blog post about a recent trip to Hawaii, highlighting cultural experiences and must-see attractions."
)

print(generate_text(
    prompt,
    max_tokens=356,
))
More info :
Matlab runtime
Matlab runtime is a standalone set of shared libraries that enables the execution of compiled MATLAB. Available versions: 2017a, 2019b, 2023a.
Usage
Example script : test-matlab-runtime.sh
#!/bin/bash

#SBATCH --job-name=test-matlab
#SBATCH --output=test-matlab-%j.msg
#SBATCH --error=test-matlab-%j.err
#SBATCH -p agustina_thin
#SBATCH -N 1

module load matlab-runtime/R2017a
#module load matlab-runtime/R2019b
#module load matlab-runtime/R2023a

echo "DONE!!!!"
Submit with :
sbatch --account=your_project_ID test-matlab-runtime.sh
More info :
Miniconda3
Miniconda is a free, miniature installation of Anaconda Distribution that includes only conda, Python, the packages they both depend on, and a small number of other useful packages.
WARNING: If you do not know how to create your own miniconda environment in agustina cluster, please read the instruction below, otherwise send and email with your request to agustina@bifi.es for further assistance.
Miniconda is useful to create your own conda environment in the /fs/agustina/USER folder. To do this, you can import your own yml file and create the environment with the following commands:
Usage
module load miniconda3/3.12
export CONDA_PKGS_DIRS=/fs/agustina/$(whoami)/.conda-pkgs
mkdir -p /fs/agustina/$(whoami)/conda-env
$MINICONDA3_HOME/bin/conda-env create --prefix /fs/agustina/$(whoami)/conda-env/my-conda-env --file /fs/agustina/$(whoami)/conda-env/my-environment-file.yml
source $MINICONDA3_HOME/bin/activate /fs/agustina/$(whoami)/conda-env/my-conda-env
Once you have the environment ready and activated, you can more packages with pip install inside the environment, the you can create a bash script to launch the environment in agustina cluster:
Example script : test-miniconda.sh
#!/bin/bash

#SBATCH -J test-miniconda
#SBATCH -o test-miniconda-%j.msg
#SBATCH -e test-miniconda-%j.err
#SBATCH -p agustina_thin
#SBATCH -N 1

module load miniconda3/3.12

# activate environment
source $MINICONDA3_HOME/bin/activate /fs/agustina/$(whoami)/conda-env/my-conda-env

python -v

echo "done!!"
Submit with :
sbatch --account=your_project_ID test-miniconda.sh
Base file: my-environment-file.yml
name:
channels:
  - defaults
dependencies:
  - _libgcc_mutex=0.1=main
  - _openmp_mutex=5.1=1_gnu
  - blas=1.0=mkl
  - bzip2=1.0.8=h5eee18b_6
  - ca-certificates=2024.9.24=h06a4308_0
  - expat=2.6.3=h6a678d5_0
  - intel-openmp=2023.1.0=hdb19cb5_46306
  - ld_impl_linux-64=2.40=h12ee557_0
  - libffi=3.4.4=h6a678d5_1
  - libgcc-ng=11.2.0=h1234567_1
  - libgomp=11.2.0=h1234567_1
  - libmpdec=4.0.0=h5eee18b_0
  - libstdcxx-ng=11.2.0=h1234567_1
  - libuuid=1.41.5=h5eee18b_0
  - mkl=2023.1.0=h213fc3f_46344
  - mkl-service=2.4.0=py313h5eee18b_1
  - mkl_fft=1.3.11=py313h5eee18b_0
  - mkl_random=1.2.8=py313h06d7b56_0
  - ncurses=6.4=h6a678d5_0
  - numpy=2.1.3=py313hf4aebb8_0
  - numpy-base=2.1.3=py313h3fc9231_0
  - openssl=3.0.15=h5eee18b_0
  - pip=24.2=py313h06a4308_0
  - python=3.13.0=hf623796_100_cp313
  - python_abi=3.13=0_cp313
  - readline=8.2=h5eee18b_0
  - setuptools=72.1.0=py313h06a4308_0
  - sqlite=3.45.3=h5eee18b_0
  - tbb=2021.8.0=hdb19cb5_0
  - tk=8.6.14=h39e8969_0
  - tzdata=2024b=h04d1e81_0
  - xz=5.4.6=h5eee18b_1
  - zlib=1.2.13=h5eee18b_1
  - pip:
      - alabaster==1.0.0
      - babel==2.16.0
      - certifi==2024.8.30
      - charset-normalizer==3.4.0
      - contourpy==1.3.1
      - cycler==0.12.1
      - docutils==0.21.2
      - fonttools==4.55.0
      - idna==3.10
      - imagesize==1.4.1
      - jinja2==3.1.4
      - kiwisolver==1.4.7
      - markupsafe==3.0.2
      - matplotlib==3.9.2
      - packaging==24.2
      - pillow==11.0.0
      - pygments==2.18.0
      - pyparsing==3.2.0
      - python-dateutil==2.9.0.post0
      - requests==2.32.3
      - scipy==1.14.1
      - six==1.16.0
      - snowballstemmer==2.2.0
      - sphinx==8.1.3
      - sphinxcontrib-applehelp==2.0.0
      - sphinxcontrib-devhelp==2.0.0
      - sphinxcontrib-htmlhelp==2.1.0
      - sphinxcontrib-jsmath==1.0.1
      - sphinxcontrib-qthelp==2.0.0
      - sphinxcontrib-serializinghtml==2.0.0
      - urllib3==2.2.3
      - wheel==0.38.1
More info :
MUMAX3-cQED 1.0
Mumax3-cQED: like Mumax3 but for a magnet coupled to a cavity. This is a fork of the micromagnetic simulation open source software mumax3. Mumax3-cQED, enhances mumax3 by including the effect of coupling the magnet to an electromagnetic cavity.
IMPORTANT: If you make use of GPU queues, it is mandatory to select a minimum number of CPU cores given by 16 cores/GPU multiplied by the amount of nodes selected and the number of selected GPUs (16 cores/gpu * num. GPUs * num. nodes).
Usage
Example script : test-mumax.sh
#!/bin/bash

#SBATCH -o mumax3-cqed-infos%j.o
#SBATCH -p rasmia_hopper
#SBATCH -N 1
#SBATCH --gres=gpu:1 # launch in 1-GPUs
#SBATCH --cpus-per-task=16 # 16 cores por GPU * 1 GPU * 1 nodo

module load mumax3-cqed/1.0

echo "GCC version: $(gcc --version)"

echo "GO version: $(go version)"

mumax3 test-script.mx3

echo "done!!"
The informative report will be shown in the output file provided by the job.
Submit with :
sbatch --account=your_project_ID test-mumax.sh
More info :
Namd
NAMD, recipient of a 2002 Gordon Bell Award, a 2012 Sidney Fernbach Award, and a 2020 Gordon Bell Prize, is a parallel molecular dynamics code designed for high-performance simulation of large biomolecular systems. Based on Charm++ parallel objects, NAMD scales to hundreds of cores for typical simulations and beyond 500,000 cores for the largest simulations. NAMD uses the popular molecular graphics program VMD for simulation setup and trajectory analysis, but is also file-compatible with AMBER, CHARMM, and X-PLOR. NAMD is distributed free of charge with source code.
Usage
Example script : testNamd.sh
#!/bin/bash
#SBATCH --job-name=alanin
#SBATCH --output=%x.o%j
#SBATCH --error=%x.e%j
#SBATCH --nodes=1
#SBATCH --ntasks-per-node=2
#SBATCH --mem=32G
#SBATCH --time=1-00:00:00
#SBATCH -p agustina_thin
#

module load namd/3.0b6

namd3 +p ${SLURM_TASKS_PER_NODE} alanin.conf > alanin.log
Example files can be found at : lib/replica/example/ in NAMD_3.0_Linux-x86_64-multicore.tar.gz
Submit with :
sbatch --account=your_project_ID testNamd.sh
More info :
- https://www.hpc.unipr.it/dokuwiki/doku.php?id=calcoloscientifico:userguide:namd
- https://www.ks.uiuc.edu/Research/namd/2.8b2/ug.pdf
NCCL Test
NCCL are the optimized primitives for inter-GPU communication. NCCL (pronounced "Nickel") is a stand-alone library of standard communication routines for GPUs, implementing all-reduce, all-gather, reduce, broadcast, reduce-scatter, as well as any send/receive based communication pattern. It has been optimized to achieve high bandwidth on platforms using PCIe, NVLink, NVswitch, as well as networking using InfiniBand Verbs or TCP/IP sockets. NCCL supports an arbitrary number of GPUs installed in a single node or across multiple nodes, and can be used in either single- or multi-process (e.g., MPI) applications.
These tests check both the performance and the correctness of NCCL operations.
Usage
Example script : test-nccl.sh
#!/bin/bash

#SBATCH -J nccl-tst # job name
#SBATCH -o nccl-test.o%j # output and error file name (%j expands to jobID)
#SBATCH -p rasmia_ada # queue L40S (partition)
#SBATCH -N 2 # total number of nodes

module load nccl-test/1.0

# Run 2 MPI processes in 2 GPUs in 2 Nodes
for i in $NCCLBUILD/*_perf; do
        FILENAME=$(basename $i)
        echo ""
        echo "Running test $FILENAME..."
        echo ""
        mpirun -np 2 $NCCLBUILD/./$FILENAME -b 8 -e 8G -f 2 -g 2
done

echo "done!!"
The informative report will be shown un the job output file.
Submit with :
sbatch --account=your_project_ID test-nccl.sh
More info :
NBO/7.0
The Natural Bond Orbital (NBO) program NBO 7.0 is a discovery tool for chemical insights from complex wavefunctions. NBO 7.0 is the current version of the broad suite of 'natural' algorithms for optimally expressing numerical solutions of Schrödinger's wave equation in the chemically intuitive language of Lewis-like bonding patterns and associated resonance-type 'donor-acceptor' interactions.
Usage
Example script : testNBO7.sh
#!/bin/bash

#SBATCH -e nbo7_test%j.err
#SBATCH -o nbo7_test%j.msg
#SBATCH -p agustina_thin
#SBATCH -N 4
#SBATCH --ntasks-per-node=24

module load nbo/7

# lauch with gaunbo7
Submit with :
sbatch --account=your_project_ID testNBO7.sh
More info :
NVIDIA HPC SDK
A Comprehensive Suite of Compilers, Libraries and Tools for HPC. The NVIDIA HPC Software Development Kit (SDK) includes the proven compilers, libraries and software tools essential to maximizing developer productivity and the performance and portability of HPC applications.
IMPORTANT: If you make use of GPU queues, it is mandatory to select a minimum number of CPU cores given by 16 cores/GPU multiplied by the amount of nodes selected and the number of selected GPUs (16 cores/gpu * num. GPUs * num. nodes).
Usage
Example script : testNvidiaHpcSdk.sh
#!/bin/bash

#SBATCH -e nvidiahpcsdk_test%j.err
#SBATCH -o nvidiahpcsdk_test%j.msg
#SBATCH -p agustina_thin
#SBATCH -N 4
#SBATCH --ntasks-per-node=24

module load nvidia-hpc-sdk/24.5

nvcc --help
nvcc --version
Submit with :
sbatch --account=your_project_ID testNvidiaHpcSdk.sh
Example script (Running in ada queue) : sumParallel.sh
#!/bin/bash

#SBATCH -J multi-gpu-test
#SBATCH -e multigpu-test%j.err
#SBATCH -o multigpu-test%j.msg
#SBATCH -p rasmia_ada # queue (partition)
#SBATCH --nodes=1
#SBATCH --gres=gpu:2 # launch in 2-GPUs
#SBATCH --cpus-per-task=32 # 16 cores por GPU * 2 GPUs * 1 nodo

module load nvidia-hpc-sdk/24.5
echo "Loaded NVIDIA SDK !!!"
nvidia-smi

mkdir -p /fs/agustina/$(whoami)/test-multigpu
export CUDA_SUM_CODE=/fs/agustina/$(whoami)/test-multigpu
nvcc $CUDA_SUM_CODE/sum-array-multigpu.cu -o $CUDA_SUM_CODE/sum-array-multigpu
$CUDA_SUM_CODE/./sum-array-multigpu
Example script (Running in hopper queue) : sumParallel.sh
#!/bin/bash

#SBATCH -J multi-gpu-test
#SBATCH -e multigpu-test%j.err
#SBATCH -o multigpu-test%j.msg
#SBATCH -p rasmia_hopper # queue (partition)
#SBATCH --nodelist=agpuh02
#SBATCH --gres=gpu:4 # launch in 4-GPUs
#SBATCH --cpus-per-task=64 # 16 cores por GPU * 4 GPUs * 1 nodo

module load nvidia-hpc-sdk/24.5
echo "Loaded NVIDIA SDK !!!"
nvidia-smi

export CUDA_SUM_CODE=/fs/agustina/sergiomtzlosa/test-multigpu
nvcc $CUDA_SUM_CODE/sum-array-multigpu.cu -o $CUDA_SUM_CODE/sum-array-multigpu
$CUDA_SUM_CODE/./sum-array-multigpu
Execution in selected nodes: sumParallel.sh
#!/bin/env bash

#SBATCH -J multgpu-test # job name
#SBATCH -o multi-gpu.o%j # output and error file name (%j expands to jobID)
#SBATCH -p rasmia_hopper # H100 (partition)
#SBATCH --gres=gpu:4 # gpus per node
#SBATCH -–nodelist=agpuh[02-03] # two nodes (node 2 and 3)
#SBATCH --ntasks=2 # one task per node
#SBATCH --cpus-per-task=128 # 16 cores por GPU * 4 GPUs * 2 nodos

module load nvidia-hpc-sdk/24.5
export CUDA_SUM_CODE=/fs/agustina/$(whoami)/test-multigpu
nvcc $CUDA_SUM_CODE/sum-array-multigpu.cu -o $CUDA_SUM_CODE/sum-array-multigpu
mpirun $CUDA_SUM_CODE/./sum-array-multigpu
Submit with :
sbatch --account=your_project_ID sumParallel.sh
CUDA file : sum-array-multigpu.cu
#include "cuda_runtime.h"
#include "device_launch_parameters.h"

#include <stdio.h>

// for random initialize
#include <stdlib.h>
#include <time.h>

// for memeset
#include <cstring>

void printGpuInfo(int i) {

	cudaDeviceProp prop;
	cudaGetDeviceProperties(&prop, i);
	printf("Device Number: %d\n", i);
	printf("  Device name: %s\n", prop.name);
	printf("  Memory Clock Rate (KHz): %d\n",  prop.memoryClockRate);
	printf("  Memory Bus Width (bits): %d\n", prop.memoryBusWidth);
	printf("  Peak Memory Bandwidth (GB/s): %f\n\n", 2.0*prop.memoryClockRate*(prop.memoryBusWidth/8)/1.0e6);
}

void compare_arrays(int *a, int *b, int size) {
	for (int i = 0; i < size; i++) {
		if (a[i] != b[i]) {
			printf("%d != %d\n", a[i], b[i]);
			printf("Arrays are different!\n\n");
			return;
		}
	}
	printf("Arrays are the same!\n\n");
}

// CUDA Kernel
__global__ void sum_array_gpu(int *a, int *b, int *c, int size) {
	int gid = blockIdx.x * blockDim.x + threadIdx.x;

	if (gid < size) {
		c[gid] = a[gid] + b[gid];
	}
}

void sum_array_cpu(int *a, int *b, int *c, int size) {
	for (int i = 0; i < size; i++) {
		c[i] = a[i] + b[i];
	}
}

int main() {

	int size = 10000;
	int block_size = 128;
	int nDevices;
	int NO_BYTES = size * sizeof(int);

	// host pointers
	int *h_a, *h_b, *gpu_results, *h_c;

	h_a = (int *)malloc(NO_BYTES);
	h_b = (int *)malloc(NO_BYTES);
	h_c = (int *)malloc(NO_BYTES);

	// initialize host pointer
	time_t t;
	srand((unsigned)time(&t));

	for (int i = 0; i < size; i++) {
		h_a[i] = (int)(rand() & 0xff);
	}

	for (int i = 0; i < size; i++) {
		h_b[i] = (int)(rand() & 0xff);
	}

	sum_array_cpu(h_a, h_b, h_c, size);

	cudaGetDeviceCount(&nDevices);

	// device pointer
	int *d_a, *d_b, *d_c;

	for (int dev = 0; dev < nDevices; dev++) {

		printGpuInfo(dev);
		cudaSetDevice(dev);

		gpu_results = (int *)malloc(NO_BYTES);
		memset(gpu_results, 0 , NO_BYTES);

		cudaMalloc((int **)&d_a, NO_BYTES);
		cudaMalloc((int **)&d_b, NO_BYTES);
		cudaMalloc((int **)&d_c, NO_BYTES);

		cudaMemcpy(d_a, h_a, NO_BYTES, cudaMemcpyHostToDevice);
		cudaMemcpy(d_b, h_b, NO_BYTES, cudaMemcpyHostToDevice);

		// launching the grid
		dim3 block(block_size);
		dim3 grid((size/block.x) + 1);

		sum_array_gpu<<<grid, block>>>(d_a, d_b, d_c, size);
		cudaDeviceSynchronize();

		cudaMemcpy(gpu_results, d_c, NO_BYTES, cudaMemcpyDeviceToHost);

		// array comparison
		compare_arrays(gpu_results, h_c, size);

		cudaFree(d_a);
		cudaFree(d_b);
		cudaFree(d_c);
		free(gpu_results);
	}

	free(h_a);
	free(h_b);

}
For a multigpu and multinode launch, it is mandatory to use OpenMPI, here is the same bash script with multigpu support:
#SBATCH -J multi-gpu-test
#SBATCH -e multigpu-test%j.err
#SBATCH -o multigpu-test%j.msg
#SBATCH -p rasmia_ada # queue L40S (partition)
#SBATCH --gres=gpu:4 # gpus per node
#SBATCH --nodes=4 # four nodes
#SBATCH --ntasks=4 # one task per node
#SBATCH --cpus-per-task=256 # 16 cores por GPU * 4 GPUs * 4 nodos

echo "This bash script launches the program on 16 GPUs"

module load nvidia-hpc-sdk/24.5
echo "Loaded NVIDIA SDK !!!"
nvidia-smi

export CUDA_SUM_CODE=/fs/agustina/$(whoami)/test-multigpu
nvcc $CUDA_SUM_CODE/sum-array-multigpu.cu -o $CUDA_SUM_CODE/sum-array-multigpu
mpirun $CUDA_SUM_CODE/./sum-array-multigpu
Submit with :
sbatch --account=your_project_ID sumParallel.sh
OLLAMA execution in Agustina
To use OLLAMA in Agustina it is mandatory to obtain the OLLAMA binary file for Linux distributions:
Uncompress the ollama-linux-amd64.tgz file and create directories:
$ mkdir -p /fs/agustina/$(whoami)/test-ollama/prompts # prompts folder
$ mkdir -p /fs/agustina/$(whoami)/test-ollama/models-ollama # new folder to download OLLAMA models
$ cd /fs/agustina/$(whoami)/test-ollama
$ wget https://github.com/ollama/ollama/releases/download/v0.3.14/ollama-linux-amd64.tgz
$ tar xvf ollama-linux-amd64.tgz
OLLAMA uses the /home directory to store the models, indeed in $HOME/.ollama/models, but we change this path by setting the OLLAMA_MODELS environment variable.
Here is an example of running OLLAMA model in Agustina cluster on H100 GPUs:
bash file : test-ollama.sh
#!/bin/bash

#SBATCH -J ollama-gpu-test
#SBATCH -e ollama-test%j.err
#SBATCH -o ollama-test%j.msg
#SBATCH -p rasmia_hopper # H100 queue (partition)
#SBATCH --nodelist=agpuh02
#SBATCH --gres=gpu:4 # four GPUs
#SBATCH --cpus-per-task=64 # 16 cores por GPU * 4 GPUs * 1 nodo

module load nvidia-hpc-sdk/24.5
echo "Loaded NVIDIA SDK !!!"

module load python-math/3.11.4

python --version
nvidia-smi

echo "Current path: $(pwd)"

export BASE_OLLAMA_TEST=/fs/agustina/$(whoami)/test-ollama
export PROMPTS_PATH=$BASE_OLLAMA_TEST/prompts
export OLLAMA_BIN=$BASE_OLLAMA_TEST/bin

echo "OLLAMA PATH: $OLLAMA_BIN"

export OLLAMA_NUMPARALLEL=4
export OLLAMA_LOAD_TIMEOUT=900

# change the models download path with this environment variable
export OLLAMA_MODELS=$BASE_OLLAMA_TEST/models-ollama

$OLLAMA_BIN/./ollama serve &
$OLLAMA_BIN/./ollama list

for i in llama3.1:8b-instruct-q2_K llama3.1:8b-instruct-q8_0; do
        touch answer1-$i.txt && >answer1-$i.txt
        echo "" >> answer1-$i.txt
        echo "PROMPT:" >> answer1-$i.txt
        echo "" >> answer1-$i.txt
        cat $PROMPTS_PATH/prompt1.txt >> answer1-$i.txt
        echo "" >> answer1-$i.txt
        echo "ANSWER:" >> answer1-$i.txt
        echo "" >> answer1-$i.txt
        echo $(< $PROMPTS_PATH/prompt1.txt) | $OLLAMA_BIN/./ollama run $i >> answer1-$i.txt
        echo "" >> answer1-$i.txt
        echo "--------------------------------" >> answer1-$i.txt
        echo "" >> answer1-$i.txt
        echo "PROMPT:" >> answer1-$i.txt
        echo "" >> answer1-$i.txt
        cat $PROMPTS_PATH/prompt2.txt >> answer1-$i.txt
        echo "" >> answer1-$i.txt
        echo "ANSWER:" >> answer1-$i.txt
        echo "" >> answer1-$i.txt
        echo $(< $PROMPTS_PATH/prompt2.txt) | $OLLAMA_BIN/./ollama run $i >> answer1-$i.txt
done

$OLLAMA_BIN/./ollama list

echo "DONE!"
The script takes the input prompts from files $PROMPTS_PATH/prompt1.txt and $PROMPTS_PATH/prompt2.txt.
Submit with :
sbatch --account=your_project_ID test-ollama.sh
More info :
Ollama
Get up and running with large language models. Ollama is a client to use AI models. It is also possible to use DeepSeek models.
Usage
This example uses some ollama models and DeepSeek model. The scripts creates two prompts in spanish and download the models to set the prompts, after that the answers are saved in separeted files.
Available ollama versions:
- ollama 0.3.14
- ollama 0.5.7
Example script : test-ollama-hpc.sh
#!/bin/bash

#SBATCH -J ollama-gpu-test
#SBATCH -e ollama-test%j.err
#SBATCH -o ollama-test%j.msg
#SBATCH -p rasmia_hopper # queue (partition)
#SBATCH --nodelist=agpuh02
#SBATCH --gres=gpu:4

# load ollama
#module load ollama/0.3.14
module load ollama/0.5.7

python --version

nvidia-smi
echo "Current path: $(pwd)"

# export variables
export BASE_OLLAMA_TEST=/fs/agustina/$(whoami)/test-ollama
export PROMPTS_PATH=$BASE_OLLAMA_TEST/prompts
export OLLAMA_BIN=$OLLAMA_ROOT/bin

echo "OLLAMA PATH: $OLLAMA_BIN"

export OLLAMA_NUMPARALLEL=4
export OLLAMA_LOAD_TIMEOUT=900
export OLLAMA_MODELS=$BASE_OLLAMA_TEST/models-ollama

# create folders for models and prompts
mkdir -p $PROMPTS_PATH
mkdir -p $OLLAMA_MODELS

# prompts creation
echo "Dime a que instituto de UNIZAR corresponden las siglas BiFi. Describe su investigacion reciente." > $PROMPTS_PATH/prompt1.txt
echo "cual es el camino mas interesante de sevilla a barcelona pasando por madrid?" > $PROMPTS_PATH/prompt2.txt

# start ollama
$OLLAMA_BIN/./ollama serve &
$OLLAMA_BIN/./ollama list

# 1 - Download models (also DeepSeek)
# 2 - Pass the prompts to the models
# 3 - Get the answers and save them to a file
for i in llama3.1:8b-instruct-q2_K \
         llama3.1:8b-instruct-q8_0 \
         deepseek-r1:7b; do
        touch answer1-$i.txt && >answer1-$i.txt
        echo "" >> answer1-$i.txt
        echo "PROMPT:" >> answer1-$i.txt
        echo "" >> answer1-$i.txt
        cat $PROMPTS_PATH/prompt1.txt >> answer1-$i.txt
        echo "" >> answer1-$i.txt
        echo "ANSWER:" >> answer1-$i.txt
        echo "" >> answer1-$i.txt
        echo $(< $PROMPTS_PATH/prompt1.txt) | $OLLAMA_BIN/./ollama run $i >> answer1-$i.txt
        echo "" >> answer1-$i.txt
        echo "--------------------------------" >> answer1-$i.txt
        echo "" >> answer1-$i.txt
        echo "PROMPT:" >> answer1-$i.txt
        echo "" >> answer1-$i.txt
        cat $PROMPTS_PATH/prompt2.txt >> answer1-$i.txt
        echo "" >> answer1-$i.txt
        echo "ANSWER:" >> answer1-$i.txt
        echo "" >> answer1-$i.txt
        echo $(< $PROMPTS_PATH/prompt2.txt) | $OLLAMA_BIN/./ollama run $i >> answer1-$i.txt
done

$OLLAMA_BIN/./ollama list

echo "DONE!"
Submit with :
sbatch --account=your_project_ID test-ollama-hpc.sh
It is also possible to use other DeepSeek models like the one to create programming code like the Deepseek-v2:16b. We can request a Brainfuck programming language interpreter made in Python:
Example script : test-deepseek-hpc.sh
#!/bin/bash

#SBATCH -J deepseek-gpu-test
#SBATCH -e deepseek-test%j.err
#SBATCH -o deepseek-test%j.msg
#SBATCH -p rasmia_hopper # queue (partition)
#SBATCH --nodelist=agpuh02
#SBATCH --gres=gpu:1

# load ollama
module load ollama/0.5.7

export BASE_OLLAMA_TEST=/fs/agustina/$(whoami)/deepseek-test
export ANSWERS_PATH=$BASE_OLLAMA_TEST/answers
export OLLAMA_BIN=$OLLAMA_ROOT/bin

echo "OLLAMA PATH: $OLLAMA_BIN"

export OLLAMA_NUMPARALLEL=1
export OLLAMA_LOAD_TIMEOUT=900
export OLLAMA_MODELS=$BASE_OLLAMA_TEST/models

mkdir -p $OLLAMA_MODELS
mkdir -p $ANSWERS_PATH

$OLLAMA_BIN/./ollama serve &

PROMPT="create a brainfuck interpreter made in python"

touch $ANSWERS_PATH/answer.txt
truncate -s 0 $ANSWERS_PATH/answer.txt

echo $PROMPT | $OLLAMA_BIN/./ollama run deepseek-coder-v2:16b >> $ANSWERS_PATH/answer.txt
Submit with :
sbatch --account=your_project_ID test-deepseek-hpc.sh
DeepSeek-v2:16b response:
Creating a Brainfuck interpreter in Python is an interesting exercise. Below, I'll provide a simple implementation of a Brainfuck interpreter
that can execute Brainfuck commands. This interpreter will handle the basic set of commands defined by Brainfuck, including moving pointers,
modifying values at the pointer location, and looping based on the value at the current cell.

Here's a basic implementation:
def brain_fuck(code):
   tape = [0] * 30000  # Initialize a tape of 30,000 cells with all values set to 0
   pointer = 0  # The current cell of the tape being pointed by the interpreter
   code_pointer = 0  # Position in the Brainfuck code string
   brackets_stack = []  # Stack for keeping track of bracket positions

   while code_pointer < len(code):
       command = code[code_pointer]

       if command == '>':
           pointer += 1
           if pointer >= len(tape):
               raise IndexError("Tape pointer out of bounds.")

       elif command == '<':
           pointer -= 1
           if pointer < 0:
               raise IndexError("Tape pointer out of bounds.")

       elif command == '+':
           tape[pointer] += 1
           if tape[pointer] > 255:
               tape[pointer] = 0

       elif command == '-':
           tape[pointer] -= 1
           if tape[pointer] < 0:
               tape[pointer] = 255

       elif command == '.':
           print(chr(tape[pointer]), end='')

       elif command == ',':
           tape[pointer] = ord(input()[0]) if input() else 0

       elif command == '[':
           if tape[pointer] == 0:
               bracket_nesting = 1
               while bracket_nesting > 0:
                   code_pointer += 1
                   if code[code_pointer] == '[':
                       bracket_nesting += 1
                   elif code[code_pointer] == ']':
                       bracket_nesting -= 1
           else:
               brackets_stack.append(code_pointer)

       elif command == ']':
           if tape[pointer] != 0:
               code_pointer = brackets_stack[-1]
           else:
               brackets_stack.pop()

       code_pointer += 1

# Example usage:
brain_fuck("++++++++++[>+>+++>+++++++>++++++++++<<<<-]>>>++.>+.+++++++..+++.<<++.>+++++++++++++++.>.+++.------.--------.")
This implementation covers the basic commands of Brainfuck and handles input/output as specified in the standard Brainfuck language.
It uses a simple stack to handle loops, jumping over the code when the condition is not met. The tape size is fixed at 30,000 cells,
which can be adjusted based on requirements.

Keep in mind that this implementation does not include error handling for malformed Brainfuck code or
runtime errors (like accessing out of bounds memory). You might want to add checks and exceptions to make the interpreter more
robust and user-friendly.
More info :
OpenBabel
OpenBabel is a project to facilitate the interconversion of chemical data from one format to another – including file formats of various types. This is important for the following reasons:
- Multiple programs are often required in realistic workflows. These may include databases, modeling or computational programs, visualization programs, etc.
- Many programs have individual data formats, and/or support only a small subset of other file types.
- Chemical representations often vary considerably:
- Some programs are 2D. Some are 3D. Some use fractional k-space coordinates.
- Some programs use bonds and atoms of discrete types. Others use only atoms and electrons.
- Some programs use symmetric representations. Others do not.
- Some programs specify all atoms. Others use "residues" or omit hydrogen atoms.
- Individual implementations of even standardized file formats are often buggy, incomplete or do not completely match published standards.
As a free, and open source project, OpenBabel improves by way of helping others. It gains by way of its users, contributors, developers, related projects, and the general chemical community. We must continually strive to support these constituencies.
Usage
Example script : testOpenbabel.sh
#!/bin/bash

#SBATCH -e openbabel_test%j.err
#SBATCH -o openbabel_test%j.msg
#SBATCH -p agustina_thin
#SBATCH -N 4
#SBATCH --ntasks-per-node=24

module load openbabel/3.1.1

obabel --help
Submit with :
sbatch --account=your_project_ID testOpenbabel.sh
More info :
OpenFOAM
OpenFOAM is the free, open source CFD software developed primarily by OpenCFD Ltd since 2004. It has a large user base across most areas of engineering and science, from both commercial and academic organisations. OpenFOAM has an extensive range of features to solve anything from complex fluid flows involving chemical reactions, turbulence and heat transfer, to acoustics, solid mechanics and electromagnetics. The availbale version is OpenFOAM v2206.
Usage
Example script : test-openfoam.sh
#!/bin/bash
#SBATCH --job-name=test-of
#SBATCH -o test-of_out%j.out
#SBATCH -e test-of_err%j.err
#SBATCH -N 1
#SBATCH -p agustina_thin

module load openfoam/2206

echo "OPENFOAM BIN:"
of_exec "ls -al $OPENFOAM_BIN"

echo "OpenFOAM v2206 HOME:"
of_exec "ls -al $OPENFOAM_HOME"

# base path for custom libraries and models
BASE_COMPILE=/fs/agustina/$(whoami)/base_data_of

BASE_COMPILE_LIB=$BASE_COMPILE/libraries
BASE_COMPILE_SOLV=$BASE_COMPILE/solvers

of_exec "cd $BASE_COMPILE_LIB/myNewLibrary && wclean && wmake"
of_exec "cd $BASE_COMPILE_SOLV/myNewModel && wclean && wmake"

of_exec "mpirun -n 4 myNewModel -parallel"

echo "done!"
Submit with :
sbatch --account=your_project_ID test-openfoam.sh
More info :
OpenMX
OpenMX (Open source package for Material eXplorer) is a software package for nano-scale material simulations based on density functional theories (DFT) [1], norm-conserving pseudopotentials [32,33,34,35,36], and pseudo-atomic localized basis functions [41]. The methods and algorithms used in OpenMX and their implementation are carefully designed for the realization of large-scale ab initio electronic structure calculations on parallel computers based on the MPI or MPI/OpenMP hybrid parallelism. The efficient implementation of DFT enables us to investigate electronic, magnetic, and geometrical structures of a wide variety of materials such as bulk materials, surfaces, interfaces, liquids, and low-dimensional materials. Systems consisting of 1000 atoms can be treated using the conventional diagonalization method if several hundreds cores on a parallel computer are used. Even ab initio electronic structure calculations for systems consisting of more than 10000 atoms are possible with the O( ) methods implemented in OpenMX if several thousands CPU cores on a parallel computer are available. Since optimized pseudopotentials and basis functions, which are well tested, are provided for many elements, users may be able to quickly start own calculations without preparing those data by themselves. Considerable functionalities have been implemented for calculations of physical properties such as magnetic, dielectric, and electric transport properties. Thus, it is expected that OpenMX can be a useful and powerful theoretical tool for nano-scale material sciences, leading to better and deeper understanding of complicated and useful materials based on quantum mechanics. The development of OpenMX has been initiated by the Ozaki group in 2000, and from then onward many developers listed in the top page of the manual have contributed for further development of the open source package. The distribution of the program package and the source codes follow the practice of the GNU General Public License version 3 (GPLv3) [102], and they are downloadable from http://www.openmx-square.org/
Usage
Example script : testOpenmx.sh
#!/bin/bash
#SBATCH --job-name=openMx
#SBATCH --output=openMx.o%j
#SBATCH --error=openMx.e%j
#SBATCH --nodes=1
#SBATCH --ntasks-per-node=2
#SBATCH --mem=32G
#SBATCH --time=1-00:00:00
#SBATCH -p agustina_thin

module load openmpi/4.1.5-gcc-12.2.0-vo6j57n
module load openmx/3.9-gcc-12.2.0-yewsx2z

mpirun -np 4 openmx -runtest -nt 1
cp runtest.result runtest.result.4.1

mpirun -np 2 openmx -runtest -nt 2
cp runtest.result runtest.result.2.2

mpirun -np 1 openmx -runtest -nt 4
cp runtest.result runtest.result.1.4
Executed in openmx3.9/work directory inside openmx source files.
Submit with :
sbatch --account=your_project_ID testOpenmx.sh
More info :
Usage
Example script : testOrca.sh
#!/bin/bash
#
#SBATCH -J testOrca # job name
#SBATCH -o testOrca.o%j # output and error file name (%j expands to  jobID)
#SBATCH -e testOrca.e%j # output and error file name (%j expands to  jobID)

#SBATCH -n 2

module load orca/5.0.4
orca water.inp
Example file : water.inp
!HF DEF2-SVP
* xyz 0 1
O   0.0000   0.0000   0.0626
H  -0.7920   0.0000  -0.4973
H   0.7920   0.0000  -0.4973
*
Example script : testOrca1.sh
#!/bin/bash

#SBATCH --job-name=orca_thin_job 	# Nombre del trabajo
#SBATCH --output=orca_thin_job.o%j 	# Archivo de salida
#SBATCH --error=orca_thin_job.e%j 	# Archivo de error
#SBATCH -p agustina_thin		# Partición 'agustina_thin'
#SBATCH --nodes=2
#SBATCH --account=proyecto_prueba 	# Cuenta del proyecto
#SBATCH --mincpus=48
#SBATCH --ntasks=12
#SBATCH --cpus-per-task=4

export ORCADIR=/opt/ohpc/pub/apps/orca/orca_5_0_4_linux_x86-64_shared_openmpi411
export LD_LIBRARY_PATH=$LD_LIBRARY_PATH:/opt/ohpc/pub/libs/hwloc/lib

module load openmpi/4.1.2-gcc-12.2.0-fosm5wz
module load orca/5.0.4

$ORCADIR/orca input.inp > output.out
Example file : input.inp
! B3LYP def2-SVP TightSCF Opt      # Cambia según tu método y requerimientos

%pal
  nprocs 12                        # Usar 48 núcleos en total (24 por nodo x 3 nodos)
end

* xyz 0 1                          # Geometría del sistema (esto es solo un ejemplo)
C    0.000000    0.000000    0.000000
H    0.000000    0.000000    1.089000
H    1.026719    0.000000   -0.363000
H   -0.513360   -0.889165   -0.363000
H   -0.513360    0.889165   -0.363000
*
Submit with :
sbatch --account=your_project_ID Orca_script_name.sh
More info : https://www.faccts.de/orca/
Pennylane
The definitive open-source Python framework for quantum programming. Built by researchers, for research. Suitable for Quantum Machine Learning.
This framework can run on CPU and GPU using the built in devices. The following example shows the Pennylane framework with GPU device.
IMPORTANT: If you make use of GPU queues, it is mandatory to select a minimum number of CPU cores given by 16 cores/GPU multiplied by the amount of nodes selected and the number of selected GPUs (16 cores/gpu * num. GPUs * num. nodes).
Usage
Example script : testPennylaneGPU.sh
#!/bin/bash

#SBATCH -e pennylanegpu-errors%j.err
#SBATCH -o pennylanegpu-infos%j.msg
#SBATCH -p rasmia_hopper # H100 queue
#SBATCH -N 2
#SBATCH --gres=gpu:1 # launch in 1-GPUs
#SBATCH --cpus-per-task=32 # 16 cores por GPU * 1 GPU * 2 nodos

module load nvidia-hpc-sdk/24.5
module load pennylane/0.33.1
nvcc --version
python test-pennylanegpu.py
Submit with :
sbatch --account=your_project_ID testPennylaneGPU.sh
Example script : test-pennylanegpu.py
#!/usr/bin/python

# General libraries
from scipy.ndimage import gaussian_filter
import warnings

# Pennylane libraries
import pennylane as qml
from pennylane import numpy as np

warnings.filterwarnings("ignore")

# Minimize the energy of this 4-qubit Hamiltonian given in Pauli operators
# H = 1.0 * XXII + 0.3 * ZIII + 1.0 * IXXI + 0.3 * IZII + 1.0 * IIXX + 0.3 * IIZI + 1.0 * XIIX + 0.3 * IIIZ

def ising_chain_ham(n, gam, pennylane = False):

    # This function build the hamiltonian with Pauli operators
    # n = number of spin positions
    # gam = transverse field parameter
    if pennylane:
        import pennylane as qml
        from pennylane import numpy as np

    from qiskit.opflow import X, Z, I

    for i in range(n):
        vecX = [I] * n
        vecZ = [I] * n
        vecX[i] = X
        vecZ[i] = Z

        if i == n - 1:
            vecX[0] = X
        else:
            vecX[i+1] = X

        auxX = vecX[0]
        auxZ = vecZ[0]

        for a in vecX[1:n]:
            auxX = auxX ^ a
        for b in vecZ[1:n]:
            auxZ = auxZ ^ b

        if i == 0:
            H = (auxX) + (gam * auxZ)
        else:
            H = H + (auxX) + (gam * auxZ)

    if pennylane:
        h_matrix = np.matrix(H.to_matrix_op().primitive.data)
        return qml.pauli.pauli_decompose(h_matrix)

    return H


# Hamiltonian definition
n = 4 # número de qubits
gam = 0.3

H = ising_chain_ham(n, gam, pennylane = True) # Creamos el Hamiltoniano

print("Hamiltoniano in Pauli operators:")
print("--------------------------------------------------\n")
print(H)

# choose device GPU or CPU
dev = qml.device("lightning.gpu", wires = n) # pennylane GPU simulator device
#dev = qml.device("lightning.qubit", wires = n) # pennylane CPU simulator device

init_param = (
    np.array(np.random.random(n), requires_grad=True),
    np.array(1.1, requires_grad=True),
    np.array(np.random.random(n), requires_grad=True),
)

rot_weights = np.ones(n)
crot_weights = np.ones(n)

nums_frequency = {
    "rot_param": {(0,): 1, (1,): 1, (2,): 1., (3,): 1.}, # parámetros iniciales para las rotaciones de puertas
    "layer_par": {(): n},
    "crot_param": {(0,): 2, (1,): 2, (2,): 2, (3,): 2},
}

@qml.qnode(dev)
def ansatz(rot_param, layer_par, crot_param, rot_weights = None, crot_weights = None):

    # Ansatz
    for i, par in enumerate(rot_param * rot_weights):
        qml.RY(par, wires = i)

    for _ in list(range(len(dev.wires))):

        qml.CNOT(wires = [0, 1])
        qml.CNOT(wires = [0, 2])
        qml.CNOT(wires = [1, 2])
        qml.CNOT(wires = [0, 3])
        qml.CNOT(wires = [1, 3])
        qml.CNOT(wires = [2, 3])

    # Measure of expected value for hamiltonian
    return qml.expval(H)

max_iterations = 500 # max. iterations for optimizer

# We use the Rotosolve optimizer built-in Pennylane
opt = qml.RotosolveOptimizer(substep_optimizer = "brute", substep_kwargs = {"num_steps": 4})

param = init_param

rot_weights = np.array([0.4, 0.8, 1.0, 1.2], requires_grad=False)
crot_weights = np.array([0.5, 1.0, 1.5, 1.8], requires_grad=False)

cost_rotosolve = []

for n in range(max_iterations):

    param, cost, prev_energy = opt.step_and_cost(
         ansatz,
         *param,
         nums_frequency=nums_frequency,
         spectra = [],
         full_output=True,
         rot_weights=rot_weights,
         crot_weights=crot_weights,
    )

    # Compute energy
    energy = ansatz(*param, rot_weights=rot_weights, crot_weights=crot_weights)

    # Calculate difference between new and old energies
    conv = np.abs(energy - prev_energy)

    if n % 10 == 0:
        print("Iteration = {:},  Energy = {:.15f} Ha,  Convergence parameter = {:.15f} Ha".format(n, energy, np.mean(conv)))

    cost_rotosolve.extend(prev_energy)

print("\n==================================")
print("Number of iterations = ", max_iterations)
print("Last energy value = ", cost_rotosolve[len(cost_rotosolve) - 1])

qml.about()
More info :
PHI
PHI is a computer program designed for the calculation of the magnetic properties of paramagnetic coordination complexes. PHI is written in FORTRAN 90/95 and has been tested on Windows, MacOS and Linux. The source code, pre-compiled binaries, the user manual and tutorial material are available for download below. Please refer to the User Manual and Installation Guide for further information.
Usage
Example script : test-phi-hpc.sh
#!/bin/bash

#SBATCH -J phi-test
#SBATCH -e phi-test%j.err
#SBATCH -o phi-test%j.msg
#SBATCH -p agustina_thin # queue (partition)
#SBATCH --nodelist=athin16

module load phi/3.1.6

$PHI_ROOT/phi_v3.1.6.x --help

echo "DONE!"
Submit with :
sbatch --account=your_project_ID test-phi-hpc.sh
More info :
Custom Python 3.11 environment for science
Custom Python 3.11.4 environment with matplotlib, scipy, numpy and math packages.
Usage
Example script : testPython.sh
#!/bin/bash

#SBATCH -e python_test%j.err
#SBATCH -o python_test%j.msg
#SBATCH -p agustina_thin
#SBATCH -N 4
#SBATCH --ntasks-per-node=24

module load python-math/3.11.4

python --help
python --version
Submit with :
sbatch --account=your_project_ID testPython.sh
More info :
Qibo
Qibo is an open-source middleware for quantum computing. An end-to-end open source platform for quantum simulation, self-hosted quantum hardware control, calibration and characterization. It has a comprehensive, flexible ecosystem of tools, libraries and community resources that lets researchers and users to quickly deploy quantum powered applications.
Qibo can run circuits in CPU and GPU backends.
IMPORTANT: If you make use of GPU queues, it is mandatory to select a minimum number of CPU cores given by 16 cores/GPU multiplied by the amount of nodes selected and the number of selected GPUs (16 cores/gpu * num. GPUs * num. nodes).
Usage
Example script : testQibo.sh
#!/bin/bash

#SBATCH -e qibo_test%j.err
#SBATCH -o qibo_test%j.msg
#SBATCH -p agustina_thin
#SBATCH -N 4
#SBATCH --ntasks-per-node=24

module load qibo/0.1.2

python qibo-test.py
Submit with :
sbatch --account=your_project_ID testQibo.sh
Example script : qibo-test.py
import numpy as np
from qibo import gates
from qibo.models import Circuit
import qibo

qibo.set_device("/CPU:0")

# Construct the circuit
c = Circuit(2)

# Add some gates
c.add(gates.H(0))
c.add(gates.H(1))

# Define an initial state (optional - default initial state is |00>)
initial_state = np.ones(4) / 2.0

# Execute the circuit and obtain the final state
result = c(initial_state) # c.execute(initial_state) also works
print(result.state())
# should print `tf.Tensor([1, 0, 0, 0])`
Qibo also runs Quantum circuits on GPUs with NVIDIA support via CuPy backend:
Example script : testQiboGPU.sh
#!/bin/bash

#SBATCH -e qibogpu-errors%j.err
#SBATCH -o qibogpu-infos%j.msg
#SBATCH -p rasmia_hopper # H100 queue
#SBATCH -N 2
#SBATCH --gres=gpu:1 # launch in 1-GPUs
#SBATCH --cpus-per-task=32 # 16 cores por GPU * 1 GPU * 2 nodos

module load nvidia-hpc-sdk/24.5
module load qibo/0.2.12-gpu
nvcc --version
python test-qibogpu.py
Submit with :
sbatch --account=your_project_ID testQiboGPU.sh
Example script : test-qibogpu.py
# Minimize energy for the 6-qubits XXZ Heisenberg hamiltonian
# using VQE and Powell optimizer
import numpy as np
from qibo import models, gates, hamiltonians
import qibo

qibo.set_device("/GPU:0") # select GPU backend

nqubits = 6
nlayers = 1

# Create variational circuit
circuit = models.Circuit(nqubits)
for l in range(nlayers):
    circuit.add((gates.RY(q, theta=0) for q in range(nqubits)))
    circuit.add((gates.CZ(q, q+1) for q in range(0, nqubits-1, 2)))
    circuit.add((gates.RY(q, theta=0) for q in range(nqubits)))
    circuit.add((gates.CZ(q, q+1) for q in range(1, nqubits-2, 2)))
    circuit.add(gates.CZ(0, nqubits-1))
circuit.add((gates.RY(q, theta=0) for q in range(nqubits)))

# Create XXZ Hamiltonian
hamiltonian = hamiltonians.XXZ(nqubits=nqubits)
# Create VQE model
vqe = models.VQE(circuit, hamiltonian)

# Optimize starting from a random guess for the variational parameters
initial_parameters = np.random.uniform(0, 2*np.pi, 2*nqubits*nlayers + nqubits)
best, params, extra = vqe.minimize(initial_parameters, method='Powell', compile=False)

print("Best value:", best)
print("Optimized params:", params)
print(extra)
More info :
Qiskit
Qiskit is the world’s most popular software stack for quantum computing, with over 2,000 forks, over 8,000 contributions, and over 3 trillion circuits run.
Usage
Example script : testQiskit.sh
#!/bin/bash

#SBATCH -e qiskit_test%j.err
#SBATCH -o qiskit_test%j.msg
#SBATCH -p agustina_thin
#SBATCH -N 4
#SBATCH --ntasks-per-node=24

module load qiskit/0.45.0

python vqe-qiskit-test.py
Submit with :
sbatch --account=your_project_ID testQiskit.sh
Example script : vqe-qiskit-test.py
# General libraries
import warnings
import numpy as np
from functools import partial
from scipy.optimize import minimize

# Qiskit libraries
import qiskit
from qiskit.utils import QuantumInstance, algorithm_globals
from qiskit import Aer
from qiskit.circuit.library import TwoLocal
from qiskit.primitives import Estimator
from qiskit.algorithms.minimum_eigensolvers import VQE

warnings.filterwarnings("ignore")

# Minimize the energy of this 4-qubit Hamiltonian given in Pauli operators
# H = 1.0 * XXII + 0.3 * ZIII + 1.0 * IXXI + 0.3 * IZII + 1.0 * IIXX + 0.3 * IIZI + 1.0 * XIIX + 0.3 * IIIZ

def ising_chain_ham(n, gam):

    # Esta función nos devuelve el Hamiltoniano en términos utilizables por los algoritmos de Qiskit
    # n = number of spin positions
    # gam = transverse field parameter
    from qiskit.opflow import X, Z, I

    for i in range(n):
        vecX = [I] * n
        vecZ = [I] * n
        vecX[i] = X
        vecZ[i] = Z

        if i == n - 1:
            vecX[0] = X
        else:
            vecX[i+1] = X

        auxX = vecX[0]
        auxZ = vecZ[0]

        for a in vecX[1:n]:
            auxX = auxX ^ a
        for b in vecZ[1:n]:
            auxZ = auxZ ^ b

        if i == 0:
            H = (auxX) + (gam * auxZ)
        else:
            H = H + (auxX) + (gam * auxZ)

    return H

# Hamiltonian definition
n = 4 # number of qubits
gam = 0.3

op_H = ising_chain_ham(n, gam) # Hamiltonian creation

print("Estructura del Hamiltoniano en matrices de Pauli:")
print("--------------------------------------------------\n")
print(op_H)

# ansatz creation
ansatz = TwoLocal(num_qubits=n, rotation_blocks='ry', entanglement_blocks='cx')

seed = 63
np.random.seed(seed) # seed for reproducibility
algorithm_globals.random_seed = seed

# use L-BFGS-B optimizer with minimizze function
optimizer = partial(minimize, method="L-BFGS-B")

initial_point = np.random.random(ansatz.num_parameters) # valor inicial

intermediate_info = {
    'nfev': [],
    'parameters': [],
    'mean': [],
}

def callback(nfev, parameters, mean, stddev):
    intermediate_info['nfev'].append(nfev)
    intermediate_info['parameters'].append(parameters)
    intermediate_info['mean'].append(mean)

backend = Aer.get_backend('aer_simulator')

qi = QuantumInstance(backend, shots=1024, seed_simulator=seed, seed_transpiler=seed)

vqe_min = VQE(estimator = Estimator(),
           ansatz=ansatz,
           optimizer=optimizer,
           initial_point=initial_point,
           callback=callback)

vqe_min.quantum_instance = qi

result = vqe_min.compute_minimum_eigenvalue(op_H)

print('\nEigenvalue:', result.eigenvalue)
print('Eigenvalue real part:', result.eigenvalue.real)

print(result, "\n")
print("E_G =", result.optimal_value)

print("Qiskit version:", qiskit.__version__)
More info :
QuantumEspresso
QuantumEspresso. It is an integrated suite of Open-Source computer codes for electronic-structure calculations and materials modeling at the nanoscale. It is based on density-functional theory, plane waves, and pseudopotentials.
Usage
Example script : test-quantum-espresso.sh
#!/bin/bash

#SBATCH --job-name=qe_test
#SBATCH -o qe_out%j.out
#SBATCH -e qe_err%j.err
#SBATCH -N 4
#SBATCH --ntasks-per-node=4
#SBATCH -p agustina_thin

export OMP_NUM_THREADS=4
export MKL_NUM_THREADS=4

# loads OpenMPI or MPICH and Quantum Espresso modules
# load one of them
#module load mpich/3.4.3-ucx
module load openmpi4/4.1.4

# load QuantumEspresso module
module load quantum-espresso/7.3.1

# run the application
#mpirun $QE_BIN/./pw.x -i nscf.in > nscf.out
mpirun pw.x -i nscf.in > nscf.out
Submit with :
sbatch --account=your_project_ID test-quantum-espresso.sh
It is also available the QuantumEspresso GPU version with nvfortran, CUDA/OpenACC:
Example script : test-quantum-espresso-gpu.sh
#!/bin/bash
#SBATCH --job-name=qe_gpu
#SBATCH -o qe_out%j.out
#SBATCH -e qe_err%j.err
#SBATCH -N 1
##SBATCH -p agustina_thin
#SBATCH -p rasmia_ada

module load quantumespresso/7.4.1_gpu

ls -al $QE_BIN

ls -al $QE_HOME

nvidia-smi -L

export CUDA_VISIBLE_DEVICES=0,1,2,3

mpirun $QE_BIN/cp.x --help

echo "done!"
Submit with :
sbatch --account=your_project_ID test-quantum-espresso-gpu.sh
More info :
R
R is a free software environment for statistical computing and graphics. It compiles and runs on a wide variety of UNIX platforms, Windows and MacOS.
Usage
Example script : testR.sh
#!/bin/bash

#SBATCH -e R_test%j.err
#SBATCH -o R_test%j.msg
#SBATCH -p agustina_thin
#SBATCH -N 4
#SBATCH --ntasks-per-node=24

module load R/4.2.1

R --help
R --version
Submit with :
sbatch --account=your_project_ID testR.sh
How to install R packages
The user can install the needed R packages in a custom folder into /fs/agustina/USER, for instance, we can install the R-package glmnet in a custom folder called R_libs with these commands:
mkdir -p /fs/agustina/$(whoami)/R_libs
module load R/4.2.1
R
install.packages("glmnet", repos="http://cran.r-project.org", lib="/fs/agustina/USERNAME/R_libs/")
.libPaths(c("/fs/agustina/USERNAME/R_libs/", .libPaths()))
library(glmnet)
More info :
Samtools 2.2.1
Samtools is a suite of programs for interacting with high-throughput sequencing data. Used for Reading/writing/editing/indexing/viewing SAM/BAM/CRAM format
Usage
Example script : test-samtools.sh
#!/bin/bash

#SBATCH -J samtools-test
#SBATCH -e samtools-test%j.err
#SBATCH -o samtools-test%j.msg
#SBATCH -p agustina_thin # queue (partition)

# load samtools
module load samtools/1.21

# list samtools root folder
ls -al $SAMTOOLS_ROOT

# list samtools binaries
ls -al $SAMTOOLS_ROOT/compiled/bin/

samtools --help

echo "DONE!"
Submit with :
sbatch --account=your_project_ID test-samtools.sh
More info :
Siesta
Siesta (Spanish Initiative for Electronic Simulations with Thousands of Atoms) is a powerful, open-source computer program used by physicists, chemists, and materials scientists to model and simulate the behavior of atoms, molecules, and solids. Available versions: siesta 4.1.5, siesta 5.4.2.
Usage
Example script : testSiesta.sh
#!/bin/bash
#SBATCH -J test-siesta
#SBATCH -o test_siesta_out%j.out
#SBATCH -e test_siesta_err%j.err
#SBATCH -N 1
#SBATCH -p cierzo_thin

module load siesta/4.1.5
#module load siesta/5.4.2

echo "==> SIESTA binary : $(which siesta)"
echo "==> SIESTA version / help output:"
echo ""

ldd $SIESTA_BIN/siesta

mpirun -np 1 siesta --help

echo "done!!"
Submit with :
sbatch --account=your_project_ID testSiesta.sh
More info :
VASP
VASP. The Vienna Ab initio Simulation Package: atomic scale materials modelling from first principles. Installaed version VASP 6.4.0.
Usage
Example script : testVasp.sh
#!/bin/bash

#SBATCH -J test-vasp
#SBATCH -o test-vasp_output_%j.out
#SBATCH -e test-vasp_error_%j.err
#SBATCH -p agustina_thin
#SBATCH --nodes=1
#SBATCH -n 16
#SBATCH --mem-per-cpu=4G

module load vasp/6.4.0 &>/dev/null
module load mkl/2023.2.0 &>/dev/null
module load openmpi/4.1.5 &>/dev/null

export OMP_NUM_THREADS=1

echo "Starting run at: `date`"

vasp_std > vasp.out

echo "Job finished at: `date`"
Submit with :
sbatch --account=your_project_ID testVasp.sh
More info :
XTB
Semiempirical Extended Tight-Binding Program Package.
Usage
Example script : testXtb.sh
#!/bin/bash

#SBATCH -e xtb_test%j.err
#SBATCH -o xtb_test%j.msg
#SBATCH -p agustina_thin
#SBATCH -N 4
#SBATCH --ntasks-per-node=24

module load xtb/6.7.0

xtb --help
xtb --version
Submit with :
sbatch --account=your_project_ID testXtb.sh
More info :
Procedimientos básicos en Cierzo
Información acerca de los procedimientos de gestión en Cierzo
Ingreso en el sistema
ssh idUsuario@cierzo.bifi.unizar.es
Trabajos
Enviar un trabajo :
Lanzamiento job normal (utilizando el binario xhpl como ejemplo) Ejemplo de script :
#!/bin/bash
#
#SBATCH -J linpack # job name
#SBATCH -o linpack.o%j # output and error file name (%j expands to jobID)
#SBATCH -N 12 # total number of nodes
#SBATCH --ntasks-per-node=24 # number of cores per node (maximum 24)
#SBATCH --exclusive
#SBATCH -p agustina_thin # queue (partition)
#SBATCH --distribution=block # Para rellenar los nodos en modo fillup
module add shared
module load openmpi/intel/1.10.2
module load intel/compiler/64/15.0.6/2015.6.233
ulimit -s unlimited
mpirun -np $SLURM_NPROCS programa
Ejecución del script :
sbatch script.sh
Otro ejemplo de script incluyendo opciones de notificación y número de cores :
#!/bin/bash
#
#SBATCH -N 3
#SBATCH -c 6 # number of cores
#SBATCH --mem 100 # memory pool for all cores
#SBATCH -o slurm.%N.%j.out # STDOUT
#SBATCH -e slurm.%N.%j.err # STDERR
#SBATCH --mail-type=begin #Envía un correo cuando el trabajo inicia
#SBATCH --mail-type=end #Envía un correo cuando el trabajo finaliza
#SBATCH --mail-user=john.diaz@bifi.es #Dirección a la que se enví
for i in {1..300000}
do
	echo $RANDOM >> SomeRandomNumbers.txt
done
sort SomeRandomNumbers.txt > SortedRandomNumbers.txt
Envío a GPU :
Lanzamiento de jobs con todas las GPUS Ejemplo de script. Importante, añadir la orden “module load cuda75”
#!/bin/bash
#Ejemplo para lanzar test linpack con las GPUs nodos81-84
#SBATCH -J linpackiGPU # job name
#SBATCH -o linpack.o%j # output and error file name (%j expands to jobID)
#SBATCH -N 4 # total number of nodes
#SBATCH --ntasks-per-node=2 # number of cores per node (maximum 24)
#SBATCH --exclusive
#SBATCH -p agustina_thin # queue (partition)
#SBATCH --gres=gpu:2
#SBATCH -t 24:00:00 # run time (hh:mm:ss)
#SBATCH --distribution=block # Para rellenar los nodos en modo fillup

export LD_LIBRARY_PATH=../hpl-2.0_FERMI_v15/src/cuda/:$LD_LIBRARY_PATH
module add shared
module load cuda75
export MKL_NUM_THREADS=1
export OMP_NUM_THREADS=1

#Específico Linpack
export CUDA_DGEMM_SPLIT=.999
export CUDA_DTRSM_SPLIT=.999
export MKL_CBWR=AVX2
export I_MPI_PIN_DOMAIN=socket

mpirun -np 8 ./xhpl >& xhpl.log
Ejecución del script :
sbatch script.sh
Envío a Xeon Phi :
Ejemplo de script:
#!/bin/bash
#SBATCH -n 24 # total number of cores requested
#SBATCH --ntasks-per-node=24 # number of cores per node (maximum 24)
#SBATCH --exclusive
#SBATCH -p agustina_thin # queue (partition)
#SBATCH -t 12:00:00 # run time (hh:mm:ss)
module add shared
module load intel-cluster-runtime/intel64/3.7
ulimit -s unlimited
xhpl_offload_intel64
Ejecución del script :
sbatch script.sh
Cancelar un trabajo :
scancel job_id
Información sobre las colas :
sinfo
Ver los trabajos en cola:
squeue
Información detallada sobre las colas :
scontrol show partition
Ver información detallada de un trabajo:
scontrol show job identificadorJob
Estimación del tiempo de arranque de un proceso encolado :
squeue --start
Información de accounting de los trabajos :
sacct
Códigos de estado :
https://confluence.cscs.ch/display/KB/Meaning+of+Slurm+job+state+codes
Enlaces de interés :
Guía del usuario : https://slurm.schedmd.com/quickstart.html
Módulos
El paquete Modules es una herramienta que simplifica la inicialización de shells y permite a los usuarios moduficar fácilmente su entorno durante la sesión usando modulefiles.
Cada modulefile contiene la información que permite configurar el shell para una aplicación. Una vez que el paquete Modules se ha inicializado, el entorno puede ser modificado usando el comando module para interpretar dichos modulefiles
Listado de módulos disponibles:
module avail
Listado de módulos cargados:
module list
Cargar un módulo:
module load nombreModulo
Descargar un módulo:
module unload nombreModulo
GAUSSIAN
Envío de trabajo Gaussian :
Partiendo del archivo :
TSHX2_boro_NBOs.gjf
Ejemplo de script:
#!/bin/bash

#SBATCH -e /home/jdiazlag/testGaussian/TSHX2_boro_NBOs%j.err
#SBATCH -o /home/jdiazlag/testGaussian/TSHX2_boro_NBOs%j.msg
#SBATCH -p agustina_thin
#SBATCH -N 2
#SBATCH --ntasks-per-node=24

module load gaussian/g09_D01

g09 < /home/jdiazlag/testGaussian/TSHX2_boro_NBOs.gjf
Ejecución del script :
sbatch script.sh
GROMACS
Envío de trabajo Gromacs :
Partiendo de los archivos :
folded-equil.ndx folded-prod.gro folded-test-protein.sh folded.top test-md-vv_prod_nvt.mdp
Ejemplo de script:
#!/bin/sh
#SBATCH -J bar-nvt-vv-fol
#SBATCH -o bar-nvt-vv-fol-%j.out
#SBATCH -p agustina_thin                    # queue (partition)
#SBATCH -N 4                       # total number of nodes
#SBATCH --ntasks-per-node=24       # number of cores per node (maximum 24)


#### Cambiar según módulos necesarios para lanzar la versión de GROMACS que se desea testar
module add shared
module load openmpi/intel/1.10.2
module load intel/compiler/64/15.0.6/2015.6.233
module load gromacs/2018.4
ulimit -s unlimited
###################


COMMAND="mpirun -np $SLURM_NPROCS gmx_mpi mdrun"
NAME=folded

################## MAIN BODY #######################

echo -n "The simulation is running in: " > RUNNING_INFORMATION.info
echo $HOSTNAME >> RUNNING_INFORMATION.info
echo "Initial time: " >> RUNNING_INFORMATION.info
date >> RUNNING_INFORMATION.info

## Production step
gmx_mpi grompp -v -f test-md-vv_prod_nvt.mdp -po mdp_out.mdp -c ${NAME}-prod.gro -r ${NAME}-prod.gro -p ${NAME}.top -n ${NAME}-equil.ndx -o ${NAME}-nvt-vv.tpr -maxwarn 10

$COMMAND -s ${NAME}-nvt-vv.tpr -x ${NAME}-nvt-vv.xtc -c ${NAME}-nvt-vv.gro -o ${NAME}-nvt-vv.trr -e ${NAME}-nvt-vv.edr -nice 19 -v

gmx_mpi trjconv -f ${NAME}-nvt-vv.xtc -s ${NAME}-nvt-vv.tpr -o ${NAME}-nvt-vv_proc.xtc -pbc mol -ur compact -center <<EOF
1
1
EOF

gmx_mpi trjconv -f ${NAME}-nvt-vv_proc.xtc -s ${NAME}-nvt-vv.tpr -o ${NAME}-rot+trans_prot.xtc -fit rot+trans <<EOF
4
1
EOF

gmx_mpi covar -f ${NAME}-rot+trans_prot.xtc -s ${NAME}-nvt-vv.tpr -o eigenval.xvg -v eigenvec.trr -ascii covar.dat -xpm covar.xpm -b 0 -e 2000  <<EOF
4
1
EOF

echo "Final time: " >> RUNNING_INFORMATION.info
date >> RUNNING_INFORMATION.info

exit
Ejecución del script :
sbatch script.sh
QUANTUM EXPRESSO
Envío de trabajo Quantum Expresso :
Partiendo del archivo :
file.in
Ejemplo de script:
#!/bin/bash

#SBATCH --job-name=qe_test
#SBATCH -o qe_out%j.out
#SBATCH -e qe_err%j.err
#SBATCH -N 2
#SBATCH --ntasks-per-node=4
#SBATCH -p agustina_thin

export OMP_NUM_THREADS=$SLURM_CPUS_PER_TASK
export MKL_NUM_THREADS=$SLURM_CPUS_PER_TASK

echo -e '\n submitted Quantum Espresso job'
echo 'hostname'
hostname

# loads Open MPI and Quantum Espresso modules
module load intel/mkl/64/17.0.1/2017
module load mpich/intel/3.2

# run Quantum Espresso using Open MPI's mpirun
# results will be printed to output.file
mpirun /cm/shared/apps/qexpresso/6.2.1/bin/pw.x -i file.in
Ejecución del script :
sbatch script.sh
Modules
Most software packages are made available via Linux Environment Modules. These modules allow us to maintain an enormous software library without users having to worry about details such as paths to different software versions or libraries; modules will set or unset the right paths and environment variables for you.
Each module contains the information needed to configure the shell and environment for a specific application.
Usage
You can see a list of these by running the module avail command.
-------------------------------------------------------------------------------------------------------------------- /opt/ohpc/pub/moduledeps/gnu12-openmpi4 ---------------------------------------------------------------------------------------------------------------------
adios/1.13.1 extrae/3.8.3 hypre/2.18.1 mumps/5.2.1 netcdf/4.9.0 petsc/3.18.1 ptscotch/7.0.1 scalapack/2.2.0 sionlib/1.7.7 tau/2.31.1
boost/1.80.0 (D) fftw/3.3.10 (D) imb/2021.3 netcdf-cxx/4.3.1 omb/6.1 phdf5/1.10.8 py3-mpi4py/3.1.3 scalasca/2.5 slepc/3.18.0 trilinos/13.4.0
dimemas/5.4.2 geopm/1.1.0 mfem/4.4 netcdf-fortran/4.6.0 opencoarrays/2.10.0 pnetcdf/1.12.3 py3-scipy/1.5.4 scorep/7.1 superlu_dist/6.4.0
------------------------------------------------------------------------------------------------------------------------- /opt/ohpc/pub/moduledeps/gnu12 -------------------------------------------------------------------------------------------------------------------------
R/4.2.1 hdf5/1.10.8 likwid/5.2.2 mpich/3.4.3-ofi mvapich2/2.3.7 openmpi4/4.1.4 (L) plasma/21.8.29 scotch/6.0.6
gsl/2.7.1 impi/2021.10.0 metis/5.1.0 (D) mpich/3.4.3-ucx (D) openblas/0.3.21 pdtoolkit/3.25.1 py3-numpy/1.19.5 superlu/5.2.1
--------------------------------------------------------------------------------------------------------------------------- /opt/ohpc/pub/modulefiles ----------------------------------------------------------------------------------------------------------------------------
EasyBuild/4.6.2 charliecloud/0.15 crest/3.0.1 gnu12/12.2.0 (L) libfabric/1.13.0 (L) ohpc (L) papi/6.0.0 qibo/0.1.12 ucx/1.11.2 (L) xtb/6.7.0 (D)
SqueezeMeta/1.6.3 cmake/3.24.2 fhi-aims/240507 hwloc/2.7.0 miniconda3/3.12 openbabel/3.1.1 pennylane/0.33.1 qiskit/0.45.0 valgrind/3.19.0
amber/24 comsol/6.1 gaussian/g16 intel/2023.2.1 namd/3.0b6 (L) orca/5.0.4 prun/2.2 (L) qiskit/1.1.0 (D) vasp/6.4.0
autotools (L) cp2k/2024.1 gimic/2.2.1 julia/1.10.3 nvidia-hpc-sdk/24.5 os python-math/3.11.4 rosetta/3.7.1 vina/1.2.5 (L)
-------------------------------------------------------------------------------------------------------------- /opt/amd/spack/share/spack/modules/linux-rocky8-zen3 --------------------------------------------------------------------------------------------------------------
adios2/2.9.1-aocc-4.1.0-zvzmkdi flex/2.6.3-gcc-12.2.0-37z4p5d libidn2/2.3.4-aocc-4.1.0-f4g5gbq mkfontscale/1.2.2-gcc-12.2.0-2yzm2ne py-six/1.16.0-gcc-12.2.0-wbggnht
amd-aocl/4.1-aocc-4.1.0-eddrifi flex/2.6.4-aocc-4.1.0-5uxrqpu (D) libidn2/2.3.4-gcc-12.2.0-zx6hiu3 (D) molden/6.7-gcc-12.2.0-oymp2os py-wheel/0.37.1-aocc-4.1.0-dnkz37i
amdblis/4.1-aocc-4.1.0-mo3sjch font-util/1.4.0-gcc-12.2.0-nk2uv26 libint/2.6.0-aocc-4.1.0-ccz5tw6 mpfr/4.2.0-aocc-4.1.0-ttzi577 py-wheel/0.37.1-gcc-12.2.0-qvbbw7a (D)
amdblis/4.1-aocc-4.1.0-ngsxfub (D) fontconfig/2.14.2-gcc-12.2.0-kas3xzk libjpeg-turbo/3.0.0-gcc-12.2.0-ba3ktnw mpfr/4.2.0-gcc-12.2.0-ah54r3p (D) python/3.10.12-aocc-4.1.0-aqsl3it
amdfftw/4.1-aocc-4.1.0-cp7genw fontsproto/2.1.3-gcc-12.2.0-626xa7o libmd/1.0.4-aocc-4.1.0-hb27dor nasm/2.15.05-gcc-12.2.0-kes6giu python/3.10.12-gcc-12.2.0-ynvxsel (D)
amdfftw/4.1-aocc-4.1.0-mok4ghe freetype/2.11.1-gcc-12.2.0-xdcwdnh libmd/1.0.4-gcc-12.2.0-kjrfbts (D) ncurses/6.4-aocc-4.1.0-whgpitb quantum-espresso/7.2-aocc-4.1.0-42rnxdd
amdfftw/4.1-aocc-4.1.0-suvpj3m (D) fribidi/1.0.12-gcc-12.2.0-zaofwfs libpciaccess/0.17-aocc-4.1.0-o5mx7uk ncurses/6.4-gcc-12.2.0-jhqnvn5 (L,D) randrproto/1.5.0-gcc-12.2.0-c543i4d
amdlibflame/4.1-aocc-4.1.0-ddal2dl gdbm/1.23-aocc-4.1.0-qpy5h7a libpciaccess/0.17-gcc-12.2.0-7hfodbw (L,D) netlib-scalapack/2.2.0-gcc-12.2.0-dwhjns4 (L) re2c/2.2-gcc-12.2.0-ozg7r26
amdlibflame/4.1-aocc-4.1.0-4bh4zio (D) gdbm/1.23-gcc-12.2.0-giacys7 (D) libpng/1.6.39-aocc-4.1.0-6ko3jub nettle/3.9.1-gcc-12.2.0-7dj6cx5 readline/8.2-aocc-4.1.0-o2mfebq
amdlibm/4.1-aocc-4.1.0-my4wori gettext/0.21.1-aocc-4.1.0-qnfns7q libpng/1.6.39-gcc-12.2.0-igvrmd7 (D) nghttp2/1.48.0-gcc-12.2.0-wa3stfg readline/8.2-gcc-12.2.0-cscczq2 (D)
amdscalapack/4.1-aocc-4.1.0-egeizcg gettext/0.21.1-gcc-12.2.0-opw3wpj (L,D) libpthread-stubs/0.4-gcc-12.2.0-gcifh7g nghttp2/1.52.0-aocc-4.1.0-7orbvet renderproto/0.11.1-gcc-12.2.0-m4mjmcd
amdscalapack/4.1-aocc-4.1.0-josz6jn (D) git/2.41.0-aocc-4.1.0-teucojb libsigsegv/2.14-aocc-4.1.0-732wcft nghttp2/1.52.0-gcc-12.2.0-p6tlqiw (D) rsync/3.2.7-gcc-12.2.0-iekndxs
aocc/4.1.0-gcc-12.2.0-py6hbh6 glib/2.76.4-gcc-12.2.0-7wqva7h libsigsegv/2.14-gcc-12.2.0-wqdemln (D) ninja/1.11.1-gcc-12.2.0-peyhbvn rust-bootstrap/1.70.0-gcc-12.2.0-3nahfp5
aocl-sparse/4.1-aocc-4.1.0-kg3h6v2 glproto/1.4.17-gcc-12.2.0-wgcdvqm libsm/1.2.3-gcc-12.2.0-vbycdbn numactl/2.0.14-aocc-4.1.0-lrvf6fd rust/1.70.0-gcc-12.2.0-7ev4du4
aocl-utils/4.1-aocc-4.1.0-ejmeoo5 glx/1.4-gcc-12.2.0-ij5zwgo libssh2/1.10.0-gcc-12.2.0-sjmm3e2 numactl/2.0.14-gcc-12.2.0-3n6dozi (L,D) scons/4.5.2-aocc-4.1.0-kpjfvxd
autoconf-archive/2023.02.20-aocc-4.1.0-bsdhizg gmake/4.4.1-aocc-4.1.0-wvvw6b2 libtiff/4.5.1-gcc-12.2.0-5mm636l nwchem/7.2.0-aocc-4.1.0-oxffn65 scotch/7.0.3-aocc-4.1.0-ehtnrdo (D)
autoconf-archive/2023.02.20-gcc-12.2.0-7q2ibvd (D) gmake/4.4.1-gcc-12.2.0-x3ya7i2 (D) libtool/2.4.7-aocc-4.1.0-hfnvkuo openblas/0.3.23-gcc-12.2.0-nrvtegk sed/4.9-aocc-4.1.0-pftfzxn
autoconf/2.69-aocc-4.1.0-q3jpzdv gmp/6.2.1-aocc-4.1.0-32gzj3k libtool/2.4.7-gcc-12.2.0-37qrebs (D) openblas/0.3.23-gcc-12.2.0-u5t6fcp (L) snappy/1.1.10-aocc-4.1.0-xz5us7u
autoconf/2.69-gcc-12.2.0-5uoofqo (D) gmp/6.2.1-gcc-12.2.0-vydqxo6 (D) libunistring/1.1-aocc-4.1.0-gb7d3dk openblas/0.3.23-gcc-12.2.0-wxtyym3 (D) sqlite/3.42.0-aocc-4.1.0-rmhj4lr
automake/1.16.5-aocc-4.1.0-dqjmmo2 gnuplot/5.4.3-gcc-12.2.0-d5u375y libunistring/1.1-gcc-12.2.0-qlu3ynd (D) openfoam/2306-aocc-4.1.0-ai2xyp7 sqlite/3.42.0-gcc-12.2.0-uriaxpa (D)
automake/1.16.5-gcc-12.2.0-3or6f4d (D) gnutls/3.7.8-gcc-12.2.0-jviytgv libunwind/1.6.2-gcc-12.2.0-xt7xp3q openlibm/0.8.1-gcc-12.2.0-3bq24ng stream/5.10-aocc-4.1.0-3jgyitd
bc/1.07.1-gcc-12.2.0-qmpyq4l gobject-introspection/1.76.1-gcc-12.2.0-lxalmn7 libuv-julia/1.44.2-gcc-12.2.0-qror4x2 openmolcas/23.06-gcc-12.2.0-fwmhgfh suite-sparse/5.13.0-gcc-12.2.0-5o4l2un
bdftopcf/1.1-gcc-12.2.0-lvhyk63 gperf/3.1-gcc-12.2.0-yaq7z2u libwhich/1.1.0-gcc-12.2.0-fechf4c openmpi/4.1.2-gcc-12.2.0-fosm5wz swig/4.0.2-fortran-gcc-12.2.0-fwwd6vy
berkeley-db/18.1.40-aocc-4.1.0-wkgac3r gromacs/2023.1-aocc-4.1.0-q64smwb libx11/1.8.4-gcc-12.2.0-l67amdb openmpi/4.1.5-aocc-4.1.0-3shbrq7 sz/2.1.12.5-aocc-4.1.0-5tsprbv
berkeley-db/18.1.40-gcc-12.2.0-4k5x4o2 (D) gzip/1.12-gcc-12.2.0-wrpdaac libxau/1.0.8-gcc-12.2.0-zs7tyzs openmpi/4.1.5-aocc-4.1.0-7skcnum tar/1.34-aocc-4.1.0-qtq366h
binutils/2.40-aocc-4.1.0-e4g3ygq harfbuzz/7.3.0-gcc-12.2.0-cck2ptk libxc/6.2.2-aocc-4.1.0-2fpwojt openmpi/4.1.5-gcc-12.2.0-vo6j57n (L,D) tar/1.34-gcc-12.2.0-3yixdgo (L,D)
binutils/2.40-aocc-4.1.0-u55wd4p hdf5/1.14.2-aocc-4.1.0-fvcc7jr libxcb/1.14-gcc-12.2.0-q2pnczm openmx/3.9-gcc-12.2.0-yewsx2z (L) tblite/0.3.0-gcc-12.2.0-7vicqa5
binutils/2.40-gcc-12.2.0-jmniree (D) hdf5/1.14.2-gcc-12.2.0-awlmxmw (D) libxcrypt/4.4.35-aocc-4.1.0-df3srd5 openssh/9.3p1-aocc-4.1.0-rzlxlsb tcl/8.6.12-gcc-12.2.0-5h4lm37
bison/3.8.2-aocc-4.1.0-5w276xj help2man/1.49.3-aocc-4.1.0-wzir3h3 libxcrypt/4.4.35-gcc-12.2.0-qg3btfg (L,D) openssh/9.3p1-gcc-12.2.0-dl2ax6z (L,D) texinfo/7.0.3-aocc-4.1.0-yd5yqhy
bison/3.8.2-gcc-12.2.0-iz3pbvn (D) hpcg/3.1-aocc-4.1.0-gklvmnx libxdmcp/1.1.4-gcc-12.2.0-s3q2pwr openssl/3.1.2-aocc-4.1.0-s2rjfac texinfo/7.0.3-gcc-12.2.0-hgw4wmn (D)
boost/1.83.0-aocc-4.1.0-nh2772c hpl/2.3-aocc-4.1.0-ih7qagb libxext/1.3.3-gcc-12.2.0-tpnvv63 openssl/3.1.2-gcc-12.2.0-g5zqvdc (L,D) ucx/1.14.1-aocc-4.1.0-fziwyqj (D)
bzip2/1.0.8-aocc-4.1.0-ossky43 hwloc/2.9.1-aocc-4.1.0-z6b6is7 libxfont/1.5.4-gcc-12.2.0-2bfu5qb p7zip/17.05-gcc-12.2.0-5ovk53v unzip/6.0-gcc-12.2.0-tt4uyp5
bzip2/1.0.8-gcc-12.2.0-t444f4w (L,D) hwloc/2.9.1-gcc-12.2.0-nn43cce (L,D) libxml2/2.10.3-aocc-4.1.0-yo4awgg pango/1.50.13-gcc-12.2.0-7icqyer utf8proc/2.8.0-gcc-12.2.0-lvh424d
c-blosc2/2.10.2-aocc-4.1.0-2csq4ov icu4c/67.1-gcc-12.2.0-dlql6hn libxml2/2.10.3-gcc-12.2.0-ymewhot (L,D) patchelf/0.18.0-gcc-12.2.0-ixbyznc util-linux-uuid/2.38.1-aocc-4.1.0-gapx3ew
ca-certificates-mozilla/2023-05-30-aocc-4.1.0-uscfebu inputproto/2.3.2-gcc-12.2.0-rdh6c22 libxmu/1.1.4-gcc-12.2.0-4o4yoot pcre/8.45-gcc-12.2.0-q2g45cb util-linux-uuid/2.38.1-gcc-12.2.0-4hsqihx (D)
ca-certificates-mozilla/2023-05-30-gcc-12.2.0-nyok33z (D) json-glib/1.6.6-gcc-12.2.0-727dve2 libxpm/3.5.12-gcc-12.2.0-qy5l55t pcre2/10.42-aocc-4.1.0-ncmzz7w util-macros/1.19.3-aocc-4.1.0-kpu3ga3
cairo/1.16.0-gcc-12.2.0-7g4e3qg kbproto/1.0.7-gcc-12.2.0-a2nh2z2 libxrandr/1.5.3-gcc-12.2.0-jsrrrx5 pcre2/10.42-gcc-12.2.0-ksputr6 (D) util-macros/1.19.3-gcc-12.2.0-xpecyvu (D)
cgal/4.13-aocc-4.1.0-7n7m5ph krb5/1.20.1-aocc-4.1.0-7zm2qsm libxrender/0.9.10-gcc-12.2.0-e4dmj36 perl-data-dumper/2.173-gcc-12.2.0-dxqzg2c vim/9.0.0045-gcc-12.2.0-lgfvv7h
charmpp/6.10.2-gcc-12.2.0-3rctwa3 krb5/1.20.1-gcc-12.2.0-j5m5mgt (L,D) libxsmm/1.17-aocc-4.1.0-wisqwdt perl/5.38.0-aocc-4.1.0-hqse4iz which/2.21-gcc-12.2.0-2rnrm2t
cmake/3.27.4-aocc-4.1.0-jrfow2u libarchive/3.7.1-aocc-4.1.0-c34azkd libxt/1.1.5-gcc-12.2.0-yzxyqrr perl/5.38.0-gcc-12.2.0-l2tpepz (D) xcb-proto/1.15.2-gcc-12.2.0-vibawzi
cmake/3.27.4-gcc-12.2.0-q2bvw3t libblastrampoline/5.8.0-gcc-12.2.0-orgt3d7 lizard/1.0-aocc-4.1.0-pl7kpq4 pigz/2.7-aocc-4.1.0-cdcuqi3 xextproto/7.3.0-gcc-12.2.0-lm5dhc3
cmake/3.27.4-gcc-12.2.0-slwphxg (D) libbsd/0.11.7-aocc-4.1.0-sr52wjf llvm/14.0.6-gcc-12.2.0-qaplq7j pigz/2.7-gcc-12.2.0-kuefe4c (L,D) xproto/7.0.31-gcc-12.2.0-zjztwbu
curl/8.1.2-aocc-4.1.0-t5nflbt libbsd/0.11.7-gcc-12.2.0-4dd6bdg (D) lua/5.3.6-gcc-12.2.0-ktdrbid pixman/0.42.2-gcc-12.2.0-p5jjljm xrandr/1.5.0-gcc-12.2.0-xplrtnx
curl/8.1.2-gcc-12.2.0-hudhko7 libcatalyst/2.0.0-rc3-aocc-4.1.0-5f6p4r6 lua/5.3.6-gcc-12.2.0-5p6wjj7 (D) pkgconf/1.9.5-aocc-4.1.0-ifteckx xtb/6.6.0-gcc-12.2.0-cmfhju3
curl/8.1.2-gcc-12.2.0-ihpwqs7 (D) libcerf/1.3-gcc-12.2.0-mcvvbrl lz4/1.9.4-aocc-4.1.0-d4ujqy3 pkgconf/1.9.5-gcc-12.2.0-3ycmepj (D) xtrans/1.4.0-gcc-12.2.0-cdynl7g
diffutils/3.9-aocc-4.1.0-3c57xx7 libedit/3.1-20210216-aocc-4.1.0-udqpr3r lz4/1.9.4-gcc-12.2.0-canqgmg (D) pmix/4.2.4-aocc-4.1.0-4tiisex xxhash/0.8.1-gcc-12.2.0-x6meh3q
diffutils/3.9-gcc-12.2.0-5ysg3hh (D) libedit/3.1-20210216-gcc-12.2.0-tnzddsx (L,D) lzma/4.32.7-gcc-12.2.0-wdos4on (L) pmix/4.2.4-gcc-12.2.0-dvyzksa (L,D) xz/5.4.1-aocc-4.1.0-ruuam4e
dsfmt/2.2.5-gcc-12.2.0-lx454m3 libevent/2.1.12-aocc-4.1.0-y5a6igm lzo/2.10-aocc-4.1.0-travabd popt/1.16-gcc-12.2.0-vm6zya4 xz/5.4.1-gcc-12.2.0-jrhrwix (L,D)
ed/1.4-gcc-12.2.0-snqqfmb libevent/2.1.12-gcc-12.2.0-2ww5546 (L,D) m4/1.4.19-aocc-4.1.0-s43xmnv protobuf/3.21.12-aocc-4.1.0-j2ezggw yaml-cpp/0.7.0-aocc-4.1.0-uapjv53
eigen/3.4.0-aocc-4.1.0-glbn5ts libfabric/1.18.1-aocc-4.1.0-hdl2u5r (D) m4/1.4.19-gcc-12.2.0-quj6b4c (D) py-flit-core/3.9.0-gcc-12.2.0-vg6rbwj zfp/0.5.5-aocc-4.1.0-e2ft2wo
elfutils/0.189-gcc-12.2.0-n6tcwy3 libffi/3.4.4-aocc-4.1.0-llpsodo makedepend/1.0.8-gcc-12.2.0-3bxd3h7 py-fypp/3.1-aocc-4.1.0-pvyqsy5 zlib-ng/2.1.3-aocc-4.1.0-lr52tqo
elpa/2021.11.001-aocc-4.1.0-5hnbxob libffi/3.4.4-gcc-12.2.0-vuvuepl (D) mbedtls/2.28.2-gcc-12.2.0-nyt5z2t py-mako/1.2.4-gcc-12.2.0-aidws7u zlib-ng/2.1.3-gcc-12.2.0-h4oi2el (L,D)
emacs/29.1-gcc-12.2.0-hddpgux libfontenc/1.1.7-gcc-12.2.0-oekdn7p mesa-glu/9.0.2-gcc-12.2.0-237xkco py-markupsafe/2.1.3-gcc-12.2.0-qhvx2m5 zstd/1.5.5-aocc-4.1.0-4nxilqy
expat/2.5.0-aocc-4.1.0-stzr7gl libgd/2.3.3-gcc-12.2.0-6g7ndns mesa/23.0.3-gcc-12.2.0-xiuk22a py-pip/23.1.2-aocc-4.1.0-43et5ls zstd/1.5.5-gcc-12.2.0-bigvwlv (L,D)
expat/2.5.0-gcc-12.2.0-ur77lsf (D) libgit2/1.5.0-gcc-12.2.0-gpbyrmb meson/1.2.0-gcc-12.2.0-p3im7ei py-pip/23.1.2-gcc-12.2.0-pave2pr (D)
fftw/3.3.10-gcc-12.2.0-b2rzfr4 (L) libice/1.0.9-gcc-12.2.0-7j63mo6 metis/5.1.0-gcc-12.2.0-mauvuef py-pyparsing/3.0.9-gcc-12.2.0-f5t72qo
findutils/4.9.0-aocc-4.1.0-te5ureg libiconv/1.17-aocc-4.1.0-2boehfu mgard/2023-03-31-aocc-4.1.0-vfntqe6 py-setuptools/68.0.0-aocc-4.1.0-rdyt3ic
findutils/4.9.0-gcc-12.2.0-qo3c6ku (D) libiconv/1.17-gcc-12.2.0-k6gski3 (L,D) mkfontdir/1.0.7-gcc-12.2.0-icaf6hl py-setuptools/68.0.0-gcc-12.2.0-qe67njw (D)
Where:
D: Default Module
L: Module is loaded
If the avail list is too long consider trying:
"module --default avail" or "ml -d av" to just list the default modules.
"module overview" or "ml ov" to display the number of modules for each name.
Use "module spider" to find all possible modules and extensions.
Use "module keyword key1 key2 ..." to search for all possible modules matching any of the "keys".
We can obtain the list of loaded modules with the command module list.
    Currently Loaded Modules:
      1) autotools          6) openmpi4/4.1.4                  11) libpciaccess/0.17-gcc-12.2.0-7hfodbw  16) ncurses/6.4-gcc-12.2.0-jhqnvn5     21) zstd/1.5.5-gcc-12.2.0-bigvwlv      26) libedit/3.1-20210216-gcc-12.2.0-tnzddsx  31) openmpi/4.1.5-gcc-12.2.0-vo6j57n
      2) prun/2.2           7) ohpc                            12) libiconv/1.17-gcc-12.2.0-k6gski3      17) hwloc/2.9.1-gcc-12.2.0-nn43cce     22) tar/1.34-gcc-12.2.0-3yixdgo        27) libxcrypt/4.4.35-gcc-12.2.0-qg3btfg      32) fftw/3.3.10-gcc-12.2.0-b2rzfr4
      3) gnu12/12.2.0       8) vina/1.2.5                      13) xz/5.4.1-gcc-12.2.0-jrhrwix           18) numactl/2.0.14-gcc-12.2.0-3n6dozi  23) gettext/0.21.1-gcc-12.2.0-opw3wpj  28) openssh/9.3p1-gcc-12.2.0-dl2ax6z         33) openblas/0.3.23-gcc-12.2.0-u5t6fcp
      4) ucx/1.11.2         9) namd/3.0b6                      14) zlib-ng/2.1.3-gcc-12.2.0-h4oi2el      19) bzip2/1.0.8-gcc-12.2.0-t444f4w     24) openssl/3.1.2-gcc-12.2.0-g5zqvdc   29) libevent/2.1.12-gcc-12.2.0-2ww5546       34) netlib-scalapack/2.2.0-gcc-12.2.0-dwhjns4
      5) libfabric/1.13.0  10) lzma/4.32.7-gcc-12.2.0-wdos4on  15) libxml2/2.10.3-gcc-12.2.0-ymewhot     20) pigz/2.7-gcc-12.2.0-kuefe4c        25) krb5/1.20.1-gcc-12.2.0-j5m5mgt     30) pmix/4.2.4-gcc-12.2.0-dvyzksa            35) openmx/3.9-gcc-12.2.0-yewsx2z
If you need to search for a specific module, but do not know the hierarchy of modules that it depends on, use the module spider command.
You can load a module by running the following: module load modulename,
e.g.: module load julia/1.10.3
Unload a module using: module unload modulename
Or unload all modules with: module purge
More info : https://modules.readthedocs.io/en/latest/index.html https://docs.rcc.fsu.edu/hpc/environment-modules/#searching-for-modules
Procedimientos básicos en Bridge
Información acerca de los procedimientos de gestión en Bridge
Uso
Bridge se establece como una plataforma a través de la que ingresar en el sistema Agustina y su propósito es el de servir como pasarela para conectar desde equipos que no dispongan de una dirección IP fija1 que pueda añadirse al firewall (trabajo en diferentes centros, proveedores de Internet que no proporcionan esa funcionalidad...).
No está pensado para ser un sistema de trabajo o almacenamiento, por lo que la cuota de disco de usuario es mínima (5MB), aunque suficiente para hacer login o copiar una clave pública que nos permita acceder más cómodamente.
Si es tu caso, puedes solicitarnos una cuenta dirigiéndote a agustina@bifi.es explicando la situación, indicando en el encabezado "Petición cuenta Bridge"
Conexión paso a paso
Primeramente, comprobar que tenemos acceso a bridge y que la contraseña esta actualizada:
ssh idUsuario@bridge.bifi.unizar.es
Si no podemos entrar en el bridge, no tenemos cuenta en el bridge o no sabemos el nombre de usuario y/o contraseña enviar un email a agustina@bifi.es para obtener la información necesaria.
En caso de tener una cuenta del sistema Agustina, podemos ingresar en ella a través de Bridge en un solo paso con el comando:
ssh -X -J idUsuario@bridge.bifi.unizar.es idUsuario@agustina.bifi.unizar.es
Tendremos que ingresar los passwords de Bridge y Agustina.
En caso de problemas relacionados con rsa/dss:
Unable to negotiate with UNKNOWN port 65535: no matching host key type found. Their offer: ssh-rsa,ssh-dss
Añadiremos al comando la opción:
-oHostKeyAlgorithms=ssh-rsa,ssh-dss
quedando el comando de la siguiente forma:
ssh -oHostKeyAlgorithms=ssh-rsa,ssh-dss -X -J idUsuario@bridge.bifi.unizar.es idUsuario@agustina.bifi.unizar.es
Copia de archivos a través de Bridge
Podremos copiar archivos desde Agustina a nuestro equipo local a través de Bridge adaptando a nuestras necesidades el siguiente comando :
scp -oHostKeyAlgorithms=ssh-rsa,ssh-dss -oProxyCommand="ssh -W %h:%p usuario@bridge.bifi.unizar.es" usuario@agustina.bifi.unizar.es:/trayectoria/origen/archivo /trayectoria/destino
Para copiar desde nuestro equipo local al directoro scratch de Agustina :
scp -oHostKeyAlgorithms=ssh-rsa,ssh-dss -oProxyCommand="ssh -W %h:%p usuario@bridge.bifi.unizar.es" archivo_local_a_copiar usuario@agustina.bifi.unizar.es:/fs/agustina/usuario
SI tienes algún problema alguno de los comandos anteriores, puedes usar el modificador -O para evitar incompatibilidades entre versiones de ssh:
scp -O -oHostKeyAlgorithms=ssh-rsa,ssh-dss -oProxyCommand="ssh -W %h:%p usuario@bridge.bifi.unizar.es" archivo_local_a_copiar usuario@agustina.bifi.unizar.es:/fs/agustina/>
La IP fija es un identificador único que permite disponer de una dirección exclusiva y reconocible en Internet como si de un número de teléfono se tratara. Probablemente la necesites para montar un servidor web, de correo, etc.
Basic procedures on Bridge
Information about management procedures on Bridge
Usage
Bridge is provided as a gateway to access the Agustina system. Its purpose is to act as a proxy for connecting from machines that do not have a fixed IP address1 that can be added to the firewall (working from different centers, ISPs that do not provide that functionality, etc.).
Bridge is not intended to be used as a workspace or storage system, so the user disk quota is minimal (5 MB), but sufficient to log in or copy a public key to allow easier access.
If you need an account, request one by emailing agustina@bifi.es and include "Bridge account request" in the subject, explaining your situation.
Step-by-step connection
First, check that you can access Bridge and that your password is up to date:
ssh <username>@bridge.bifi.unizar.es
If you cannot log in to Bridge, do not have a Bridge account, or do not know your username and/or password, send an email to agustina@bifi.es to obtain the necessary information.
If you have an Agustina account, you can access it via Bridge in a single step with:
ssh -X -J <username>@bridge.bifi.unizar.es <username>@agustina.bifi.unizar.es
You will be prompted for the Bridge and Agustina passwords.
If you encounter problems related to rsa/dss, for example:
Unable to negotiate with UNKNOWN port 65535: no matching host key type found. Their offer: ssh-rsa,ssh-dss
add the following option to the command:
-oHostKeyAlgorithms=ssh-rsa,ssh-dss
resulting in the command:
ssh -oHostKeyAlgorithms=ssh-rsa,ssh-dss -X -J <username>@bridge.bifi.unizar.es <username>@agustina.bifi.unizar.es
Copying files through Bridge
You can copy files from Agustina to your local machine via Bridge using a command like:
scp -oHostKeyAlgorithms=ssh-rsa,ssh-dss -oProxyCommand="ssh -W %h:%p <bridge_user>@bridge.bifi.unizar.es" <agustina_user>@agustina.bifi.unizar.es:/path/to/source/file /path/to/destination
To copy from your local machine to the Agustina scratch directory:
scp -oHostKeyAlgorithms=ssh-rsa,ssh-dss -oProxyCommand="ssh -W %h:%p <bridge_user>@bridge.bifi.unizar.es" local_file_to_copy <agustina_user>@agustina.bifi.unizar.es:/fs/agustina/<username>
If you experience compatibility issues between SSH versions, you can use the -O modifier:
scp -O -oHostKeyAlgorithms=ssh-rsa,ssh-dss -oProxyCommand="ssh -W %h:%p <bridge_user>@bridge.bifi.unizar.es" local_file_to_copy <agustina_user>@agustina.bifi.unizar.es:/fs/agustina/<username>
A fixed IP address is a unique identifier that provides an exclusive and recognizable address on the Internet, similar to a telephone number. You typically need one to host services such as web or mail servers.
Procedimientos de notificación de incidencias
Buenas prácticas y cómo notificar correctamente una incidencia.
Procedimientos
Buenas prácticas
Dado que trabajamos con sistemas complejos, es habitual que se den incidencias en el uso, como por ejemplo :
- Contraseñas caducadas.
- Cuentas bloqueadas.
- Cuotas de disco insuficientes.
- Fallos de software.
- Etc.
Algunas de estas circunstancias son fácilmente evitables con medidas muy sencillas, como por ejemplo, ejercer una política de contraseñas adecuada (guardarlas de forma segura, renovarlas...) o intentar mantener los archivos y sus tamaños dentro de límites razonables (eliminando todo aquello que no sea necesario almacenar). Aplicar dichas medidas elementales beneficia a todos los usuarios, además de al Departamento de Sistemas, por lo que se recomienda encarecidamente una gestión responsable de las cuentas de usuario.
Notificación de incidencias
En caso de producirse alguna incidencia, existen dos direcciones de correo a la que comunicarlas :
cierzo@bifi.es agustina@bifi.es
cada una específica de uno de los sistemas del centro de computación.
Para solucionar los problemas, es necesario contexto, por lo que las notificaciones deberán seguir un cierto formato.
Ejemplo :
Forma incorrecta de notificar una incidencia :
Hola. No tengo memoria.
Forma correcta de notificar una incidencia :
Buenos días.
Mi nombre es XXX, con usuario YYY en el sistema ZZZ.
Descripción del problema (software implicado, circunstancias, herramientas usadas, ip desde la que se conecta si procede, etc). En general, todos los datos que clarifiquen la incidencia.
Salida de los comandos (códigos de error, informes, capturas de pantalla, logs o lo que proceda)
El usuario debe tener en cuenta que, cuántos más datos aporte, más fácil será la resolución.
Una vez recibida la notificación, se encolará con una prioridad asignada. Como es lógico, los tiempos de resolución varían mucho y, por lo general, hay incidencias de varios tipos abiertas de forma simultánea, por lo que se recomienda dar al Departamento de Sistemas un tiempo razonable antes de reclamar información sobre algún tema en particular.
En caso de que no se reciba ningún tipo de contestación transcurridos algunos días, se recomienda contactar de nuevo con los correos anteriormente citados o dirigirse directamente a los miembros del Departamento de Sistemas.
Incident Reporting Procedures
Best practices and how to report an incident correctly.
Procedures
Good practices
Because we work with complex systems, incidents in normal usage are common, for example:
- Expired passwords.
- Locked accounts.
- Insufficient disk quotas.
- Software failures.
- Etc.
Some of these situations are easily avoided with very simple measures, such as following a proper password policy (store them securely, rotate them...) or keeping files and their sizes within reasonable limits (removing anything unnecessary). Applying these basic measures benefits all users as well as the Systems Department, so responsible user account management is strongly recommended.
Reporting incidents
If an incident occurs, there are two email addresses to report it to:
cierzo@bifi.es
agustina@bifi.es
Each address corresponds to one of the center's systems.
To resolve problems, context is necessary, so reports should follow a specific format.
Example:
Incorrect way to report an incident:
Hi. I don't have memory.
Correct way to report an incident:
Good morning.
My name is XXX, my username is YYY on system ZZZ.
Description of the problem (software involved, circumstances, tools used, IP address if relevant, etc.). In general, all details that clarify the incident.
Output of commands (error codes, reports, screenshots, logs or whatever is appropriate)
Users should keep in mind that the more information they provide, the easier it will be to resolve the issue.
Once the report is received, it will be queued with an assigned priority. Naturally, resolution times vary widely and multiple incidents of different types are often open at the same time, so it is recommended to give the Systems Department a reasonable amount of time before requesting updates on a specific issue.
If no response is received after several days, it is recommended to contact the addresses above again or to contact members of the Systems Department directly.
Almacenamiento de objetos S3
El servicio de storage en S3 está pensado para almacenar datos fríos, es decir, orientado a grandes cantidades de información de uso muy infrecuente que deben permanecer congelados por largos periodos de tiempo. S3 no puede utilizarse como un espacio de scratch o para trabajar habitualmente con los archivos almacenados, ya que los archivos no se pueden modificar una vez guardados. Para hacerlo, hay que descargarlos, llevar a cabo los cambios y volver a subirlos al almacén.
CONFIGURACIÓN DEL CLIENTE
Aunque existen otras alternativas, la documentación se basa en el uso de aws cli, descargable en : https://docs.aws.amazon.com/es_es/cli/latest/userguide/getting-started-install.html
Una vez entregados los credenciales al usuario, éste procederá a configurar la herramienta cliente con :
aws configure --profile=nombre_perfil
Es recomendable trabajar con perfiles, dado que así podremos configurar diferentes juegos de credenciales para acceder a distintos almacenamientos S3.
Indicando :
AWS Access Key ID AWS Secret Access Key
y dejando por defecto las opciones de :
Default region name [None]:
Default output format [None]:
COMANDOS BÁSICOS
Listado de buckets :
aws s3 ls --endpoint=http://url_del_endpoint --profile=nombre_perfil
Listado de elementos de un bucket :
aws s3 ls nombre_bucket --endpoint=http://url_del_endpoint --profile=nombre_perfil
Subir archivo a un bucket :
aws s3 cp nombre_archivo s3://nombre_bucket/ --endpoint=http://url_del_endpoint --profile=nombre_perfil
** NOTA IMPORTANTE: En caso de que el tamaño del archivo sea superior a 50Gb, será necesario incluir el parámetro**
--expected-size num_bytes
de lo contrario, el proceso de upload puede fallar. https://docs.aws.amazon.com/cli/latest/reference/s3/cp.html*
Descargar un archivo desde el bucket a nuestro equipo :
aws s3 cp s3://nombre_bucket/nombre_archivo carpeta_local --endpoint=http://url_del_endpoint --profile=nombre_perfil
Borrar elemento de un bucket :
aws s3 rm s3://nombre_bucket/nombre_archivo --endpoint=http://url_del_endpoint --profile=nombre_perfil
COMANDOS AVANZADOS
Ver : https://docs.aws.amazon.com/AmazonS3/latest/API/API_Object.html
Enviar un archivo indicando su md5 para verificación :
1.Calcular el md5
openssl md5 nombre_archivo
2.Calcular el md5 en formato Base64
openssl md5 --binary nombre_archivo |base64
3.Subir el archivo indicando el valor para comprobación. El sistema verificará que el valor de md5 al terminar el upload del archivo sea el que hemos indicado :
aws s3api put-object --bucket nombre_bucket --key nombre_archivo --body nombre_archivo --content-md5 "md5_formato_base64" --endpoint=https://url_del_endpoint --profile=nombre_perfil
Si se produce algún error, el sistema lo indicará; de lo contrario nos mostrará información acerca del md5 del archivo, aunque no en Base64. Corresponderá al valor calculado en el paso 1.
    {
        "ETag": "\"valor_calculado_en_paso_uno\""
    }
Obtener los md5sum de los archivos de un bucket :
aws s3api list-objects --bucket nombre_del_bucket --endpoint=http://url_del_endpoint --profile=nombre_perfil
Obtener el md5sum de un archivo :
aws s3api head-object --bucket nombre_del_bucket --key nombre_archivo --query ETag --output text --endpoint=http://url_del_endpoint --profile=nombre_perfil
** NOTA : El valor de ETag difiere del archivo original si se sube con aws put. Para usar códigos md5 de comprobación, debería utilizarse aws s3api put-object**
S3 Object Storage
The S3 storage service is intended for storing "cold" data — i.e., large amounts of information that are accessed very infrequently and must remain "frozen" for long periods. S3 should not be used as scratch space or for routine work with files stored there, since files cannot be modified once uploaded. To change a file, you must download it, make the changes locally, and upload it again.
CLIENT CONFIGURATION
Although there are other alternatives, this documentation is based on using the AWS CLI, downloadable at: https://docs.aws.amazon.com/cli/latest/userguide/getting-started-install.html
Once credentials are provided to the user, configure the client tool with:
aws configure --profile=profile_name
It is recommended to work with profiles so you can configure different sets of credentials to access different S3 storages.
You will be prompted for:
AWS Access Key ID
AWS Secret Access Key
and you can leave the following options at their defaults:
Default region name [None]:
Default output format [None]:
BASIC COMMANDS
List buckets:
aws s3 ls --endpoint=http://endpoint_url --profile=profile_name
List objects in a bucket:
aws s3 ls bucket_name --endpoint=http://endpoint_url --profile=profile_name
Upload a file to a bucket:
aws s3 cp file_name s3://bucket_name/ --endpoint=http://endpoint_url --profile=profile_name
IMPORTANT NOTE: If the file size exceeds 50 GB, you must include the following parameter:
--expected-size num_bytes
otherwise the upload process may fail.
https://docs.aws.amazon.com/cli/latest/reference/s3/cp.html
Download a file from a bucket to your local machine:
aws s3 cp s3://bucket_name/file_name local_folder --endpoint=http://endpoint_url --profile=profile_name
Delete an object from a bucket:
aws s3 rm s3://bucket_name/file_name --endpoint=http://endpoint_url --profile=profile_name
ADVANCED COMMANDS
See: https://docs.aws.amazon.com/AmazonS3/latest/API/API_Object.html
Upload a file providing its MD5 for verification:
- Compute the MD5 (hex):
openssl md5 file_name
- Compute the MD5 in Base64 format:
openssl md5 --binary file_name | base64
- Upload the file specifying the value for verification. The system will verify that the MD5 value after the upload matches the one you provided:
aws s3api put-object --bucket bucket_name --key file_name --body file_name --content-md5 "base64_md5" --endpoint=https://endpoint_url --profile=profile_name
If an error occurs, the system will report it; otherwise it will show information about the file's MD5, although not in Base64. It will correspond to the value calculated in step 1.
{
    "ETag": "\"value_calculated_in_step_one\""
}
Get the MD5s (ETags) of objects in a bucket:
aws s3api list-objects --bucket bucket_name --endpoint=http://endpoint_url --profile=profile_name
Get the MD5 (ETag) of a single object:
aws s3api head-object --bucket bucket_name --key file_name --query ETag --output text --endpoint=http://endpoint_url --profile=profile_name
NOTE: The ETag value may differ from the original file's MD5 if the object was uploaded using multipart upload. To use MD5 verification, prefer aws s3api put-object.
Colossus Cloud access
BiFi offers a private IaaS cloud solution based on OpenStack Train Services in High Availability Infrastructure. OpenStack is a cloud operating system that controls large pools of compute, storage, and networking resources throughout a datacenter, all managed and provisioned through APIs with common authentication mechanisms.
A dashboard is also available, giving administrators control while empowering their users to provision resources through a web interface. This web shows the basic information to access the cloud.
Table of Contents
- Login
- Web interface
- Instances
- Keypairs
- Volumes
- Network
- Quotas
- Orchestration
- SSHFS
- SFTP
- RDP
- OpenStack client
- Terraform single instance
- Terraform multiple instances
- Terraform custom multiple instances
- Terraform RDP
- Endpoints
- OpenStack docs
- OpenStack modules
- Support
Login into Colossus Cloud
The cloud service is available at https://colossus.cesar.unizar.es.
This document provides step-by-step instructions for accessing the OpenStack service hosted at colossus.cesar.unizar.es via the Graphical User Interface (GUI) and the OpenStack Client.
Accessing OpenStack via the GUI
Step 1: Navigate to the OpenStack Dashboard
Open a web brwoser and enter the url: https://colossus.cesar.unizar.es.
Step 2: Login into the cloud dashboard
If you have an available account in Agustina supercomputer,, cloud account or an email address from the bifi.es domain, you would enter this information in the respective fields.
In the first screen select Bifi Auth from the dropdown element:
Then click on Iniciar sesión. Then you can enter your Agustina username and password or choose Google authentication on the bottom part to login with your bifi email (domain bifi.es):

If you have problems, please send an email to agustina@bifi.es.
Step 3: Explore the clod dashboard
After successfully logging in, the dashboard provides access to:
- Overview Page: Monitor your current resource consumption and usage metrics
- Resource Management Sections:
- Instances - Manage your virtual machines
- Volumes - Control storage devices
- Networks - Configure networking settings
- Images - Handle system images and templates
Accessing OpenStack via the OpenStack Client
Step 1: Install the OpenStack Client
Ensure that you have the OpenStack client installed on your local system. You can install it using pip:
pip install python-openstackclient --upgrade
pip install python-heatclient
For detailed installation instructions, refer to the OpenStack CLI Installation Guide.
Step 2: Obtain OpenStack RC File
Log in to the OpenStack GUI as described in the previous section. Navigate to your user profile settings (usually found at the top-right corner) and download the OpenStack RC File for your project.
Step 3: Source the RC File
On your local machine, source the downloaded RC file to load your OpenStack credentials into the environment:
source <your-openstack-rc-file>.sh
Step 4: Use the OpenStack Client
You can now execute OpenStack commands. For example:
- List available instances:
openstack server list
- Create a new instance:
openstack server create --image <image-name> \
                        --flavor <flavor-name> \
                        --network <network-name> \
                        <instance-name>
- List available projects:
openstack project list
Support
If you encounter any issues, please contact the support team at agustina@bifi.es or refer to the OpenStack Documentation. For further support do not hesitate to contact us.
Web interface
The OpenStack Web UI, commonly known as Horizon, is useful and important because it provides a user-friendly, graphical interface for managing and interacting with OpenStack cloud resources. It allows users—including administrators, developers, and end-users—to easily perform tasks such as launching instances, managing storage, configuring networks, and monitoring resources without needing to use complex command-line tools or APIs. This lowers the barrier to entry, improves productivity, and helps organizations efficiently manage their cloud infrastructure.
Compute resources

The Compute Resources section is a core component of OpenStack that manages your virtual computing resources. This interface provides:
- Overview Dashboard: Displays usage metrics, quotas, and resource allocation
- Instance Management: Create, modify and monitor virtual machines
- Image Library: Access pre-configured OS images and snapshots
- Flavor Management: Define and select compute/memory/storage combinations
- Key Management: Handle SSH keypairs for secure instance access
From this central location, administrators and users can efficiently provision and manage their compute infrastructure while monitoring resource utilization against defined quotas. The intuitive layout makes it easy to access common compute operations and view system status at a glance.
Instances
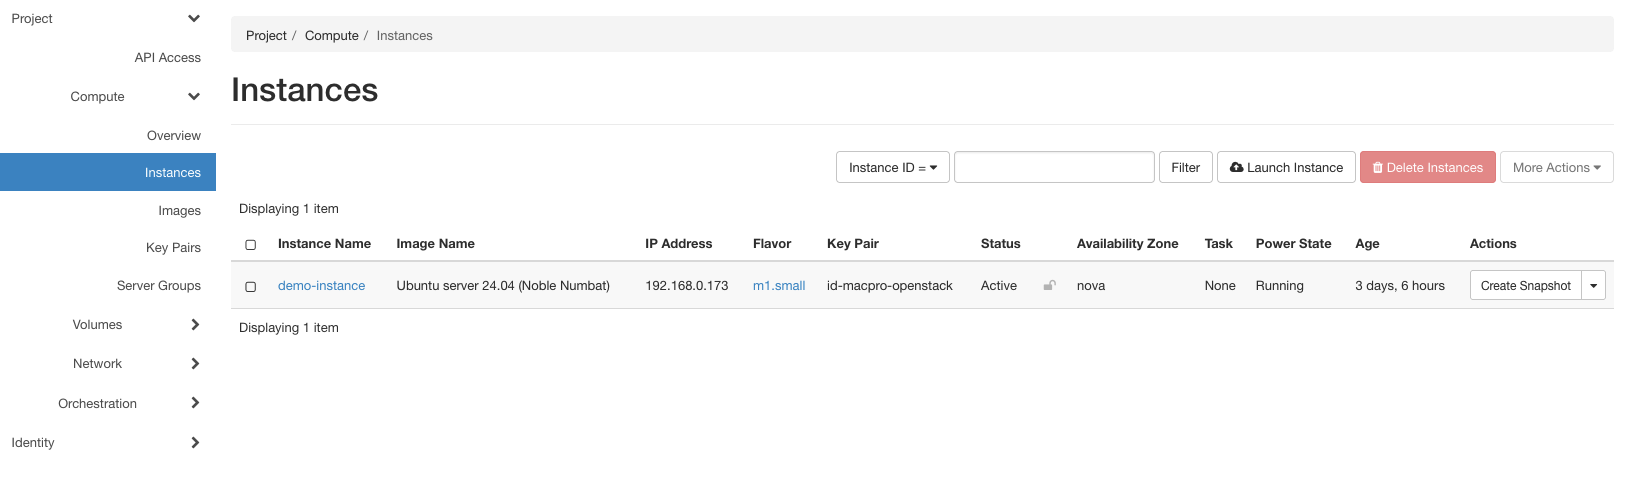
The Instances section is where you manage your virtual machines in OpenStack. Key capabilities include:
- Instance Lifecycle: Launch, stop, start, and terminate virtual machines
- Resource Monitoring: Track CPU, memory, and storage usage in real-time
- Instance Actions: Perform operations like resize, rebuild, and create snapshots
- Console Access: Direct access to instance console for troubleshooting
- Network Management: Configure network interfaces and security groups
This interface provides complete control over your virtual machines, from initial deployment through ongoing maintenance and monitoring. Users can easily scale resources, manage configurations, and ensure optimal performance of their cloud instances.
Images
The Images section provides a centralized repository for managing virtual machine images and snapshots in OpenStack. Key features include:
- Image Management: Upload, modify and delete OS images
- Snapshot Control: Create and manage instance snapshots
- Image Properties: Configure metadata, minimum requirements, and visibility settings
- Format Support: Handles multiple image formats (QCOW2, ISO, AMI, etc.)
- Version Control: Track image versions and updates
This interface allows users to maintain a library of standardized images for consistent instance deployment across the cloud infrastructure. Images can be public or private, enabling both shared resources and custom configurations.
Keypairs
The Keypairs section manages SSH key authentication for secure instance access. Key features include:
- Key Generation: Create new SSH key pairs directly in the interface
- Key Import: Import existing public keys from your local system
- Key Management: View, download, and delete stored keypairs
- Instance Association: Assign keys during instance creation
- Access Control: Manage secure access to multiple instances
This interface simplifies secure access management by providing centralized control over SSH authentication credentials. Keys are essential for secure instance access and automated deployments in OpenStack environments.
Volumes
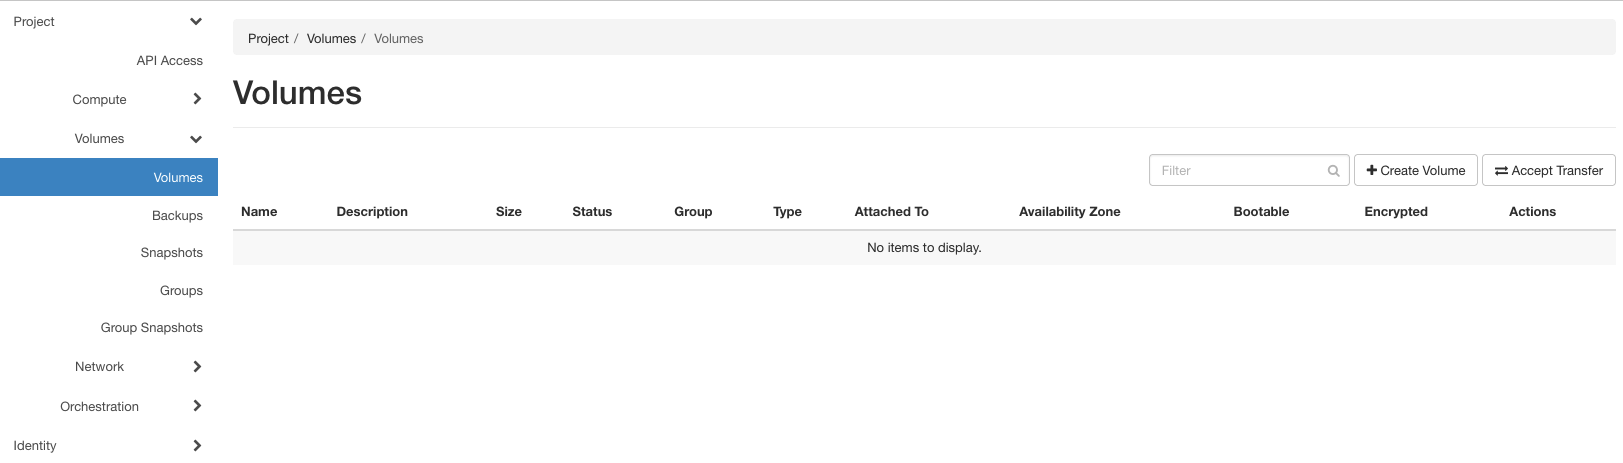
The Volumes section provides block storage management capabilities in OpenStack. Key features include:
- Volume Operations: Create, delete, and modify block storage volumes
- Snapshot Management: Create and restore volume snapshots
- Instance Attachment: Attach/detach volumes to running instances
- Volume Types: Select different storage backends and performance tiers
- Backup Control: Create and manage volume backups
This interface enables users to manage persistent storage resources independently of instances. Volumes can be moved between instances and survive instance termination, making them ideal for storing critical data and applications.
Network
The Network section provides comprehensive network management capabilities in OpenStack. Key features include:
- Network Creation: Design and implement virtual networks
- Subnet Management: Configure IP ranges and DHCP settings
- Router Configuration: Set up network routing and external connectivity
- Security Groups: Define network access rules and firewall policies
- Topology View: Visualize network connections and relationships
This interface enables users to create and manage complex network architectures, ensuring secure and efficient communication between instances and external networks. The visual topology viewer helps understand and troubleshoot network configurations.
Stacks
The Stacks section manages Infrastructure as Code (IaC) deployments through OpenStack Heat. Key features include:
- Template Management: Create and modify Heat templates
- Stack Deployment: Launch and manage infrastructure stacks
- Resource Tracking: Monitor stack resources and their states
- Version Control: Track changes and updates to stack templates
- Automated Scaling: Configure auto-scaling policies and groups
This interface enables users to deploy and manage complex infrastructure environments using declarative templates. Stacks provide automated, repeatable deployments of multi-resource cloud environments while maintaining consistency and version control.
API Access

The API Access section provides essential information for programmatic interaction with OpenStack. Key features include:
- API Endpoints: View and manage service endpoint URLs
- Authentication: Access credentials and authentication tokens
- CLI Downloads: Download OpenStack command-line tools
- API Documentation: Access to REST API documentation
- Application Credentials: Create and manage API-specific credentials
This interface enables developers and automation tools to interact with OpenStack programmatically. It provides the necessary information and credentials for building custom applications, scripts, and integrations with the OpenStack infrastructure.
OpenStack RC File
The OpenStack RC (Runtime Configuration) file is a shell script that sets environment variables needed to interact with OpenStack APIs. It can be downloaded from the API Access section of the dashboard. This file is used for:
- Purpose: Sets up authentication credentials and endpoint URLs
- Format: Shell script containing environment variables
- Location: Downloaded from API Access > Download OpenStack RC File
Example RC file structure:
#!/bin/bash
export OS_AUTH_URL="https://your-openstack-endpoint:5000/v3"
export OS_PROJECT_ID="your-project-id"
export OS_PROJECT_NAME="your-project"
export OS_USER_DOMAIN_NAME="Default"
export OS_USERNAME="your-username"
export OS_PASSWORD="your-password"
export OS_REGION_NAME="your-region"
export OS_INTERFACE=public
export OS_IDENTITY_API_VERSION=3
To use the RC file:
- Download from API Access section
- Source it in your terminal:
source project-openrc.sh
After sourcing, you can use OpenStack CLI commands or APIs without additional authentication parameters.
Security Note: The RC file contains sensitive credentials. Keep it secure and never commit it to version control.
View Credentials in API Access
The View Credentials button in OpenStack's API Access section provides essential authentication information for your current project. When clicked, it displays:
-
Project Details:
- Project ID
- Project Name
- Project Domain
- User Domain
-
Authentication Endpoints:
- Identity Service (Keystone) URL
- Available API versions
- Region information
-
Current User Context:
- Username
- User Role(s)
- Authentication token status
Important Security Notes:
- Credentials are only displayed temporarily
- The authentication token is session-specific
- Never share or screenshot this information
- Tokens expire after a set period for security
This information is particularly useful when:
- Configuring CLI tools
- Setting up automation scripts
- Troubleshooting API authentication issues
- Verifying project access permissions
Each section of the UI is designed for intuitive operation, making cloud resource management accessible to users of all experience levels. The graphical interface simplifies complex operations while providing full access to OpenStack's capabilities.
Instances Creation
This document provides comprehensive instructions on creating instances and understanding the virtual machine types available.
Instance creation can be done easily via OpenStack Horizon from the "Launch Instance" button on the Project -> Compute -> Instances Panel.
However, you can also deploy an instance via OSC using the following steps:
Key Points for Instance Creation
-
Ensure a security group is selected that allows access to the VM from the Internet or private networks.
-
A keypair must be created and associated with the instance.
Step-by-Step Guide to create a new instance
Step 1: List Resource Names and IDs
openstack image list
openstack flavor list
openstack security group list
openstack network list
openstack keypair list
Step 2: Keypair creation
openstack keypair create --public-key ~/.ssh/id_rsa.pub <keypair-name>
Step 3: Security Group Configuration
openstack security group rule create --ingress --proto tcp --remote-ip 0.0.0.0/0 --dst-port 22 default
If you need to open more ports you can set on the same security group, you can allow inbound traffic with --ingress option or outbound traffic with --egress option.
Step 4: Instance creation
- With non-persistense storage:
openstack server create --image <image> --flavor <flavor> --security-group <security-group> --network <network> --key-name <keypair-name> <name>
For sensitive data, it is recommended to use encrypted volumes. You can create and attach one as follows:
1.- Create the encrypted volume:

    ```bash
    openstack volume create --size <size> --type LUKS <volume-name>
    ```

2.- Attach it to your server (after creation or later):

    ```bash
    openstack server add volume <server> <volume>
    ```
- With Persistent Storage (including encrypted volumes created as above):
openstack server create --image <image> --boot-from-volume <volume-size> --flavor <flavor> --security-group <security-group> --network <network> --key-name <keypair-name> <name>
Step 5: Floating IP Creation and Assignment
You can list the available floating IPs provided by BiFi and assing it to your instance:
openstack floating ip list
openstack server add floating ip <server> <floating-ip>
Virtual machine flavours
Check the available image flavour with the command:
openstack flavor list
Instance Types
| Name | RAM | Disk | VCPUs |
|---|---|---|---|
| m1.tiny | 512 | 1 | 1 |
| m1.small | 2048 | 20 | 1 |
| m1.medium | 4096 | 40 | 2 |
| m1.large | 8192 | 80 | 4 |
| m1.xlarge | 16384 | 160 | 8 |
| m2.tiny | 512 | 1 | 2 |
| 16_8_50 | 8192 | 50 | 16 |
| 4_4_200 | 4096 | 200 | 4 |
Images
Check the available images with the command:
openstack image list
Operating Systems
| Name | Status |
|---|---|
| Alpine Linux | active |
| Debian 10 (Buster) | active |
| Rocky Linux 8.9 (Green Obsidian) | active |
| Rocky Linux 9.4 (Blue Onyx) | active |
| Ubuntu server 24.04 (Noble Numbat) | active |
| Ubuntu server 24.10 (Oracular Oriole) | active |
| cirros | active |
Keypairs
Keypairs serve several critical functions in colossus cloud environment:
Security
- Provide secure SSH access to instances
- Replace less secure password authentication
- Enable encrypted connections between user and instances
Authentication
- Act as your digital credentials for instance access
- Allow automated scripts and tools to securely connect
- Prevent unauthorized access to your cloud resources
Management Benefits
-
Instance Access
- Required for initial instance setup
- Enable remote administration
- Allow secure file transfers
-
Automation
- Enable infrastructure as code
- Support automated deployment scripts
- Facilitate CI/CD pipelines
Best Practices
- Keep private keys secure and never share them
- Use unique keypairs for different projects
- Back up private keys safely
- Name keys descriptively
To create a keypair with the CLI:
openstack keypair create <keypair-name> > <keypair-name>.pem
chmod 400 my-key.pem
You can also create a keypair with your own local ssh public key:
openstack keypair list
openstack keypair create --public-key <public-key-name>.pub <keypair-name>
Then you can exter your instance by using your ssh key, for example in a ubuntu instace:
ssh -i ~/.ssh/my_ssh_key ubuntu@INSTANCE_IP
Without a valid keypair, you cannot access your instances, making them a fundamental component of colossus infrastructure.
Create SSH key for Colossus
You can also create your public/private ssh keys and upload the public key to Colossus to create the keypair, the steps are:
Step 1: Create the SSH keys
Launch the ssh-keygen command and leave empty the passphrase.
ssh-keygen -t ed25519 -C "user-email@domain.com"
[openstack@DESKTOP-G16DBTQ]:/mnt/c/Users/openstack/Desktop $ ssh-keygen -t ed25519 -C "user-email@domain.com"
Generating public/private ed25519 key pair.
Enter file in which to save the key (/home/openstack/.ssh/id_ed25519): /home/openstack/.ssh/id_openstack_key
Enter passphrase (empty for no passphrase):
Enter same passphrase again:
Your identification has been saved in /home/openstack/.ssh/id_openstack_key
Your public key has been saved in /home/openstack/.ssh/id_openstack_key.pub
The key fingerprint is:
SHA256:ErPuaD4XKwOXgfaY5s user-email@domain.com
The key's randomart image is:
+--[ED25519 256]--+
|**o .....   .    |
|+oo.     . . .   |
|...o  o   . o    |
| o...  +   . +   |
|..+oo.o S   . +  |
|o.*=o...     E   |
|*o.+  .o         |
|*.  =oo          |
|+o oo=.          |
+----[SHA256]-----+
Step 2: Upload the publilc key
Inside colossus web interface in Compute -> Key pairs, create a new one by pressing Import Public Key, fill the name fiel, select SSH key in Key Type selection and choose the .pub file just created in step 1, then press Import Public Key button:
Volumes
The creation of volumes are useful to attach an extra storage (a persistent one) to an instance.
Create a volume
openstack volume list
openstack volume create --size <volume-size-GB> --description <volume-description> <volume-name>
Backup a volume
You can create full or incremental backup copies from the volume attached to the instance.
List Volumes and Snapshots
openstack volume list
openstack volume snapshot list
Create a full backup
openstack volume backup create --force --name <backup-name> --description <backup-description> --container <container> <volume-name>
Create an inbcremental backup
openstack volume backup create --force --incremental --name <backup-name> --description <backup-description> --container <container> <volume-name>
Backup a snapshot
openstack volume backup create --force --name <backup-name> --description <backup-description> --container <container> --snapshot <snapshot-id> <volume-name>
Restore volume
The volume to restore must be available
openstack volume list
openstack volume backup restore <volume-backup-id> <volume-id>
Network
First, we should explpain some important concepts:
-
Virtual Router: A router is a logical component that forwards data packets between networks. It also provides Layer 3 and NAT forwarding to provide external network access for servers on project networks.
-
Internal Network: Internal networks are a type of network in which all the instances connected to that network can talk to each other and reach the rest of the Internet through a router, but the rest of the Internet cannot initialize a connection to those instances without a floating IP. Internal networks are ideal for running services you wish to make secure, as, by default, these services are unreachable from the Internet and thus are much harder to compromise.
-
Floating IP: OpenStack floating IP addresses are publicly routable IPs that users can allocate to their instances, making them accessible from the outside world.
-
Floating IP and Network Policy: Each project is assigned a quota of floating IPs, along with a single SNAT router and an internal network connected to it. By default, each project will be set up with one router, which provides internet connectivity to the internal network using Source NAT (SNAT).
Outgoing/Incoming Connections
The following ports are open by default in the BiFi Network for outgoing and incoming connections:
- 7 (ICMP) - For ping request to the remote machine Colossus
- 22 (SSH) - For data transfer, interactive nodes, and HPC logins
Remember: Even if these ports are open in the BiFi Network, you must verify they are also open in your instance’s security group for successful traffic.
Internal network creation
openstack network create --internal --project <project> --project-domain <project-domain> <name>
Subnetwork creation
The subnetwork should be a private network range, and aim to 155.210.12.9, 155.210.3.12 as DNS servers.
The subnet range should be in CIDR format, for example, 192.168.0.0/24
openstack network list
openstack subnet create --project <project> --project-domain <project-domain> --subnet-range <subnet-range> --network <network> --dns-nameserver 155.210.12.9 --dns-nameserver 155.210.3.12 <name>
Add subnet to router
In order to enroute the traffic we must bind the router to the subnet we have created:
openstack router list
openstack subnet list
openstack router add subnet <router> <subnet>
Security Group Creation
By default, any egress traffic is allowed in default security group, but no ingress traffic. Hence, editing the default security group or creating new security groups with ingress traffic rules is important to allow access to the VM from the Internet or other private networks, ingress rules such as SSH, HTTPS, etc.
openstack security group create <security-group>
Example:
openstack security group rule create --protocol tcp --remote-ip 0.0.0.0/0 --dst-port 22 --ingress my-security-group
openstack security group rule create --protocol tcp --remote-ip 0.0.0.0/0 --dst-port 22 --egress my-security-group
Quotas
Your project will obtain a quota provided by the adequate allocation committee.
The quotas and current usage of your project can be checked by OSC (OpenStack CLI).
openstack quota show
Or via Web through Horizon dashboard, On the dashboard, go to panel Project -> Compute -> Overview.
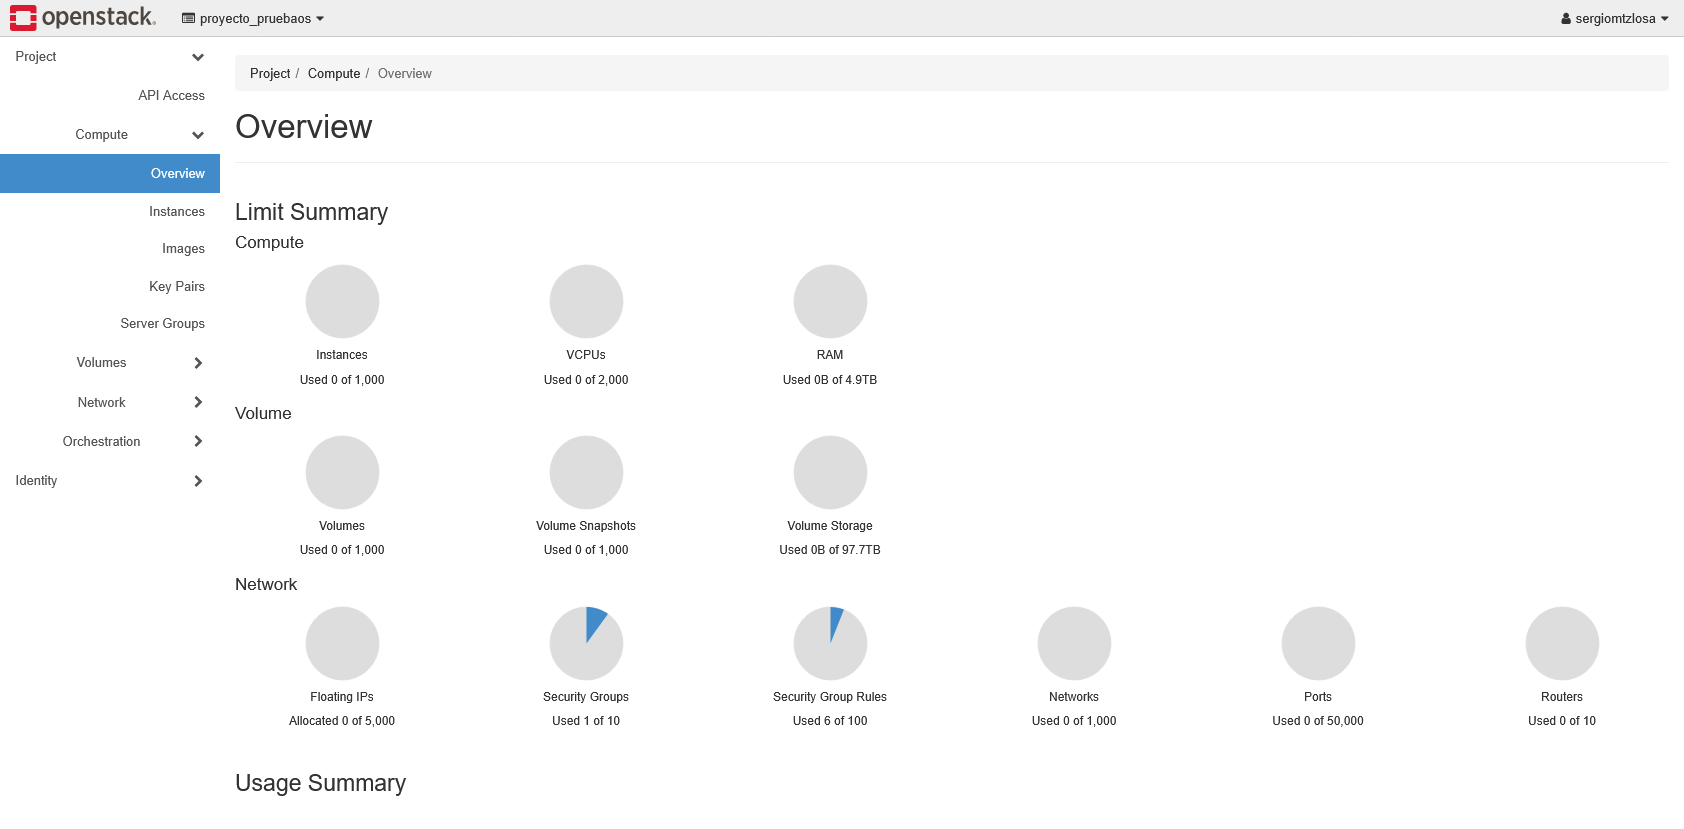
Orchestration
Orchestration, implemented through OpenStack, is crucial for cloud infrastructure management as it enables Infrastructure as Code (IaC) practices by allowing you to describe and automate the deployment of entire cloud environments using template files (like YAML).
Instead of manually creating and configuring resources through the dashboard or CLI commands, orchestration lets you define complete application stacks - including instances, networks, storage, and security groups - in a single template file that can be version-controlled, reused, and consistently deployed across different environments. This automation not only reduces human error and saves time but also ensures reproducibility and scalability of your cloud infrastructure deployments.
OpenStack YML file orchestration
It is also possible to create a yml file to create the isntance and other resources, this is a template file for a ubuntu image:
IMPORTANT NOTE: Make suere that you have the OpenStack client installed on your local system. You can install it using pip:
pip install python-openstackclient --upgrade
pip install python-heatclient
File demo-template.yml:
heat_template_version: 2015-10-15
description: Launch a basic instance with Ubuntu image

parameters:
  NetID:
    type: string
    description: Network ID or name to use for the instance.
  KeyPair:
    type: string
    description: Keypair to create the instance.

resources:
  server:
    type: OS::Nova::Server
    properties:
      image: Ubuntu server 24.04 (Noble Numbat)
      flavor: m1.small
      key_name: { get_param: KeyPair }
      networks:
      - network: { get_param: NetID }

outputs:
  instance_name:
    description: Name of the instance.
    value: { get_attr: [ server, name ] }
  instance_ip:
    description: IP address of the instance.
    value: { get_attr: [ server, first_address ] }
Lauch the yml file with the command:
source <file>-openrc.sh
openstack stack create -t demo-template.yml --parameter "NetID=test-network;KeyPair=my-keypair-openstack" demo-stack
We used a network called test-network and the keypair my-keypair-openstack, both parameters must be already created in colossus cloud.
Terraform orchestration
Using Terraform in an OpenStack environment is important because it allows for infrastructure as code (IaC) management, which provides a consistent, repeatable, and version-controlled way to provision and manage cloud resources. Terraform enables users to define and manage OpenStack resources such as instances, networks, and volumes using a human-readable configuration file, rather than relying on manual CLI commands or GUI interactions.
This approach ensures that infrastructure configurations are predictable, scalable, and easy to reproduce, reducing the risk of human error and configuration drift. Additionally, Terraform's state management capabilities allow for easy tracking of changes and rollbacks, making it an essential tool for managing complex OpenStack environments and ensuring compliance with organizational policies and regulatory requirements. By using Terraform, OpenStack users can streamline their workflow, improve efficiency, and reduce the time and effort required to manage and maintain their cloud infrastructure.
Install terraform: https://developer.hashicorp.com/terraform/install
We can replicate the OpenStack YML file orchestration with Terraform, this are the steps to reproduce the deployment of a single instance. Create a folder containing the following files:
Step 1: Create the OpenStack provider (provider.tf)
provider "openstack" {
    user_name     = "your-username"
    tenant_name   = "your-username"
    password      = "your-password"
    auth_url      = "https://colossus.cesar.unizar.es:5000/v3"
}
Step 2: Create a variables file (variables.tf)
variable "network_name" {
  type        = string
  default     = "test-network"
  description = "Network name to use for the instance"
}

variable "keypair_name" {
  type        = string
  default     = "my-keypair-openstack"
  description = "Keypair name for instance access"
}
Step 3: Create the main terraform file (main.tf)
# Configure OpenStack Provider
terraform {
required_version = ">= 0.14.0"
  required_providers {
    openstack = {
      source  = "terraform-provider-openstack/openstack"
      version = "~> 1.53.0"
    }
  }
}

# Create instance
resource "openstack_compute_instance_v2" "demo_instance" {
  name            = "demo-instance"
  image_name      = "Ubuntu server 24.04 (Noble Numbat)"
  flavor_name     = "m1.small"
  key_pair        = var.keypair_name

  network {
    name = var.network_name
  }
}

# Output instance details
output "instance_name" {
  value = openstack_compute_instance_v2.demo_instance.name
}

output "instance_ip" {
  value = openstack_compute_instance_v2.demo_instance.access_ip_v4
}
Now, you can launch the commands to create the orchestration in colossus cloud:
terraform init
source <file>-rc.sh
terraform plan
terraform apply
You can debug the terraform deployment by setting the OS_DEBUG=1 variable:
OS_DEBUG=1 TF_LOG=DEBUG terraform apply
Step 4: Destroy instance deployment (optional)
You can rollback the deployment and destroy the instance with the command:
terraform destroy
IMPORTANT: This will destroy the instance and you will lose all your data.
For more information check the terraform documentation: https://developer.hashicorp.com/terraform/docs
Mounting Storage via SSHFS
Prerequisites
- SSHFS Installation: SSHFS must be installed on your OpenStack VM. If not, you can install it using the package manager of your distribution. For example, on Ubuntu:
sudo apt-get update
sudo apt-get install -y sshfs fuse3
- SSH keypair: Ensure you have an SSH key pair set up. If not, you can generate one using:
ssh-keygen -t ed25519 -C "user-email@domain.com"
Steps to Mount the Storage
Step 1: Create a Local Mount Point
First, create a directory on your VM where you would like to mount the remote storage.
mkdir -p /home/$USER/sshfs-folder
chown -R $USER:$USER /home/$USER/sshfs-folder
Step 2: Mount the Storage with SSHFS
Use the sshfs command to mount the remote directory (for instance /mnt/data-volume) to your local mount point. Replace YOUR_USERNAME with your instance user, for example for ubuntu images the current user is ubuntu:
mkdir -p /home/$USER/sshfs-folder
chown -R $USER:$USER /home/$USER/sshfs-folder
sshfs -o ssh_command='ssh -i <PRIVATE_SSH_KEY_LOCAL_PATH>' ubuntu@IP_INSTANCE:/mnt/data-volume /home/$USER/sshfs-folder
Remember to set the full path to the private ssh file.
Step 3: Verify the Mount
Check if the storage has been mounted successfully by listing the contents of the /home/$USER/sshfs-folder directory:
ls /home/$USER/sshfs-folder
Step 4: Unmounting the Storage
When done, unmount your storage using the fusermount command:
fusermount -u /home/$USER/sshfs-folder
SHFS mounts are not persistent across reboots by default. For permanence, consider adding the sshfs command to your system's startup scripts or using /etc/fstab.
Alternative mode
You can also use the private key file using the following command:
sshfs -o allow_other,default_permissions,identityfile=<PRIVATE_SSH_KEY_LOCAL_PATH> <USER>@<EXTERNAL_IP>:<REMOTE-PATH> <LOCAL-MOUNT-PATH>
For instance, we can mount a remote folder available in OpenStack instance in path /mnt/data-volume onto the local path /home/$USER/sshfs-folder:
mkdir -p /home/$USER/sshfs-folder
chown -R $USER:$USER /home/$USER/sshfs-folder
sshfs -o allow_other,default_permissions,identityfile=<PRIVATE_SSH_KEY_LOCAL_PATH> ubuntu@EXTERNAL_IP:/mnt/data-volume /home/$USER/sshfs-folder
Remember to set the full path to the private ssh file. If you get an error like this:
fusermount3: option allow_other only allowed if 'user_allow_other' is set in /etc/fuse.conf
Uncoment the option user_allow_other in your /etc/fuse.conf.
When done, unmount your storage using the fusermount command:
fusermount -u /home/$USER/sshfs-folder
Other methods to copy files
- RSYNC:
rsync -avz -e "ssh -i <PRIVATE_SSH_KEY_LOCAL_PATH> -p 22" <USER>@<EXTERNAL_IP>:<REMOTE-PATH> <LOCAL-MOUNT-PATH>. Example:
mkdir -p /home/$USER/sshfs-folder
chown -R $USER:$USER /home/$USER/sshfs-folder
rsync -avz -e "ssh -i /home/$USER/id_private_key.pem -p 22" ubuntu@EXTERNAL_IP:/mnt/data-volume/ /home/$USER/sshfs-folder
- SCP:
scp -r -i <PRIVATE_SSH_KEY_LOCAL_PATH> <USER>@<EXTERNAL_IP>:<REMOTE-PATH> <LOCAL-MOUNT-PATH>. Example:
mkdir -p /home/$USER/sshfs-folder
chown -R $USER:$USER /home/$USER/sshfs-folder
scp -r -i /home/$USER/id_private_key.pem ubuntu@EXTERNAL_IP:/mnt/data-volume/ /home/$USER/sshfs-folder
- SFTP:
sftp -P 22 -i <PRIVATE_SSH_KEY_LOCAL_PATH> <USER>@<EXTERNAL_IP>:<REMOTE-PATH>. Example:
sftp -P 22 -i /home/$USER/id_private_key.pem ubuntu@EXTERNAL_IP:/mnt/data-volume
ls
exit
Mounting Storage via SFTP
Prerequisites
We will use the private .pem SSH file and Filezilla, make sure you have both items on your system. You can download Filezilla here.
Connect via PEM file to the instance
To create a new site connection using a PEM file in FileZilla, follow these steps:
- Open FileZilla and go to File -> Site Manager.
- Click on the New Site button to create a new site connection.
- Enter a name for your external IP in the "Host" field, this can be the domain name or IP address of your server.
- Select SFTP as the protocol.
- In the Logon Type field, select Key file and click on the Browse button next to the Key file field.
- Set the username from your instance, in ubuntu instances the default user is ubuntu.
- Navigate to the location of your PEM file and select it.
- Click OK to save the site connection.
- You can now connect to your server using the new site connection by selecting it from the Site Manager and clicking the Connect button.
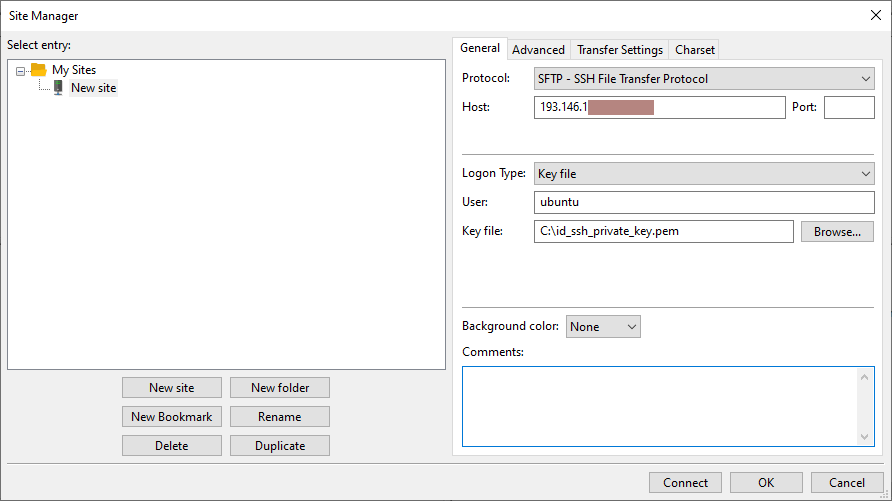
RDP: How to Install a Desktop Interface and Connect via RDP on Your Cloud Instance
Once your instance is deployed and you have obtained its floating IP, you can install a graphical desktop environment and enable RDP access by following these steps:
1. Connect to Your Instance via SSH
Use the SSH command provided by Terraform output, for example:
ssh -i <your_private_key> ubuntu@<floating_ip>
Replace <your_private_key> with your SSH key path and <floating_ip> with the instance's public IP.
2. Install XFCE4 and XRDP
After logging in, run the following commands to install XFCE4 and XRDP, configure the session, and open the RDP port:
sudo apt-get update && \
sudo apt-get install -y xfce4 xfce4-goodies xrdp && \
sudo adduser xrdp ssl-cert && \
sudo systemctl restart xrdp

# Create .xsession file for xfce4

echo "xfce4-session" | sudo tee .xsession
sudo mv .xsession /home/ubuntu/.xsession
sudo chown $USER:$USER /home/ubuntu/.xsession
sudo chmod 755 /home/ubuntu/.xsession

# Configure xrdp to use xfce4
sudo sed -i.bak '/^test -x \/etc\/X11\/Xsession && exec \/etc\/X11\/Xsession/a xfce4-session' /etc/xrdp/startwm.sh
sudo sed -i.bak 's/\/etc\/X11\/Xsession/\/home\/ubuntu\/.xsession/' /etc/xrdp/startwm.sh
sudo sed -i.bak 's/\/etc\/X11\/Xsession/\/home\/ubuntu\/.xsession/' /etc/xrdp/xrdp.ini
sudo sed -i.bak 's/\/etc\/X11\/Xsession/\/home\/ubuntu\/.xsession/' /etc/xrdp/xrdp-sesman.ini

# Open port 3389
sudo ufw enable
sudo ufw allow 3389
sudo ufw allow OpenSSH
3. Set the Ubuntu User Password
Set the password for the ubuntu user (for example, to ubuntu):
echo "ubuntu:ubuntu" | sudo chpasswd
4. Reboot the Instance
sudo reboot
5. Connect via RDP
After the instance reboots, use an RDP client (such as Windows Remote Desktop or Remmina) to connect to the floating IP. Log in with:
- Username: ubuntu
- Password: ubuntu
You should now have access to the XFCE4 desktop environment on your cloud instance.
Note:
- The installation and reboot process may take several minutes.
- If you encounter issues, check the security group rules to ensure ports 22 (SSH) and 3389 (RDP) are open.
- The installation lasts around 30 minutes.
Set the floating IP in Windows Remote Desktop application to connect the RDP instance.
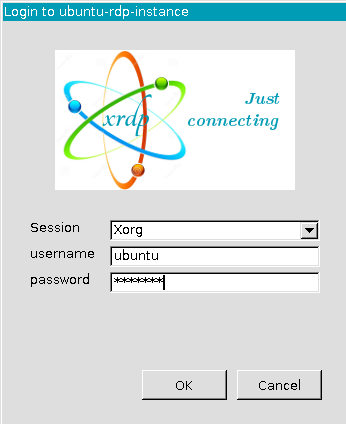

OpenStack client example
This example will show how to create an instance with a jupyter notebook exposed on the 8888 port, it is used an ubuntu image with a 2GB as additional volume for persistant storage.
These are the commands used with the openstack client, if you do not have this client installed on your computer, please refer to login section.
Step 1: Download API file (OpenStack RC File)
Download the API file from the API section (see login section). This file will allow us to login onto https://colossus.cesar.unizar.es:
source <file>-openrc.sh
Step 2: Create ssh keypair
If you already have a keypair skip to step 3.
openstack keypair list
openstack keypair create --public-key ~/.ssh/id_key.pub id-key-openstack
Step 3: Create security group
Create an isolated security group only for your new instance, we call the security group security-group-jupyter.
openstack security group create security-group-jupyter
Step 4: Open ports in security group
Once the security group is created, we open the ports neeeded:
openstack security group rule create --protocol tcp --dst-port 22 --ingress security-group-jupyter
openstack security group rule create --protocol tcp --dst-port 22 --egress security-group-jupyter
openstack security group rule create --protocol tcp --dst-port 8888 --ingress security-group-jupyter
openstack security group rule create --protocol icmp --ingress security-group-jupyter # incoming ICMP
openstack security group rule create --protocol icmp --egress security-group-jupyter # outgoing ICMP
Step 5: Create network and subnetwork
The instance needs a subnetwork to route the traffic, this subnetwork will be linked to a external router, here we set the range for the private subnetwork and the DNS server to resolve the outgoing traffic.
openstack network create network-jupyter
openstack subnet create --network network-jupyter --subnet-range 192.168.0.0/24 --gateway 192.168.0.1 --dns-nameserver 155.210.12.9 network-jupyter-subnet
Step 6: Create a router
Now, a new router es created, we link the previous subnetwork created to the router. Note that you will have a virual network to point the internet on yout Network -> Networks name as vlanXXXX, this is the trunk network to intenet.
openstack router create router-jupyter
openstack router set --external-gateway vlanXXX router-jupyter
openstack router add subnet router-jupyter network-jupyter-subnet
Step 7: Instance creation
We can now create am instance, a network is linked to the instance, we choose the flavour 2 (m1.small) which a tiny instance and the image id of the ubuntu image, lastly, we all set the keypair for login. You can list the image IDs with the command: openstack image list
openstack flavor list
openstack image list
openstack server create --flavor 2 --image <IMAGE_ID> --key-name id-key-openstack --security-group security-group-jupyter --network network-jupyter ubuntu-jupyter
Step 8: Data volume creation
Now, we create a 2GB data volume for persistent storage.
openstack volume list
openstack volume create --size 2 --description "This is data volume for jupyter notebooks" jupyter-data-volume
Step 9: Attach volume to instance
The volume created in step 8 (jupyter-data-volume) is attached to the instance we created, called ubuntu-jupyter. We reboot the instance.
openstack server list
openstack server add volume ubuntu-jupyter jupyter-data-volume
openstack server show ubuntu-jupyter
openstack server reboot ubuntu-jupyter
Step 10: Set floating IP to instance
In order to access the instance, we set an external floating IP available in the Network -> Floating IPs section, we atach the available floating IP to the instance:
openstack floating ip list
openstack server add floating ip ubuntu-jupyter FLOATING_IP
Step 11: SSH login into the instance
We can now mount and give a filesystem format to the atached volume, in this case we have it on the /dev/vdb device:
ssh -i ~/.ssh/id_key ubuntu@FLOATING_IP
sudo lsblk
sudo mkfs.ext4 /dev/vdb
sudo mkdir -p /mnt/data-jupyter
sudo chown -R ubuntu:ubuntu /mnt/data-jupyter
sudo mount /dev/vdb /mnt/data-jupyter/
Step 12: Install jupyter notebook
As a normal ubuntu installation, we can use apt-get to install jupyter notebook, we also make use of venv (virtual environment):
sudo apt update
sudo apt install python3-venv
python3 -m venv jupyter-env
source jupyter-env/bin/activate
pip install notebook
jupyter notebook --no-browser --ip=0.0.0.0 --port=8888
deactivate
Rolling back changes (optional)
It is also possible to detroy all the previous configuration, but we must be aware that we must delete from the lowest level to top, therefore, we should first release the floating IP, the remove the subnetwork, the router, the network, the volume, security gorup and the instance.
# shutdown instance
openstack server list
openstack server stop ubuntu-jupyter
# release floating IP
openstack floating ip list
openstack floating ip delete FLOATING_IP
# remove router
openstack router list
openstack router remove subnet router-jupyter network-jupyter-subnet # remove subnet
openstack router delete router-jupyter
# remove instance
openstack server list
openstack server delete ubuntu-jupyter
# remove data volume
openstack volume list
openstack volume delete jupyter-data-volume
# remove security group
openstack security group list
openstack security group delete security-group-jupyter
# remove subnetworks
openstack subnet list
openstack subnet delete network-jupyter-subnet
# remove network
openstack network list
openstack network delete network-jupyter
Terraform example
It is possible to replicate the OpenStack client example created with the OpenStack YML file using Terraform orchestrator, create a folder containing the following files.
The orchestrator creates a base instance with apache2 and SSH. The orchestrator creates an instances with apache2, the main file shows the external IP.
Step 1: Create the variables provider file (provider.tf)
provider "openstack" {
    user_name     = "<OPENSTACK_USERNAME>"
    tenant_name   = "<OPENSTACK_USERNAME>"
    password      = "<OPENSTACK_PASSWORD>"
    auth_url      = "https://colossus.cesar.unizar.es:5000/v3"
}
Step 2: Create the variables file (variables.tf)
# Params file for variables

# Local SSH private key
variable "private_ssh_key" {
  type        = string
  default     = "<PRIVATE_SSH_KEY_LOCAL_PATH>"
  description = "Private ssh key path"
}

# Keypair associated with the local SSH private key
variable "keypair_name" {
  type        = string
  default     = "<OPENSTACK_ID_KEYPAIR>"
  description = "Keypair name for instance access"
}

# UUID of external gateway
variable "external_gateway" {
  type    = string
  default = "<OPENSTACK_VLAN_UUID>"
}

variable "external_network" {
  type    = string
  default = "vlanXXXX"
}

variable "dns_ip" {
  type    = list(string)
  default = ["155.210.12.9", "155.210.3.12"]
}

variable "network_http" {
  type = map(string)
  default = {
    net_name    = "test-network"
    subnet_name = "test-subnetwork"
    cidr        = "192.168.0.0/24"
  }
}

# Mounting point for data volume
variable "mounting_point_data" {
  type        = string
  default     = "/mnt/data-volume"
  description = "Mounting point for data volume"
}

variable "volume_size" {
  type        = number
  default     = 2
  description = "Size of the volume in GB"
}
Step 3: Security groups file (security_groups.tf)
This security group, we open the port 80, 22 and 8888.
resource "openstack_compute_secgroup_v2" "http" {
  name        = "http"
  description = "Open input http port"
  rule {
    from_port   = 80
    to_port     = 80
    ip_protocol = "tcp"
    cidr        = "0.0.0.0/0"
  }
}

resource "openstack_compute_secgroup_v2" "ssh" {
  name        = "ssh"
  description = "Open input ssh port"
  rule {
    from_port   = 22
    to_port     = 22
    ip_protocol = "tcp"
    cidr        = "0.0.0.0/0"
  }
}

resource "openstack_compute_secgroup_v2" "jupyter" {
  name        = "jupyter"
  description = "Open input jupyter port"
  rule {
    from_port   = 8888
    to_port     = 8888
    ip_protocol = "tcp"
    cidr        = "0.0.0.0/0"
  }
}
Step 4: Networking file (network.tf)
We create a router, a network and a subnetwork.
# Router creation
resource "openstack_networking_router_v2" "router_test" {
  name                = "test-router"
  external_network_id = var.external_gateway
}

# Network creation
resource "openstack_networking_network_v2" "router_test" {
  name = var.network_http["net_name"]
}

#### HTTP SUBNET ####

# Subnet http configuration
resource "openstack_networking_subnet_v2" "http" {
  name            = var.network_http["subnet_name"]
  network_id      = openstack_networking_network_v2.router_test.id
  cidr            = var.network_http["cidr"]
  dns_nameservers = var.dns_ip
}

# Router interface configuration
resource "openstack_networking_router_interface_v2" "http" {
  router_id = openstack_networking_router_v2.router_test.id
  subnet_id = openstack_networking_subnet_v2.http.id
}
Step 5: Main file (main.tf)
We create the instance, attach the network to the instance and a data volume of 2GB, as well as the floating IP.
# Configure OpenStack Provider
terraform {
required_version = ">= 0.14.0"
  required_providers {
    openstack = {
      source  = "terraform-provider-openstack/openstack"
      version = "~> 1.53.0"
    }
  }
}

# Create instance
resource "openstack_compute_instance_v2" "demo_instance" {
  name            = "demo-instance"
  image_name      = "Ubuntu server 24.04 (Noble Numbat)"
  flavor_name     = "m1.small"
  key_pair        = var.keypair_name
  network {
    port = openstack_networking_port_v2.http.id
  }
}

# Create network port
resource "openstack_networking_port_v2" "http" {
  name           = "port-instance-http"
  network_id     = openstack_networking_network_v2.router_test.id
  security_group_ids = [
    openstack_compute_secgroup_v2.ssh.id,
    openstack_compute_secgroup_v2.http.id,
    openstack_compute_secgroup_v2.jupyter.id,
  ]
  fixed_ip {
    subnet_id = openstack_networking_subnet_v2.http.id
  }
}

# Create floating ip
resource "openstack_networking_floatingip_v2" "http" {
  pool = var.external_network
}

# Attach floating ip to instance
resource "openstack_compute_floatingip_associate_v2" "http" {
  floating_ip = openstack_networking_floatingip_v2.http.address
  instance_id = openstack_compute_instance_v2.demo_instance.id
}

# Create volume
resource "openstack_blockstorage_volume_v3" "data_volume" {
  name        = "data-volume"
  description = "Data volume for demo instance"
  size        = var.volume_size  # Size in GB
}

# Attach volume to instance
resource "openstack_compute_volume_attach_v2" "attached" {
  instance_id = openstack_compute_instance_v2.demo_instance.id
  volume_id   = openstack_blockstorage_volume_v3.data_volume.id
}

# Post-deployment actions, format and mount data volume (optional)
# for manually post-deployment see step 7
resource "null_resource" "post_deployment" {
  connection {
    type        = "ssh"
    host        = openstack_networking_floatingip_v2.http.address
    user        = "ubuntu"
    private_key = file(var.private_ssh_key)
  }

  provisioner "remote-exec" {
    inline = [
      "DISK=\"/dev/$(lsblk | grep ${var.volume_size}G | awk '{print $1}')\"",
      "sudo mkfs.ext4 -qF $DISK",
      "sudo mkdir -p ${var.mounting_point_data}",
      "sudo mount $DISK ${var.mounting_point_data}",
      "sudo chown -R $USER:$USER ${var.mounting_point_data}",
      "UUID=$(sudo blkid -s UUID -o value $DISK)",
      "echo \"UUID=$UUID ${var.mounting_point_data} ext4 defaults,nofail 0 2\" | sudo tee -a /etc/fstab",
      "sudo apt update && sudo apt install -y apache2",
      "sudo echo \"<html><body>External IP: $(curl -s ident.me)</body></html>\" | sudo tee /var/www/html/index.html"
    ]
  }
}

# Add volume output
output "volume_id" {
  value = openstack_blockstorage_volume_v3.data_volume.id
}

# Output instance details
output "instance_name" {
  value = openstack_compute_instance_v2.demo_instance.name
}

output "instance_ip" {
  value = openstack_compute_instance_v2.demo_instance.access_ip_v4
}

output "floating_ip" {
  value = openstack_networking_floatingip_v2.http.address
}
Step 6: Launch Terraform orchestrator
Now, you can launch the commands to create the orchestration in colossus cloud:
terraform init
source <file>-rc.sh
terraform fmt -recursive
terraform plan -out plan.out
terraform apply plan.out
You can debug the terraform deployment by setting the OS_DEBUG=1 variable:
OS_DEBUG=1 TF_LOG=DEBUG terraform apply plan.out
Step 7: Create volume in image and mount external volume (optional)
We can mount and give a filesystem format to the atached volume, in this case we have it on the /dev/vdb device:
ssh -i ~/.ssh/id_key ubuntu@FLOATING_IP
sudo lsblk
sudo mkfs.ext4 -qF /dev/vdb
sudo mkdir -p /mnt/data-jupyter
sudo mount /dev/vdb /mnt/data-jupyter/
sudo chown -R ubuntu:ubuntu /mnt/data-jupyter
sudo UUID=$(sudo blkid -s UUID -o value /dev/vdb)
echo "UUID=$UUID /mnt/data-jupyter ext4 defaults,nofail 0 2" | sudo tee -a /etc/fstab
Step 8: Install jupyter notebook
As a normal ubuntu installation, we can use apt-get to install jupyter notebook, we also make use of venv (virtual environment):
sudo apt update
sudo apt install python3-venv
python3 -m venv jupyter-env
source jupyter-env/bin/activate
pip install notebook
jupyter notebook --no-browser --ip=0.0.0.0 --port=8888
deactivate
Rolling back changes (optional)
You can rollback the deployment and destroy the instance with the command:
terraform destroy
IMPORTANT: This will destroy the instance and you will lose all your data.
For more information check the terraform documentation: https://developer.hashicorp.com/terraform/docs
Terraform example
It is possible to replicate the OpenStack client example created with the OpenStack YML file using Terraform orchestrator, create a folder containing the following files:
Terraform runs 3 base instances with apache2 and SSH. The orchestrator creates an instances with apache2, the main file shows the external IP.
Step 1: Create the variables provider file (provider.tf)
provider "openstack" {
    user_name     = "<OPENSTACK_USERNAME>"
    tenant_name   = "<OPENSTACK_USERNAME>"
    password      = "<OPENSTACK_PASSWORD>"
    auth_url      = "https://colossus.cesar.unizar.es:5000/v3"
}
Step 2: Create the variables file (variables.tf)
# Params file for variables

# Number of instances to deploy
variable "num_instances" {
  type    = number
  default = 3
}

# Local SSH private key
variable "private_ssh_key" {
  type        = string
  default     = "<PRIVATE_SSH_KEY_LOCAL_PATH>"
  description = "Private ssh key path"
}

# Keypair associated with the local SSH private key
variable "keypair_name" {
  type        = string
  default     = "<OPENSTACK_ID_KEYPAIR>"
  description = "Keypair name for instance access"
}

# UUID of external gateway
variable "external_gateway" {
  type    = string
  default = "<OPENSTACK_VLAN_UUID>"
}

variable "external_network" {
  type    = string
  default = "vlanXXXX"
}

variable "dns_ip" {
  type    = list(string)
  default = ["155.210.12.9", "155.210.3.12"]
}

variable "network_http" {
  type = map(string)
  default = {
    net_name    = "test-network"
    subnet_name = "test-subnetwork"
    cidr        = "192.168.0.0/24"
  }
}

# Mounting point for data volume
variable "mounting_point_data" {
  type        = string
  default     = "/mnt/data-volume"
  description = "Mounting point for data volume"
}

variable "volume_size" {
  type        = number
  default     = 2
  description = "Size of the volume in GB"
}
Step 3: Security groups file (security_groups.tf)
This security group, we open the port 80 and 22.
resource "openstack_compute_secgroup_v2" "http" {
  name        = "http"
  description = "Open input http port"
  rule {
    from_port   = 80
    to_port     = 80
    ip_protocol = "tcp"
    cidr        = "0.0.0.0/0"
  }
}

resource "openstack_compute_secgroup_v2" "ssh" {
  name        = "ssh"
  description = "Open input ssh port"
  rule {
    from_port   = 22
    to_port     = 22
    ip_protocol = "tcp"
    cidr        = "0.0.0.0/0"
  }
}

resource "openstack_compute_secgroup_v2" "icmp" {
  name        = "icmp"
  description = "Security group for ICMP"
  rule {
    from_port   = -1
    to_port     = -1
    ip_protocol = "icmp"
    cidr        = "0.0.0.0/0"
  }
}
Step 4: Networking file (network.tf)
We create a router, a network and a subnetwork.
# Router creation
resource "openstack_networking_router_v2" "router_test" {
  name                = "test-router"
  external_network_id = var.external_gateway
}

# Network creation
resource "openstack_networking_network_v2" "router_test" {
  name = var.network_http["net_name"]
}

#### HTTP SUBNET ####

# Subnet http configuration
resource "openstack_networking_subnet_v2" "http" {
  name            = var.network_http["subnet_name"]
  network_id      = openstack_networking_network_v2.router_test.id
  cidr            = var.network_http["cidr"]
  dns_nameservers = var.dns_ip
}

# Router interface configuration
resource "openstack_networking_router_interface_v2" "http" {
  router_id = openstack_networking_router_v2.router_test.id
  subnet_id = openstack_networking_subnet_v2.http.id
}
Step 5: Main file (main.tf)
We create the instance, attach the network to the instance and a data volume, as well as the floating IP.
# Configure OpenStack Provider
terraform {
required_version = ">= 0.14.0"
  required_providers {
    openstack = {
      source  = "terraform-provider-openstack/openstack"
      version = "~> 1.53.0"
    }
  }
}

# Create instance
resource "openstack_compute_instance_v2" "demo_instance" {
  count       = var.num_instances
  name        = "demo-instance-${count.index + 1}"
  image_name  = "Ubuntu server 24.04 (Noble Numbat)"
  flavor_name = "m1.small"
  key_pair    = var.keypair_name
  network {
    port = openstack_networking_port_v2.http[count.index].id
  }
}

# Create network port
resource "openstack_networking_port_v2" "http" {
  count      = var.num_instances
  name       = "port-instance-http-${count.index + 1}"
  network_id = openstack_networking_network_v2.router_test.id
  security_group_ids = [
    openstack_compute_secgroup_v2.ssh.id,
    openstack_compute_secgroup_v2.http.id,
    openstack_compute_secgroup_v2.icmp.id,
  ]
  fixed_ip {
    subnet_id = openstack_networking_subnet_v2.http.id
  }
}

# Create floating ip
resource "openstack_networking_floatingip_v2" "http" {
  count = var.num_instances
  pool  = var.external_network
}

# Attach floating ip to instance
resource "openstack_compute_floatingip_associate_v2" "http" {
  count       = var.num_instances
  floating_ip = openstack_networking_floatingip_v2.http[count.index].address
  instance_id = openstack_compute_instance_v2.demo_instance[count.index].id
}

# Create volume
resource "openstack_blockstorage_volume_v3" "data_volume" {
  count       = var.num_instances
  name        = "data-volume-${count.index + 1}"
  description = "Data volume for demo instance ${count.index + 1}"
  size        = var.volume_size
}

# Attach volume to instance
resource "openstack_compute_volume_attach_v2" "attached" {
  count       = var.num_instances
  instance_id = openstack_compute_instance_v2.demo_instance[count.index].id
  volume_id   = openstack_blockstorage_volume_v3.data_volume[count.index].id
}

# Post-deployment actions, format and mount data volume
resource "null_resource" "post_deployment" {
  count = var.num_instances
  connection {
    type        = "ssh"
    host        = openstack_networking_floatingip_v2.http.address
    user        = "ubuntu"
    private_key = file(var.private_ssh_key)
  }

  # Copies file from local directory to remote directory
  provisioner "file" {
    source      = "post-deployment.sh"
    destination = "/tmp/post-deployment.sh"
  }

  provisioner "remote-exec" {
    inline = [
      "chmod +x /tmp/post-deployment.sh",
      "/tmp/post-deployment.sh ${var.volume_size} ${var.mounting_point_data}",
    ]
  }
}

# Add volume output
output "instance_names" {
  value = openstack_compute_instance_v2.demo_instance[*].name
}

output "instance_ips" {
  value = openstack_compute_instance_v2.demo_instance[*].access_ip_v4
}

output "floating_ips" {
  value = openstack_networking_floatingip_v2.http[*].address
}

output "volume_ids" {
  value = openstack_blockstorage_volume_v3.data_volume[*].id
}
File post-deployment.sh:
#!/bin/bash

# Look for disks with the specified size
DISK=/dev/$(lsblk | awk -v size=$1G '$4 == size {print $1}')

# Check if the disk is available
if [ -z "$DISK" ]; then
  echo "No disk found with size ${1}G"
  exit 1
else
  echo "Disk found: $DISK"
fi

# Check if the disk is already mounted and unmount it
if mount | grep -q "$DISK"; then
  echo "Unmounting $DISK"
  sudo umount $DISK
fi

DATA_VOLUME=$2

# Format data volume and mount it
sudo mkfs.ext4 -qF $DISK
sudo mkdir -p $DATA_VOLUME && \
sudo mount $DISK $DATA_VOLUME && \
sudo chown -R $USER:$USER $DATA_VOLUME

# Add the disk to fstab use the UUID of the disk
UUID=$(sudo blkid -s UUID -o value $DISK)
if [ -z "$UUID" ]; then
  echo "Failed to get UUID for $DISK"
  exit 1
fi

# Check if the disk is already in fstab
if grep -q "$UUID" /etc/fstab; then
  echo "Disk $DISK already in fstab"
else
  echo "Adding disk $DISK to fstab"
  echo "UUID=$UUID $DATA_VOLUME ext4 defaults,nofail 0 2" | sudo tee -a /etc/fstab
fi

# Install packages
sudo apt update && sudo apt install -y apache2

# Create HTML file and display the external IP
sudo echo "<html><body>External IP: $(curl -s ident.me)</body></html>" | sudo tee /var/www/html/index.html

# Open ports in firewall
sudo ufw enable
sudo ufw allow 80/tcp
sudo ufw allow OpenSSH
Step 6: Launch Terraform orchestrator
Now, you can launch the commands to create the orchestration in colossus cloud:
terraform init
source <file>-rc.sh
terraform fmt -recursive
terraform plan -out plan.out
terraform apply plan.out
You can debug the terraform deployment by setting the OS_DEBUG=1 variable:
OS_DEBUG=1 TF_LOG=DEBUG terraform apply plan.out
Rolling back changes (optional)
You can rollback the deployment and destroy the instance with the command:
terraform destroy
IMPORTANT: This will destroy the instance and you will lose all your data.
For more information check the terraform documentation: https://developer.hashicorp.com/terraform/docs
Terraform example for custom multiple instances
In this example we willl create 3 instances with different settigns on each one, this is useful because sometimes the images to create are always the same.
Terraform runs 3 base instances (2 Ubuntu flavours and one Rocky Linux) with apache2 and SSH. The orchestrator creates the instances with a main file shows the external IP.
Step 1: Create the variables provider file (provider.tf)
provider "openstack" {
    user_name     = "<OPENSTACK_USERNAME>"
    tenant_name   = "<OPENSTACK_USERNAME>"
    password      = "<OPENSTACK_PASSWORD>"
    auth_url      = "https://colossus.cesar.unizar.es:5000/v3"
}
Step 2: Create the variables file (variables.tf)
# Params file for variables

# Create an array of heterogenuos instances with configuration
variable "instances" {
  description = "The Instances to be deployed"
  type = map(object({
    name        = string
    image       = string
    flavor      = string
    volume_size = number
    tags        = list(string)
  }))
  default = {
    "instance-01" = {
      name        = "Webserver01"
      image       = "Ubuntu server 24.04 (Noble Numbat)"
      flavor      = "m1.small"
      volume_size = 1
      tags        = ["general", "webserver"]
    },
    "instance-02" = {
      name        = "Webserver02"
      image       = "Ubuntu server 24.10 (Oracular Oriole)"
      flavor      = "m1.small"
      volume_size = 3
      tags        = ["general", "webserver"]
    },
    "instance-03" = {
      name        = "Webserver03"
      image       = "Rocky Linux 9.4 (Blue Onyx)"
      flavor      = "m1.medium"
      volume_size = 2
      tags        = ["general", "webserver"]
    }
  }
}

variable "private_ssh_key" {
  type        = string
  default     = "<PRIVATE_SSH_KEY_LOCAL_PATH>"
  description = "Private ssh key path"
}

variable "keypair_name" {
  type        = string
  default     = "<OPENSTACK_ID_KEYPAIR>"
  description = "Keypair name for instance access"
}

# UUID of external gateway
variable "external_gateway" {
  type    = string
  default = "<OPENSTACK_VLAN_UUID>"
}

variable "external_network" {
  type    = string
  default = "vlanXXXX"
}

variable "dns_ip" {
  type    = list(string)
  default = ["155.210.12.9", "155.210.3.12"]
}

variable "network_http" {
  type = map(string)
  default = {
    net_name    = "cluster-network"
    subnet_name = "cluster-subnetwork"
    cidr        = "192.168.1.0/24"
  }
}

# Mounting point for data volume
variable "mounting_point_data" {
  type        = string
  default     = "/mnt/data-volume"
  description = "Mounting point for data volume"
}
Step 3: Security groups file (security_groups.tf)
This security group, we open the port 80 and 22.
# Acces group, open input port 80 and ssh port
resource "openstack_compute_secgroup_v2" "http" {
  name        = "http"
  description = "Open input http port"
  rule {
    from_port   = 80
    to_port     = 80
    ip_protocol = "tcp"
    cidr        = "0.0.0.0/0"
  }
}

resource "openstack_compute_secgroup_v2" "ssh" {
  name        = "ssh"
  description = "Open input ssh port"
  rule {
    from_port   = 22
    to_port     = 22
    ip_protocol = "tcp"
    cidr        = "0.0.0.0/0"
  }
}

resource "openstack_compute_secgroup_v2" "icmp" {
  name        = "icmp"
  description = "Security group for ICMP"

  # Allow inbound traffic on port 139 (NetBIOS)
  rule {
    from_port   = -1
    to_port     = -1
    ip_protocol = "icmp"
    cidr        = "0.0.0.0/0"
  }
}
Step 4: Networking file (network.tf)
We create a router, a network and a subnetwork.
# Router creation
resource "openstack_networking_router_v2" "router_cluster" {
  name                = "cluster-router"
  external_network_id = var.external_gateway
}

# Network creation
resource "openstack_networking_network_v2" "router_cluster" {
  name = var.network_http["net_name"]
}

#### HTTP SUBNET ####

# Subnet http configuration
resource "openstack_networking_subnet_v2" "http" {
  name            = var.network_http["subnet_name"]
  network_id      = openstack_networking_network_v2.router_cluster.id
  cidr            = var.network_http["cidr"]
  dns_nameservers = var.dns_ip
}

# Router interface configuration
resource "openstack_networking_router_interface_v2" "http" {
  router_id = openstack_networking_router_v2.router_cluster.id
  subnet_id = openstack_networking_subnet_v2.http.id
}
Step 5: Main file (main.tf)
We create the instance, attach the network to the instance and a data volume, as well as the floating IP.
# Configure OpenStack Provider
terraform {
  required_version = ">= 0.14.0"
  required_providers {
    openstack = {
      source  = "terraform-provider-openstack/openstack"
      version = "~> 1.53.0"
    }
  }
}

# Create multiple instances
resource "openstack_compute_instance_v2" "instances" {
  for_each = var.instances

  name        = each.value.name
  flavor_name = each.value.flavor
  key_pair    = var.keypair_name
  image_name  = each.value.image
  network {
    port = openstack_networking_port_v2.http[each.key].id
  }

  tags = each.value.tags
}

# Create network ports
resource "openstack_networking_port_v2" "http" {
  for_each   = var.instances
  name       = "port-instance-http-${each.key}"
  network_id = openstack_networking_network_v2.router_cluster.id
  security_group_ids = [
    openstack_compute_secgroup_v2.ssh.id,
    openstack_compute_secgroup_v2.http.id,
    openstack_compute_secgroup_v2.icmp.id,
  ]
  fixed_ip {
    subnet_id = openstack_networking_subnet_v2.http.id
  }
}

# Create volume
resource "openstack_blockstorage_volume_v3" "data_volume" {
  for_each    = var.instances
  name        = "data-volume-${each.key}"
  description = "Data volume for demo instance ${each.key}"
  size        = each.value.volume_size
}

# Attach volume to instance
resource "openstack_compute_volume_attach_v2" "attached" {
  for_each    = var.instances
  instance_id = openstack_compute_instance_v2.instances[each.key].id
  volume_id   = openstack_blockstorage_volume_v3.data_volume[each.key].id
}

# Create floating ips
resource "openstack_networking_floatingip_v2" "http" {
  for_each = var.instances
  pool     = var.external_network
}

# Attach floating ips to instances
resource "openstack_compute_floatingip_associate_v2" "http" {
  for_each = openstack_networking_floatingip_v2.http
  instance_id = openstack_compute_instance_v2.instances[each.key].id
  floating_ip = each.value.address
}

locals {
  script_exec = { for k, v in var.instances : k => strcontains(lower(v.image), "ubuntu") ? "post-deployment-ubuntu.sh" : "post-deployment-rocky.sh" }
}

# Post-deployment actions, format and mount data volume
resource "null_resource" "post_deployment" {
  for_each    = var.instances

  connection {
    type        = "ssh"
    host        = openstack_networking_floatingip_v2.http[each.key].address
    user        = strcontains(lower(each.value.image), "ubuntu") ? "ubuntu" : "rocky"
    private_key = file(var.private_ssh_key)
  }

  # Copies file from local directory to remote directory
  provisioner "file" {
    source      = "${local.script_exec[each.key]}"
    destination = "/tmp/${local.script_exec[each.key]}"
  }

  provisioner "remote-exec" {
    inline = [
      "chmod +x /tmp/${local.script_exec[each.key]}",
      "/tmp/${local.script_exec[each.key]} ${each.value.volume_size} ${var.mounting_point_data}",
    ]
  }
}

# Modified outputs for multiple instances
output "instance_names" {
  value = [for k, v in openstack_compute_instance_v2.instances : v.name]
}

output "instance_ips" {
  value = [for k, v in openstack_compute_instance_v2.instances : v.access_ip_v4]
}

output "floating_ips" {
  value = [for k, v in openstack_networking_floatingip_v2.http : v.address]
}
File post-deployment-ubuntu.sh:
#!/bin/bash

# Look for disks with the specified size
DISK=/dev/$(lsblk | awk -v size=$1G '$4 == size {print $1}')

# Check if the disk is available
if [ -z "$DISK" ]; then
  echo "No disk found with size ${1}G"
  exit 1
else
  echo "Disk found: $DISK"
fi

# Check if the disk is already mounted and unmount it
if mount | grep -q "$DISK"; then
  echo "Unmounting $DISK"
  sudo umount $DISK
fi

DATA_VOLUME=$2

# Format data volume and mount it
sudo mkfs.ext4 -qF $DISK
sudo mkdir -p $DATA_VOLUME && \
sudo mount $DISK $DATA_VOLUME && \
sudo chown -R $USER:$USER $DATA_VOLUME

# Add the disk to fstab use the UUID of the disk
UUID=$(sudo blkid -s UUID -o value $DISK)
if [ -z "$UUID" ]; then
  echo "Failed to get UUID for $DISK"
  exit 1
fi

# Check if the disk is already in fstab
if grep -q "$UUID" /etc/fstab; then
  echo "Disk $DISK already in fstab"
else
  echo "Adding disk $DISK to fstab"
  echo "UUID=$UUID $DATA_VOLUME ext4 defaults,nofail 0 2" | sudo tee -a /etc/fstab
fi

# Install packages
sudo apt update && sudo apt install -y apache2

# Open ports in firewall
sudo ufw enable
sudo ufw allow 80/tcp
sudo ufw allow OpenSSH

# Create HTML file and display the external IP
sudo echo "<html><body>" | sudo tee /var/www/html/index.html
sudo echo "External IP: $(curl -s ident.me)<br/>" | sudo tee -a /var/www/html/index.html
sudo echo "hello user! I am this machine:<br/>" | sudo tee -a /var/www/html/index.html
sudo echo "$(lsb_release -a)<br/>" | sudo tee -a /var/www/html/index.html
sudo echo "</body></html>" | sudo tee -a /var/www/html/index.html
File post-deployment-rocky.sh:
#!/bin/bash

# Look for disks with the specified size
DISK=/dev/$(lsblk | awk -v size=$1G '$4 == size {print $1}')

# Check if the disk is available
if [ -z "$DISK" ]; then
  echo "No disk found with size ${1}G"
  exit 1
else
  echo "Disk found: $DISK"
fi

# Check if the disk is already mounted and unmount it
if mount | grep -q "$DISK"; then
  echo "Unmounting $DISK"
  sudo umount $DISK
fi

DATA_VOLUME=$2

# Format data volume and mount it
sudo mkfs.ext4 -qF $DISK
sudo mkdir -p $DATA_VOLUME && \
sudo mount $DISK $DATA_VOLUME && \
sudo chown -R $USER:$USER $DATA_VOLUME

# Add the disk to fstab use the UUID of the disk
UUID=$(sudo blkid -s UUID -o value $DISK)
if [ -z "$UUID" ]; then
  echo "Failed to get UUID for $DISK"
  exit 1
fi

# Check if the disk is already in fstab
if grep -q "$UUID" /etc/fstab; then
  echo "Disk $DISK already in fstab"
else
  echo "Adding disk $DISK to fstab"
  echo "UUID=$UUID $DATA_VOLUME ext4 defaults,nofail 0 2" | sudo tee -a /etc/fstab
fi

# Install packages
sudo dnf check-update
sudo dnf install -y httpd firewalld

sudo systemctl start httpd && sudo systemctl enable httpd
sudo systemctl enable --now firewalld
sudo firewall-cmd --permanent --zone=public --add-service=http
sudo firewall-cmd --permanent --zone=public --add-service=ssh
sudo firewall-cmd --reload

# Create HTML file and display the external IP
sudo echo "<html><body>" | sudo tee /var/www/html/index.html
sudo echo "External IP: $(curl -s ident.me)<br/>" | sudo tee -a /var/www/html/index.html
sudo echo "hello user! I am this machine:<br/>" | sudo tee -a /var/www/html/index.html
sudo echo "$(hostnamectl)<br/>" | sudo tee -a /var/www/html/index.html
sudo echo "</body></html>" | sudo tee -a /var/www/html/index.html
Step 6: Launch Terraform orchestrator
Now, you can launch the commands to create the orchestration in colossus cloud:
terraform init
source <file>-rc.sh
terraform fmt -recursive
terraform plan -out plan.out
terraform apply plan.out
You can debug the terraform deployment by setting the OS_DEBUG=1 variable:
OS_DEBUG=1 TF_LOG=DEBUG terraform apply plan.out
Rolling back changes (optional)
You can rollback the deployment and destroy the instance with the command:
terraform destroy
IMPORTANT: This will destroy the instance and you will lose all your data.
For more information check the terraform documentation: https://developer.hashicorp.com/terraform/docs
Terraform example
A very common practice in the orchestation technique is to create an image with RDP (Remote Desktop Protocol) enabled for users that need an UI in the system. In this example, we will create an Ubuntu image with XFCE4, RDP and a data volume of 2GB attached to the instance.
Step 1: Create the variables file (variables.tf)
# Instance information
variable "instance_info" {
  type = map(string)
  default = {
    name        = "ubuntu-rdp-instance"
    image_name  = "Ubuntu server 24.04 (Noble Numbat)"
    flavor_name = "m1.small"
  }
}

# Configure your user credentials for colossus
variable "user_credentials" {
  type = map(string)
  default = {
    username  = "<OPENSTACK_USERNAME>"
    password  = "<OPENSTACK_PASSWORD>"
    url_login = "https://colossus.cesar.unizar.es:5000/v3"
  }
}

# Set your SSH private key local path
variable "private_ssh_key" {
  type        = string
  default     = "<PRIVATE_SSH_KEY_LOCAL_PATH>"
  description = "Private ssh key path"
}

# Set the keypair name associated with your private SSH key
variable "keypair_name" {
  type        = string
  default     = "<OPENSTACK_ID_KEYPAIR>"
  description = "Keypair name for instance access"
}

# Set the UUID of the external gateway (vlanXXXX)
variable "external_gateway" {
  type    = string
  default = "<OPENSTACK_VLAN_UUID>"
}

# Configure external VLAN available in colussus for your user
variable "external_network" {
  type    = string
  default = "vlanXXX"
}

# UNIZAR DNS records
variable "dns_ip" {
  type    = list(string)
  default = ["155.210.12.9", "155.210.3.12"]
}

# Network and subnetwork
variable "network_rdp" {
  type = map(string)
  default = {
    net_name    = "rdp-network"
    subnet_name = "rdp-subnetwork"
    cidr        = "192.168.0.0/24"
  }
}

# 2GB external volume size, data volume
variable "volume_size" {
  type        = number
  default     = 2
  description = "Size of the volume in GB"
}

# Mounting point for data volume
variable "mounting_point_data" {
  type        = string
  default     = "/mnt/data-volume"
  description = "Mounting point for data volume"
}

# Credentials for RDP user (default user ubuntu)
variable "rdp_credentials" {
  type = map(string)
  default = {
    username  = "ubuntu"
    password  = "ubuntu"
  }
  description = "Credentials for RDP user"
}
Step 2: Create the variables provider file (provider.tf)
provider "openstack" {
    user_name     = var.user_credentials["username"]
    tenant_name   = var.user_credentials["username"]
    password      = var.user_credentials["password"]
    auth_url      = var.user_credentials["url_login"]
}
Step 3: Security groups file (security_groups.tf)
This security group, we open the port 22 and 3389.
resource "openstack_compute_secgroup_v2" "ssh" {
  name        = "ssh"
  description = "Open input ssh port"
  rule {
    from_port   = 22
    to_port     = 22
    ip_protocol = "tcp"
    cidr        = "0.0.0.0/0"
  }
}

resource "openstack_compute_secgroup_v2" "rdp" {
  name        = "rdp"
  description = "Open input rdp port"
  rule {
    from_port   = 3389
    to_port     = 3389
    ip_protocol = "tcp"
    cidr        = "0.0.0.0/0"
  }
}
Step 4: Networking file (network.tf)
We create a router, a network and a subnetwork.
# Router creation
resource "openstack_networking_router_v2" "router_rdp" {
  name                = "rdp-router"
  external_network_id = var.external_gateway
}

# Network creation
resource "openstack_networking_network_v2" "router_rdp" {
  name = var.network_rdp["net_name"]
}

#### RDP SUBNET ####

# Subnet rdp configuration
resource "openstack_networking_subnet_v2" "rdp" {
  name            = var.network_rdp["subnet_name"]
  network_id      = openstack_networking_network_v2.router_rdp.id
  cidr            = var.network_rdp["cidr"]
  dns_nameservers = var.dns_ip
}

# Router interface configuration
resource "openstack_networking_router_interface_v2" "rdp" {
  router_id = openstack_networking_router_v2.router_rdp.id
  subnet_id = openstack_networking_subnet_v2.rdp.id
}
Step 5: Main file (main.tf)
We create the instance, attach the network to the instance and a data volume of 2GB, as well as the floating IP.
# Configure OpenStack Provider
terraform {
required_version = ">= 0.14.0"
  required_providers {
    openstack = {
      source  = "terraform-provider-openstack/openstack"
      version = "~> 1.53.0"
    }
  }
}

# Create instance
resource "openstack_compute_instance_v2" "rdp_instance" {
  name            = var.instance_info["name"]
  image_name      = var.instance_info["image_name"]
  flavor_name     = var.instance_info["flavor_name"]
  key_pair        = var.keypair_name
  network {
    port = openstack_networking_port_v2.rdp.id
  }
}

# Create network port
resource "openstack_networking_port_v2" "rdp" {
  name           = "port-instance-rdp"
  network_id     = openstack_networking_network_v2.router_rdp.id
  security_group_ids = [
    openstack_compute_secgroup_v2.ssh.id,
    openstack_compute_secgroup_v2.rdp.id,
  ]
  fixed_ip {
    subnet_id = openstack_networking_subnet_v2.rdp.id
  }
}

# Create floating ip
resource "openstack_networking_floatingip_v2" "rdp" {
  pool = var.external_network
}

# Attach floating ip to instance
resource "openstack_compute_floatingip_associate_v2" "rdp" {
  floating_ip = openstack_networking_floatingip_v2.rdp.address
  instance_id = openstack_compute_instance_v2.rdp_instance.id
}

# Create volume
resource "openstack_blockstorage_volume_v3" "data_volume" {
  name        = "data-volume"
  description = "Data volume for demo instance"
  size        = var.volume_size  # Size in GB
}

# Attach volume to instance
resource "openstack_compute_volume_attach_v2" "attached" {
  instance_id = openstack_compute_instance_v2.rdp_instance.id
  volume_id   = openstack_blockstorage_volume_v3.data_volume.id
}

resource "null_resource" "post_deployment" {
  connection {
    type        = "ssh"
    host        = openstack_networking_floatingip_v2.rdp.address
    user        = "ubuntu"
    private_key = file(var.private_ssh_key)
  }

  # Copies file from local directory to remote directory
  provisioner "file" {
    source      = "script.sh"
    destination = "/tmp/script.sh"
  }

  provisioner "remote-exec" {
    inline = [
      "chmod +x /tmp/script.sh",
      "/tmp/script.sh ${var.volume_size} ${var.mounting_point_data} ${var.rdp_credentials["username"]} ${var.rdp_credentials["password"]}",
    ]
  }
}

# Add volume output
output "volume_id" {
  value = "Volume ID: ${openstack_blockstorage_volume_v3.data_volume.id}"
}

output "volume_mount_point" {
  value = "Data volume amounted at: ${var.mounting_point_data}"
}

# Output instance details
output "instance_name" {
  value = "Instance name: ${openstack_compute_instance_v2.rdp_instance.name}"
}

output "instance_ip" {
  value = "Instance IP: ${openstack_compute_instance_v2.rdp_instance.access_ip_v4}"
}

output "floating_ip" {
  value = "Floating IP: ${openstack_networking_floatingip_v2.rdp.address}"
}

output "ssh_connection" {
  value = "ssh -i ${var.private_ssh_key} ubuntu@${openstack_networking_floatingip_v2.rdp.address}"
}

output "rdp_credentials" {
  value = "RDP user: ${var.rdp_credentials["username"]} / password: ${var.rdp_credentials["password"]}"
}
The main.tf uses an post-deployment bash script to format the data volume and install XFCE4 and RDP, this is the script.sh file:
#!/bin/bash

# Look for disks with the specified size
DISK=/dev/$(lsblk | awk -v size=$1G '$4 == size {print $1}')

# Check if the disk is available
if [ -z "$DISK" ]; then
  echo "No disk found with size ${1}G"
  exit 1
else
  echo "Disk found: $DISK"
fi

# Check if the disk is already mounted and unmount it
if mount | grep -q "$DISK"; then
  echo "Unmounting $DISK"
  sudo umount $DISK
fi

DATA_VOLUME=$2

# Format data volume and mount it
sudo mkfs.ext4 -qF $DISK
sudo mkdir -p $DATA_VOLUME && \
sudo mount $DISK $DATA_VOLUME && \
sudo chown -R ubuntu:ubuntu $DATA_VOLUME

# Add the disk to fstab use the UUID of the disk
UUID=$(sudo blkid -s UUID -o value $DISK)
if [ -z "$UUID" ]; then
  echo "Failed to get UUID for $DISK"
  exit 1
fi

# Check if the disk is already in fstab
if grep -q "$UUID" /etc/fstab; then
  echo "Disk $DISK already in fstab"
else
  echo "Adding disk $DISK to fstab"
  echo "UUID=$UUID $DATA_VOLUME ext4 defaults,nofail 0 2" | sudo tee -a /etc/fstab
fi

# Install xfce4 and xrdp and configure it
sudo apt-get update && \
sudo apt-get install -y xfce4 xfce4-goodies xrdp && \
sudo adduser xrdp ssl-cert && \
sudo systemctl restart xrdp

# Install xubuntu and configure it
#sudo apt-get update && \
#sudo apt-get install -y xubuntu-desktop xrdp && \
#sudo adduser xrdp ssl-cert && \
#sudo systemctl restart xrdp

# Create .xsession file for xfce4
echo "xfce4-session" | sudo tee .xsession
sudo mv .xsession /home/ubuntu/.xsession
sudo chown $USER:$USER /home/ubuntu/.xsession
sudo chmod 755 /home/ubuntu/.xsession

# Configure xrdp to use xfce4
sudo sed -i.bak '/^test -x \/etc\/X11\/Xsession && exec \/etc\/X11\/Xsession/a xfce4-session' /etc/xrdp/startwm.sh
sudo sed -i.bak 's/\/etc\/X11\/Xsession/\/home\/ubuntu\/.xsession/' /etc/xrdp/startwm.sh
sudo sed -i.bak 's/\/etc\/X11\/Xsession/\/home\/ubuntu\/.xsession/' /etc/xrdp/xrdp.ini
sudo sed -i.bak 's/\/etc\/X11\/Xsession/\/home\/ubuntu\/.xsession/' /etc/xrdp/xrdp-sesman.ini

# Open port 3389
sudo ufw enable
sudo ufw allow 3389
sudo ufw allow OpenSSH

# Set password for ubuntu user, password ubuntu
echo "$3:$4" | sudo -S chpasswd

# Reboot the system
sudo reboot
Step 6: Launch Terraform orchestrator
Now, you can launch the commands to create the orchestration in colossus cloud:
terraform init
source <file>-rc.sh
terraform fmt -recursive
terraform plan -out plan.out
terraform apply plan.out
You can debug the terraform deployment by setting the OS_DEBUG=1 variable:
OS_DEBUG=1 TF_LOG=DEBUG terraform apply plan.out
Step 7: Connect to RDP
Once terraform ends the deployment, you can connect RDP thru Windows Remote Desktop application in windows Systems or Remmina in Linux. The deplyment creates an RDP user ubuntu with password ubuntu:
Set the floating IP in Windows Remote Desktop application to connect the RDP instance.
NOTE: The terraform deployment lasts around 30 minutes
Rolling back changes (optional)
You can rollback the deployment and destroy the instance with the command:
terraform destroy
IMPORTANT: This will destroy the instance and you will lose all your data.
For more information check the terraform documentation: https://developer.hashicorp.com/terraform/docs
Endpoints
You can obtain the colossus endpoints on the API section in https://colossus.cesar.unizar.es.
OpenStack documentation link
For any other doubt in using the OpenStack tools and commands, please refer to general OpenStack documentation.
OpenStack modules
This page lists the OpenStack modules supported in ncloud. Most of these modules operate in the background and may not be directly visible to users. However, understanding their roles can help users better navigate the platform. For advanced usage or troubleshooting, external documentation links are provided.
| Module | Service | Description | Status | External Documentation |
|---|---|---|---|---|
| keystone | Identity | Manages authentication and authorization for all OpenStack services. | Active | Keystone |
| cinderv3 | Volume Service v3 | Provides persistent block storage for compute instances. | Active | Cinder |
| octavia | Load Balancer | Offers load balancing services to distribute network traffic. | Pending | Octavia |
| heat | Orchestration | Automates the deployment of infrastructure using templates. | Active | Heat |
| barbican | Key Manager | Handles secrets management including passwords and certificates. | Active | Barbican |
| aodh | Alarming | Provides alarms based on defined thresholds for monitoring purposes. | Active | Aodh |
| gnocchi | Metric | Stores and indexes time series data for metrics. | Active | Gnocchi |
| nova | Compute | Manages virtual machine instances. | Active | Nova |
| ceilometer | Metering | Collects measurements and events for billing and monitoring. | Active | Ceilometer |
| heat-cfn | CloudFormation | Provides AWS CloudFormation-compatible API support. | Active | Heat CFN |
| placement | Placement | Tracks resource inventories and usages. | Active | Placement |
| sahara | Data Processing | Enables provisioning of data processing frameworks like Hadoop or Spark. | Pending | Sahara |
| glance | Image Service | Manages disk images used to launch instances. | Active | Glance |
| neutron | Networking | Provides networking as a service for interface management and IP address assignment. | Active | Neutron |
For additional help, please contact the datamanagment@bsc.es or refer to the OpenStack documentation.
Help and assistance
BiFi provides users with excellent consulting assistance. Cloud consultants are available during normal business hours, Monday to Friday, 08 a.m. to 15 p.m. (CEST time).
User questions and support are handled at: agustina@bifi.es
If you need assistance, please supply us with the nature of the problem, the date and time that the problem occurred, and the location of any other relevant information, such as output files. Please contact BiFi if you have any questions or comments regarding policies or procedures.
Agustina and Cierzo Nodes
Node Configurations
| Node Type | CPU Configuration | Cores | RAM | GPU | Architecture | Nodes in partition |
|---|---|---|---|---|---|---|
| agustina_thin | 2 x AMD EPYC 7763 | 64 | 256GB | No | x86_64 | 93 |
| agustina_fat | 2 x AMD EPYC 7763 | 64 | 512GB | No | x86_64 | 3 |
| rasmia_ada | 2 x Intel Xeon Gold 6548Y+ | 64 | 2TB | 4 x NVIDIA L40s | x86_64 | 9 |
| rasmia_hopper | 2 x Intel Xeon Platinum 8462Y+ | 64 | 1.5TB | 4 x NVIDIA H100 | x86_64 | 3 |
| cierzo_thin | 2 x Intel Xeon E5-2680 | 24 | 64GB | No | x86_64 | 78 |
| cierzo_fat | 4 x Intel Xeon E5-4627 | 40 | 2TB | No | x86_64 | 1 |
| cierzo_kepler | 2 x Intel Xeon E5-2680 | 24 | 64GB | 2 x NVIDIA K40m | x86_64 | 4 |
| mequinenza | 2 x Intel Xeon Platinum 8160 | 48 | 96GB | No | x86_64 | 144 |
Additional Information
- Time limit: 7 days (7-00:00:00) for all partitions
- Full partition includes all nodes
Network Configuration
- Cierzo: InfiniBand FDR (56 Gbps)
- Agustina: InfiniBand HDR (200 Gbps)
- Mequinenza: OmniPath (100 Gbps)
Storage
- Shared Lustre filesystem
- High-performance parallel I/O
- Multi-petabyte capacity
User guide for the access to Aragon Supercomputing Center (CESAR) Services
Introduction
This document explains how to proceed to apply for the creation, activation or vinculation of projects and users in the Aragon Supercomputing Center (CESAR) located in the Institute for Biocomputing and Physics of Complex Systems (BIFI) of the University of Zaragoza. This information is suitable for Principal Investigators (PI) of any research project or group, in or outside the University of Zaragoza, and users related to them. The corresponding application forms are available at:
https://soporte.bifi.unizar.es/forms/form.php
There are four types of application forms corresponding to different objectives:
- Project creation form (to be filled by Principal Investigators)
- Account creation form (to be filled by users in general)
- Account activation form (to be filled by users in general)
- Account - project vinculation form (to be filled by Principal Investigators)
This document will guide through the process to fill in each of them. The main concepts are the following. Any person (in general, a researcher from a research center or company) willing to use CESAR services will need a user account. A typical service is the use of the computing infrastructure, but these user accounts can also grant access to data storage or to some web services provided by the datacenter, among others.
However, the use of these services has to be somehow organized and, in some cases, paid for. In this sense, the Project creation form, when filled, provides the necessary information about the objectives of the research as well as about the person (PI) that takes the responsibility for the correct use of the service and/or infrastructure (that will also be assumed by the users) and for the corresponding payment when necessary.
1.- Project creation form
https://soporte.bifi.unizar.es/forms/form.php?idForm=1
This form is intended to be filled in by the Principal Investigators. When approved, a new project will be registered in the CESAR system. The fields of this form are:
- Researcher e-mail: Contact email of the PI or main responsible of the project/group.
- Telephone: Main contact telephone.
- Project title: Title of the project to be registered.
- Project ID: Unique identifier of the project (it can be chosen by the PI, but the system will verify that it does not exist yet)
- Research project reference: Reference given by an official institution (it can be the reference provided by a granting entity or an internal code of the University, for example; please inform which is the case)
- Research proposal: Main explanation, goals and research track that will tackle the project, why the need or wish to use CESAR services...
- Comments: Further comments complementing the previous information. software needed or any other peculiarity to be taken into account.
After these fields are filled, the Principal Investigator will download the agreement document by clicking the blue button "Download document for signing", then s/he has to sign this document, upload it and press the "Request project" button.
The lack of information in any field could invalidate the request; please make sure you send all the information needed.
The CESAR access committee will manually review the request and they will give an answer according to the provided information.
2.- User account creation form
https://soporte.bifi.unizar.es/forms/form.php?idForm=2
This form can be used by anyone that needs a new account to access CESAR services. The fields for this request are:
- Name: Person who makes the request.
- Email: Person contact email to communicate the final response.
- Telephone: Contact phone of the current person that makes the request.
- Desired username: Username to access the CESAR system (computing and storage infrastructures, etc.). This username must be plain text without special characters (like
@ # ~ $).
After these fields are filled, the user will download the agreement document by clicking the blue button "Download document for signing", then s/he has to sign this document, upload it and press the "Request creation" button.
The lack of information in any field could invalidate the request; please make sure you send all the information needed.
The IT team will contact the user to bring the response to the request on the given email address.
The creation of a user account does not automatically allow the user to access CESAR services, as some of them (in particular those subject to payment) will require their vinculation to a Project.
3.- User account to project vinculation form
https://soporte.bifi.unizar.es/forms/form.php?idForm=4
This request has to be performed by the Principal Investigator of a Project already existing in the CESAR system. This is intended to add a new member (user) into the Project which, in this way, will grant access to the CESAR services associated with the said Project.
- Principal researcher name: Principal Investigator of the research Project already existing in the CESAR system.
- Email: Contact email of the PI.
- Username to vinculate: Username to be vinculated to the Project.
- Project ID to vinculate to: Project ID of the Project.
- Project title: Title of the Project.
After these fields are filled, the Principal Investigator will download the agreement document by clicking the blue button "Download document for signing", then s/he has to sign this document, upload it and press the "Request vinculation" button.
With this vinculation, the PI will take the responsibility for the correct use of the service and/or infrastructure (that will also be assumed by the users) and for the corresponding payment when necessary.
The lack of information in any field could invalidate the request; please make sure you send all the information needed.
The CESAR team will review the request and they will give an answer according to the provided information.
This document is subject to change. We are committed to updating it in case the registration process varies.
4.- Account activation (OPTIONAL)
https://soporte.bifi.unizar.es/forms/form.php?idForm=3
The following form will provide the information needed to activate an account that is inactive (due to different reasons, the passing of time, existing accounts still not activated, etc.). You must bear in mind that accounts will be temporarily suspended if there is a lack of activity during a long time.
- Name: Name of the person that makes the request.
- Email: Contact email to dispatch the final response over this request.
- Username: Currently suspended username that should be activated.
After these fields are filled, the user will download the agreement document by clicking the blue button "Download document for signing", then s/he has to sign this document, upload it and press the "Request activation" button.
The lack of information in any field could invalidate the request; please make sure you send all the information needed.
The IT team will contact the user to bring the response to the request on the given email address.
Agustina data transfer
The Agustina supercomputer is a high-performance computing (HPC) system used for scientific and technical computing tasks. Efficient data transfer to and from Agustina is essential for preparing jobs, analyzing results, and managing large datasets.
This document provides step-by-step instructions for securely transferring files between your local machine and the Agustina supercomputer using several methods, including SFTP, Filezilla, SSHFS, SCP, and Rclone. Each method is described with practical examples to help you choose the best approach for your workflow.
Prerequisites
Before you can transfer data, you will need the following:
- Username and Password: You will need a valid username and password to access the Agustina supercomputer.
- Secure Shell (SSH) Client: You will need an SSH client, such as PuTTY (Windows) or Terminal (macOS/Linux), to connect to the supercomputer.
- Filezilla: You will need Filezilla to copy files on graphical UI.
Transfer Methods
SFTP (Secure File Transfer Protocol)
SFTP is a secure way to transfer files to and from the Agustina supercomputer. Here's how to use it:
- Open your SSH client and connect to the Agustina supercomputer using your username and password.
- Once connected, you can use the SFTP client to transfer files. For example, in PuTTY, you can type
sftp username@agustina.bifi.unizar.esand press Enter. - Navigate to the desired directories on both your local machine and the Agustina supercomputer using the
cdcommand. - Use the
putcommand to upload files from your local machine to the Agustina supercomputer, and thegetcommand to download files from the Agustina supercomputer to your local machine.
To upload a file from your local machine to Agustina:
sftp username@agustina.bifi.unizar.es
# After entering your password and connecting:
cd /path/to/remote/directory
put /path/to/local/file
To download a file from Agustina to your local machine:
sftp username@agustina.bifi.unizar.es
# After entering your password and connecting:
cd /path/to/remote/directory
get remote_file.txt /path/to/local/directory/
Filezilla (Graphical SFTP Client)
Filezilla is a free, cross-platform graphical SFTP client that makes it easy to transfer files between your local machine and the Agustina supercomputer.
-
Download and Install Filezilla
Download Filezilla from https://filezilla-project.org/ and install it on your computer. -
Open Filezilla and Set Up a New Connection
- Open Filezilla.
- At the top, enter the following details:
- Host:
sftp://agustina.bifi.unizar.es - Username: your Agustina username
- Password: your Agustina password
- Port:
22
- Host:
- Click "Quickconnect".
-
Transfer Files
- The left pane shows your local files; the right pane shows files on Agustina.
- Drag and drop files between panes to upload or download.
-
Security Note
- The first time you connect, you may be prompted to trust the server's host key. Accept to proceed.
Filezilla provides a user-friendly way to manage file transfers without using the command line.
SSHFS (Secure Shell Filesystem)
SSHFS allows you to mount the Agustina supercomputer's file system on your local machine, making it easier to manage files. Here's how to use it:
- Install the SSHFS client on your local machine. On Windows, you can use WinFsp; on macOS/Linux, you can use the built-in SSHFS client.
- Open your SSH client and connect to the Agustina supercomputer using your username and password.
- Once connected, use the
sshfscommand to mount the Agustina supercomputer's file system on your local machine. For example, on macOS/Linux, you can typesshfs username@agustina.bifi.unizar.es:/path/to/remote/directory /path/to/local/mount/point. - You can now manage files on the Agustina supercomputer as if they were on your local machine.
Example: Using SSHFS to Mount Agustina's Filesystem
On macOS or Linux, you can mount a remote directory from Agustina to a local mount point using SSHFS.
First, ensure SSHFS is installed. On macOS, you can use Homebrew:
brew install sshfs fuse3
On Linux, install via your package manager:
sudo apt-get install sshfs fuse3
Then, mount the remote directory:
sshfs -o allow_other,default_permissions username@agustina.bifi.unizar.es:/path/to/remote/directory /path/to/local/mount/point
- Replace
usernamewith your Agustina username. - Replace
/path/to/remote/directorywith the directory you want to access on Agustina. - Replace
/path/to/local/mount/pointwith an existing directory on your local machine.
Remember to set the full path to the private ssh file. If you get an error like this:
fusermount3: option allow_other only allowed if 'user_allow_other' is set in /etc/fuse.conf
Uncomment the option user_allow_other in your /etc/fuse.conf.
To unmount when finished:
fusermount -u /path/to/local/mount/point
SCP (Secure Copy)
SCP is a command-line tool for securely copying files between your local machine and the Agustina supercomputer. Here's how to use it:
- Open your SSH client and connect to the Agustina supercomputer using your username and password.
- To upload a file from your local machine to the Agustina supercomputer, use the
scpcommand. For example,scp /path/to/local/file username@agustina.bifi.unizar.es:/path/to/remote/directory. - To download a file from the Agustina supercomputer to your local machine, use the
scpcommand in the opposite direction. For example,scp username@agustina.bifi.unizar.es:/path/to/remote/file /path/to/local/directory.
To upload a file from your local machine to Agustina:
scp /path/to/local/file username@agustina.bifi.unizar.es:/path/to/remote/directory
To download a file from Agustina to your local machine:
scp username@agustina.bifi.unizar.es:/path/to/remote/file /path/to/local/directory
Rclone
Rclone is a command-line tool that can be used to transfer files between your local machine and cloud storage services, including the Agustina supercomputer. Here's how to use it:
- Install Rclone on your local machine with
sudo apt-get install rclone. - Configure Rclone to connect to the Agustina supercomputer by running
rclone configand following the prompts. - Use the
rclone copycommand to upload files from your local machine to the Agustina supercomputer, and therclone synccommand to download files from the Agustina supercomputer to your local machine. For example,rclone copy /path/to/local/file agustina:/path/to/remote/directory.
Example: Using Rclone with Password Obscuration
- Obscure your plain text password
rclone obscure <your-plain-text-password>
The output string will set on the rclone.conf file on step 2.
- Create or Edit your
rclone.conffile
Create a file called rclone.conf (usually located at ~/.config/rclone/rclone.conf) with the following content.
Replace username with your Agustina username and use rclone config password to generate the obscured password string.
[agustina]
type = sftp
host = agustina.bifi.unizar.es
user = username
pass = <obscured-password>
port = 22
- Copy files from Agustina to your local machine
To copy a remote file or directory from Agustina to your local machine, use:
rclone --config=/full/path/to/rclone.conf copy agustina:/path/to/remote/file /path/to/local/directory
To copy an entire directory:
rclone --config=/full/path/to/rclone.conf copy agustina:/path/to/remote/directory /path/to/local/directory --progress
Agustina also has a rclone module installed to copy files and folders from remote to local, to load the module the commmand is:
module load rclone/1.69.3
For more commands to use in rclone visit: https://rclone.org/commands/.
Remember to replace the placeholders (e.g., username, agustina.bifi.unizar.es, /path/to/remote/directory) with the appropriate values.
WinSCP (Windows)
WinSCP is a free, open-source SFTP and SCP client for Windows that provides a graphical interface for file transfers. Since you need to connect through the Bridge node, WinSCP supports SSH tunneling (jump host) connections.
Installation
- Download WinSCP from https://winscp.net/
- Install it on your Windows machine
- Launch WinSCP
Step-by-step configuration:
-
Open WinSCP and click "New Session"
-
Configure the Direct Connection to Agustina:
- Host name:
agustina.bifi.unizar.es - Port:
22 - Username: your Agustina username
- Password: your Agustina password
- Host name:
-
Set Up the SSH Tunnel (Jump Host):
- In the right panel, click "Advanced"
- Go to "Connection" -> "Tunnel"
- Check the box: "Connect through SSH tunnel"
- Tunnel host:
bridge.bifi.unizar.es - Tunnel port:
22 - Tunnel username: your Bridge username
- Tunnel password: your Bridge password
- Click "OK"
-
Save the Session (Optional):
- Enter a session name (e.g., "Agustina via Bridge")
- Click "Save"
- The session will be saved for future use
-
Connect:
- Click "Login" to establish the connection
- WinSCP will first connect to Bridge, then tunnel to Agustina
- You'll see the remote file system in the right pane
File Transfer with WinSCP
Once connected:
- Upload files: Drag and drop from the left pane (local) to the right pane (remote), or use the upload button
- Download files: Drag and drop from the right pane (remote) to the left pane (local), or use the download button
- Navigate directories: Double-click folders to enter them
- Create folders: Right-click in the remote pane and select "New Folder"
- Delete files: Right-click and select "Delete"
Rsync through Bridge
Rsync is an efficient tool for transferring files between your local machine and Agustina through the Bridge jump host. It supports resuming interrupted transfers and shows progress.
Download a file from Agustina to your local machine:
rsync -avzP -e "ssh -J username@bridge.bifi.unizar.es" username@agustina.bifi.unizar.es:/fs/agustina/username/filename /path/to/local/directory/
Upload a file from your local machine to Agustina:
rsync -avzP -e "ssh -J username@bridge.bifi.unizar.es" /path/to/local/file username@agustina.bifi.unizar.es:/fs/agustina/username/
Copy an entire directory:
rsync -avzP -e "ssh -J username@bridge.bifi.unizar.es" username@agustina.bifi.unizar.es:/fs/agustina/username/directory /path/to/local/destination/
Options explained:
-a: Archive mode (preserves permissions, timestamps, etc.)-v: Verbose (shows progress)-z: Compress during transfer-e: Specify SSH command with jump host via-J-Por--progress: Show detailed progress for each file
Acknowledgments
It will be mandatory that in all scientific, informative or any other kind of articles, whose results have been obtained totally or partially thanks to the BIFI computational infrastructures, the following sentence of gratitude will appear:
We acknowledge the use of the computational resources of CESAR at BIFI Institute (University of Zaragoza)
Tarifas de servicios de cómputo en infraestructura Agustina
La Universidad de Zaragoza aprobó en 2018 las tarifas de uso de los servicios de computación de altas prestaciones en el Centro de Supercomputación de Aragón (CESAR), centro de proceso de datos mantenido y gestionado por el Instituto BIFI. Las tarifas vigentes para el curso 2024-2025 están publicadas en el siguiente enlace:
Las tarifas quedan definidas de la siguiente forma.
| Tarifas | |||
|---|---|---|---|
| PRESTACIÓN | TARIFA INTERNA | TARIFA OPI | TARIFA EXTERNA |
| Unidades de cómputo (incluye computación y almacenamiento local necesario para el cálculo) | 0,014€/(core*hora) | 0,028€/(core*hora) | 0,045€/(core*hora) |
Estas tarifas pueden ser bonificadas, según detalla el propio documento de regularización del servicio.
Según vemos en la tabla superior, la tarifa base para los investigadores de Unizar es de 0,014€ por core y hora. A pesar de que dicha tarifa puede considerarse muy competitiva con relación a cualquier tarifa externa, existen proyectos de investigación y simulaciones que requieren de un número muy elevado de horas de cálculo, para los cuales difícilmente los investigadores podrían abordar el pago de dicha tarifa base. Con el objetivo de incentivar (o, al menos, de no desincentivar) el uso de una infraestructura que está concebida precisamente para que los investigadores la utilicen y obtengan el máximo rendimiento de ella, se han definido unas bonificaciones que reducen el precio unitario cuando el consumo de horas de cómputo es muy elevado, aplicable a todos los usuarios de UNIZAR y centros mixtos que han apoyado la adquisición de infraestructuras del CESAR, ya que este apoyo se considera una aportación en especie a la financiación del centro.
Para ello, se han definido unos tramos en el número de horas de uso, de forma que, por un lado, hasta un determinado número de horas el uso sea gratuito (puede considerarse una prueba de concepto) y a partir de cierto número de horas la tarifa sufre un descuento considerable, de modo que la infraestructura no quede infrautilizada por ser un coste inasumible para los investigadores. Los tramos se han definido de la siguiente forma:
| Tarifa Base (€/(core*hora)) | ||||
|---|---|---|---|---|
| 0,014 | ||||
| Tipo de tramo | Inicio Tramo (Horas CPU) | Fin Tramo (Horas CPU) | Factor reductor | Coste Max (€) |
| Tramo 1 | 1 | 10000 | 0 | 0 |
| Tramo 2 | 10001 | 100000 | 1 | 1260 |
| Tramo 3 | 100001 | 1000000 | 0,2 | 2520 |
| Tramo 4 | 1000001 | 10000000 | 0,1 | 12600 |
También ponemos a disposición de los usuarios una herramienta de estimación de costes en función de las horas consumidas y las tarifas vigentes.
Grupos de investigación que realicen otro tipo de aportaciones pueden obtener bonificaciones adicionales. En tal caso, contactar con agustina@bifi.es.
Tarifas Agustina GPUs
Para el cálculo del precio de uso de las GPU, se realiza una equivalencia con la parte proporcional de cores de CPU existentes en cada nodo:
- Una hora de GPU L40S equivale a una hora de 16 cores de CPU
- Una hora de GPU H100 equivale a tres horas de 16 cores de CPU
Por lo tanto, cuando el usuario lanza un trabajo a una de las colas de GPU, debe reservar obligatoriamente 16 cores de CPU multiplicado por el número de GPUs que desea usar.
Ejemplo de cabecera de script bash, usamos 4 GPUs de tipo L40S (pedimos un nodo completo de GPUs):
#SBATCH –N 1 # usamos un nodo, cada nodo dispone de 4GPUs
#SBATCH --ntasks-per-node=1 # una tarea por nodo
#SBATCH --gres=gpu:4 # seleccionamos las GPUs a usar, 4 GPUs (un nodo completo)
#SBATCH --cpus-per-task=64 # 16 cores por GPU * 4GPUs
#SBATCH -p rasmia_ada # nombre de la cola de GPUs L40S
La cola gpu se tarifica igual que la cola rasmia_ada. Esta cola de trabajo alberga todas los nodos de rasmia_hopper, rasmia_ada y cierzo_kepler.
Pimp my prompt
Default style in bash prompt is boring and green colour is also old-fashioned, you can change the style of your bash prompt with a couple of lines.
Bash prompt styling with one line
The PS1 variable change the style of bash prompt, for instance you can set the style to your prompt by setting the variable as follows in your terminal:
export PS1="\[\e[31m\][\[\e[m\]\[\e[33m\]\u\[\e[m\]@\[\e[36m\]\h\[\e[m\]\[\e[31m\]]\[\e[m\]:\[\e[33;40m\]\w\[\e[m\]\[\e[40m\] \[\e[m\]\[\e[32;40m\]\\$\[\e[m\] "
Set the line above at the end of your .bashrc file available in your home directory to make the style permanent every time you login. Reload the configuration file by using:
source .bashrc
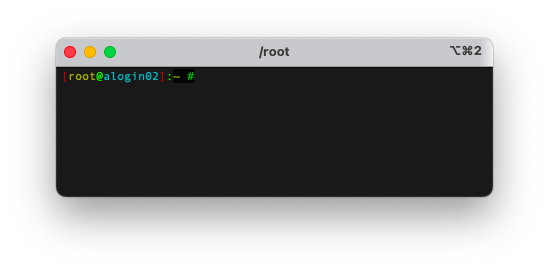
This is just an example with fits nicely with console's black background, but you can set your own bash prompt style by using this web:
https://robotmoon.com/bash-prompt-generator/
Enhancing output colours on listing files and folders
By default the cluster provides a light colour style for the ls output command, you can set a more colourful style by using this project:
https://github.com/trapd00r/LS_COLORS
To get the new colour style just clone the project inside your home directory:
git clone https://github.com/trapd00r/LS_COLORS.git
The add the following line at the end of your .bashrc file present in your hone directory:
source "$HOME/LS_COLORS/lscolors.sh"
Save file changes and reload the configuration file by using:
source .bashrc